Send a sweet message to a friend, family member, teacher, or someone else who deserves a reminder of how much we appreciate them. Whether you share this pan together, or drop off on a doorstep, a meaningful (and delicious) note is a great way to show you’re thinking about someone. People always appreciate an unexpected treat.
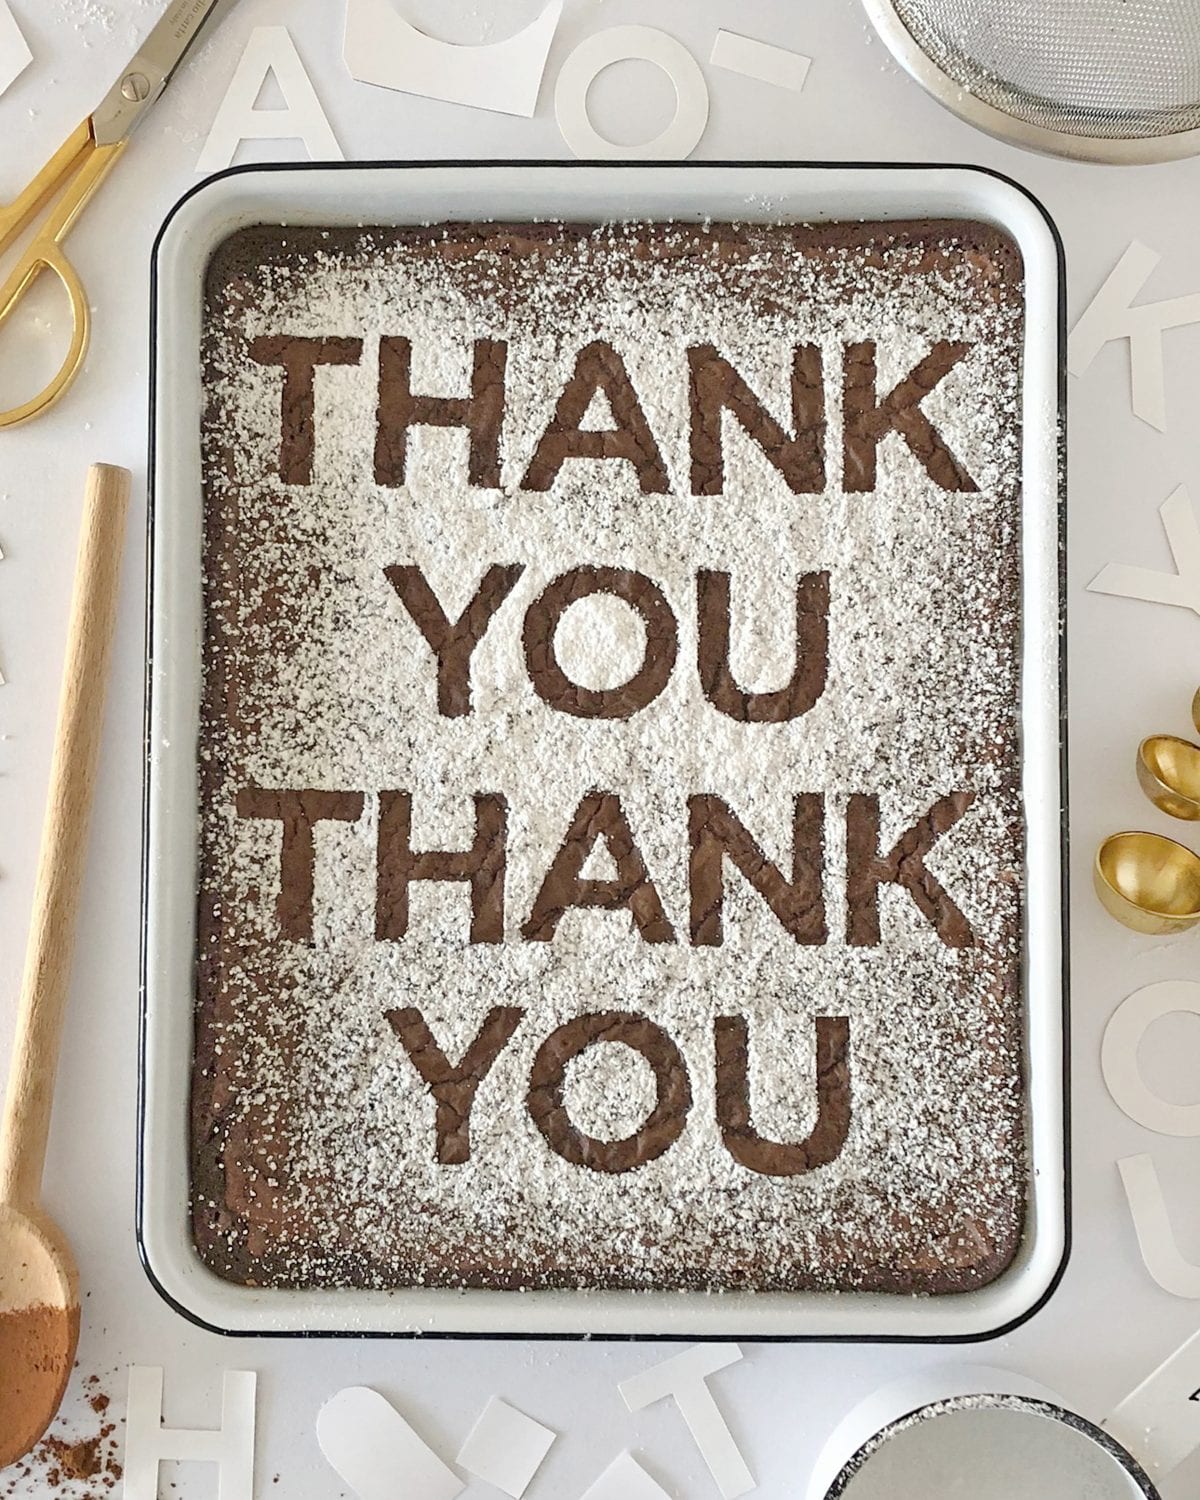
Send as a thank you to a friend who helped you out, gone out of your way, or if you just want to thank them for being who they are. You could also put on a dessert table at a baby shower, an engagement party (SHE SAID YES), a birthday (YOU ARE TEN), a retirement party (TIME TO RELAX), Father’s Day (WE LOVE DAD) or Mother’s Day (MOM IS COOL), a graduation party (YOU DID IT), or any other celebration.
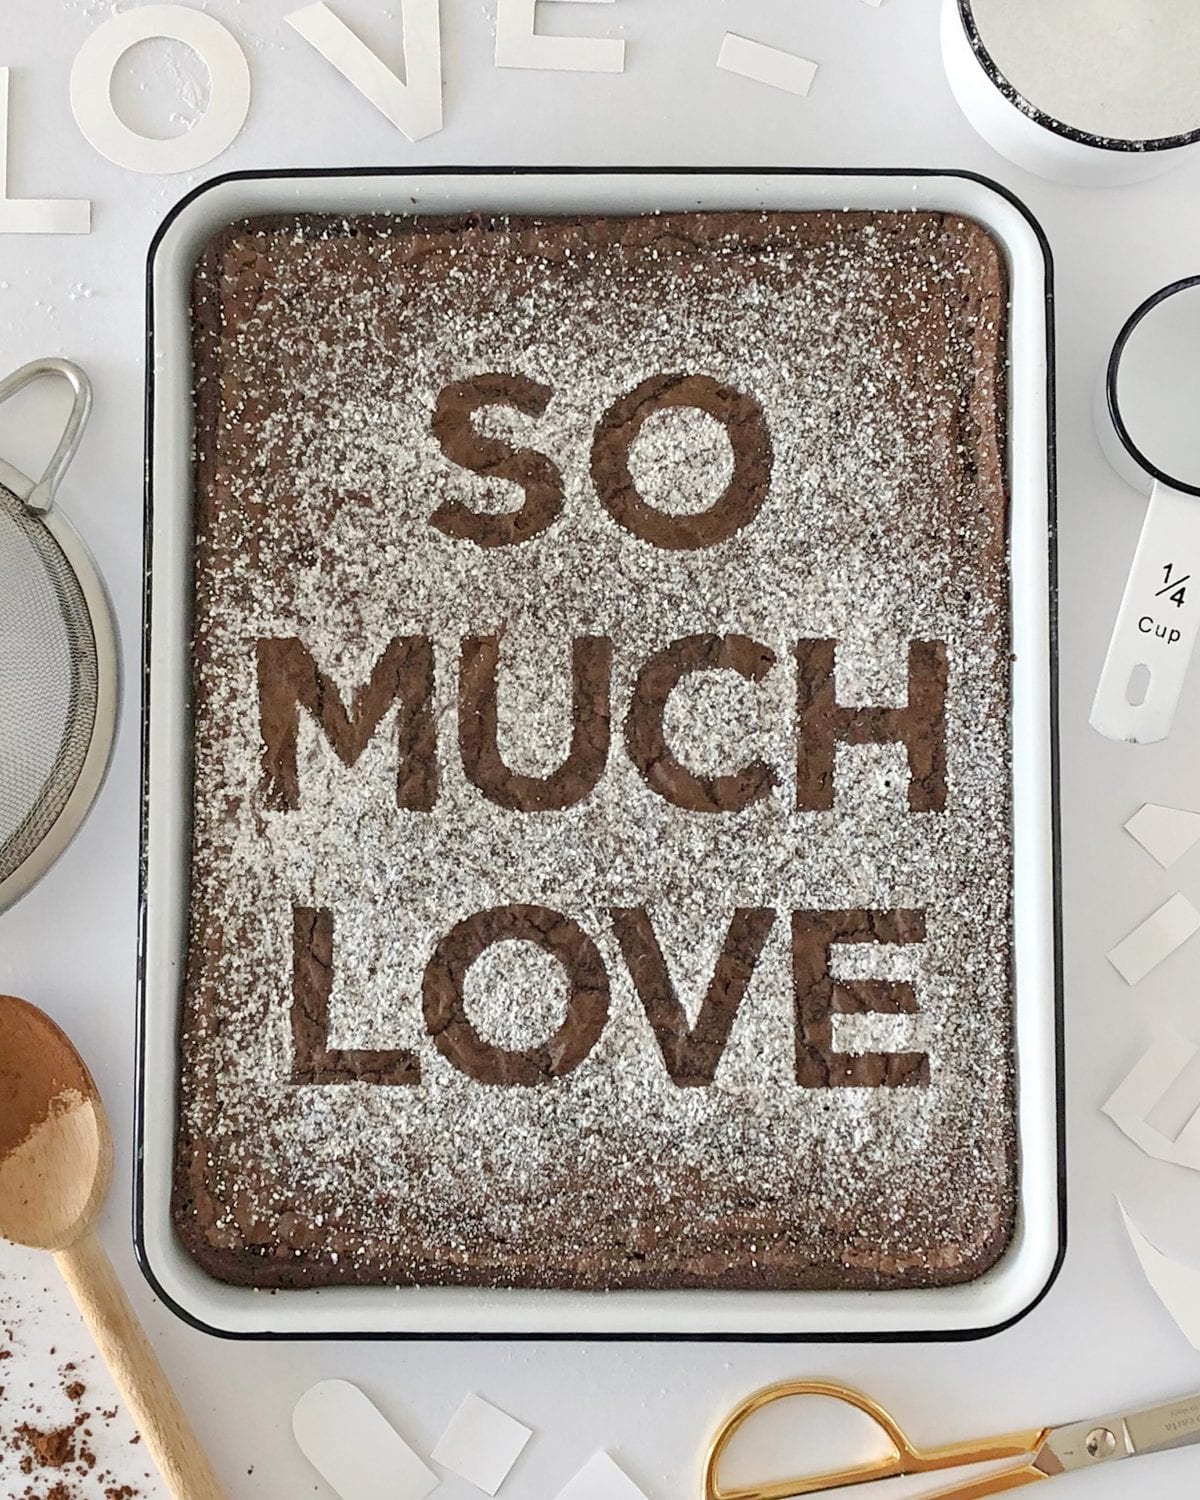
Of course you can send SO MUCH LOVE at any time, but you can also make these as holiday greetings or gifts. MERRY X-MAS for Christmas, I <3 YOU for Valentine’s Day, or THANK-FUL at Thanksgiving. It’s as easy as baking a pan of brownies–or even a sheet cake–whether you make from scratch or use a boxed mix.
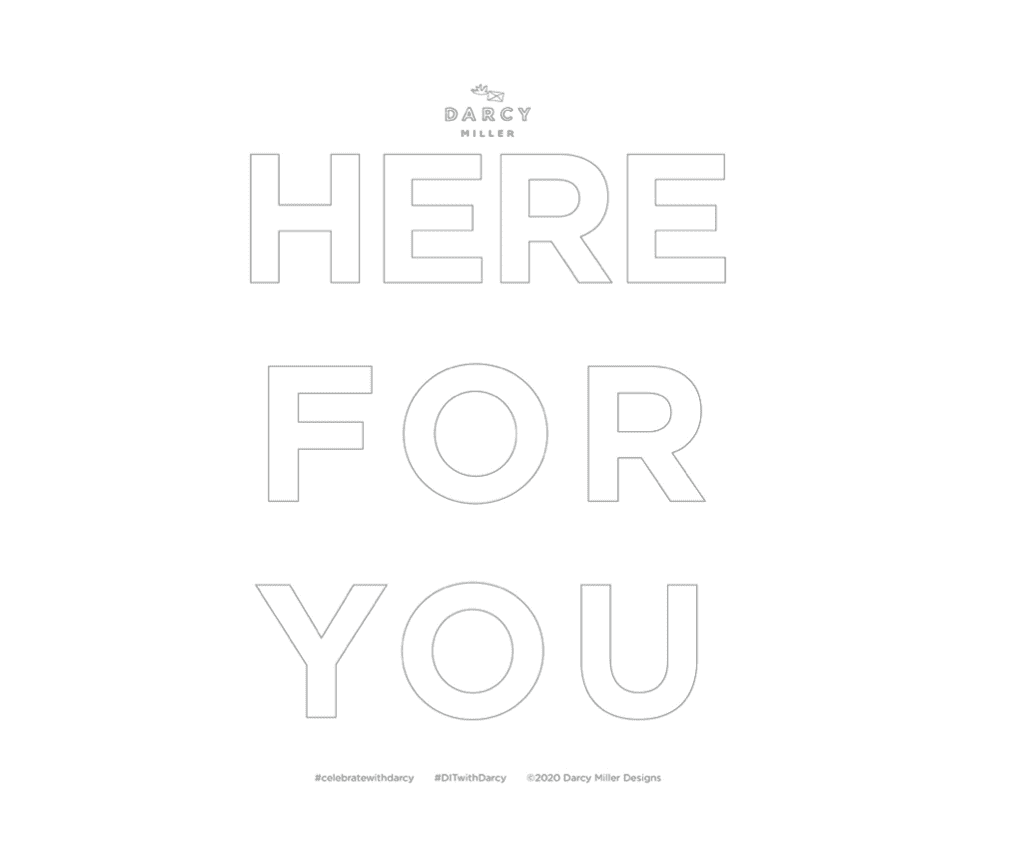
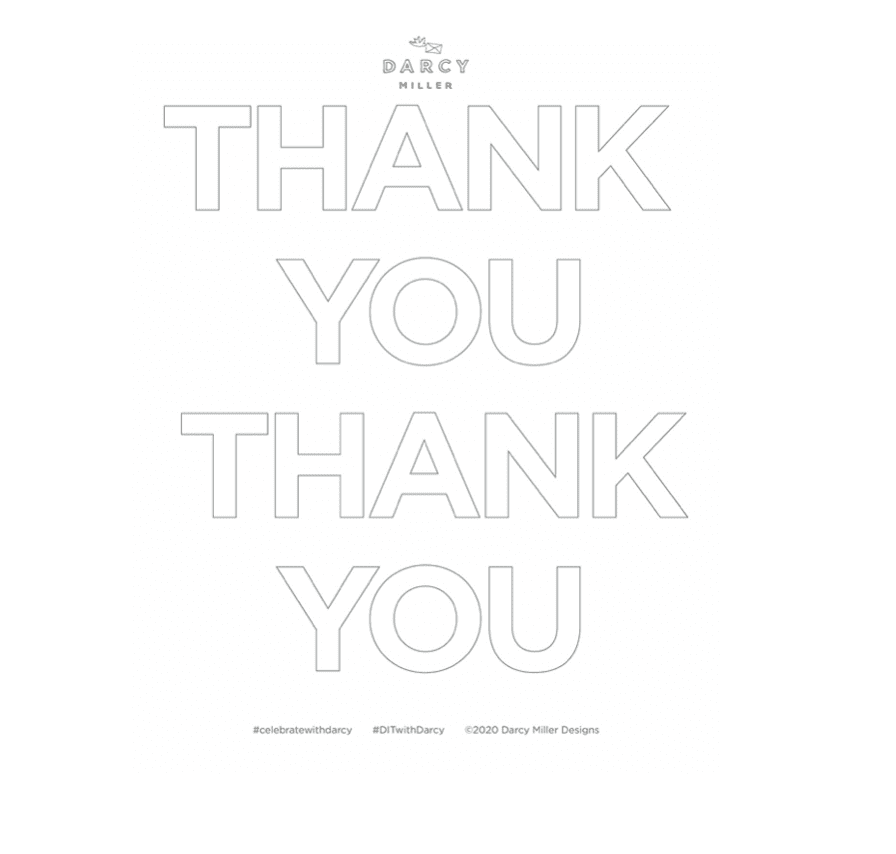
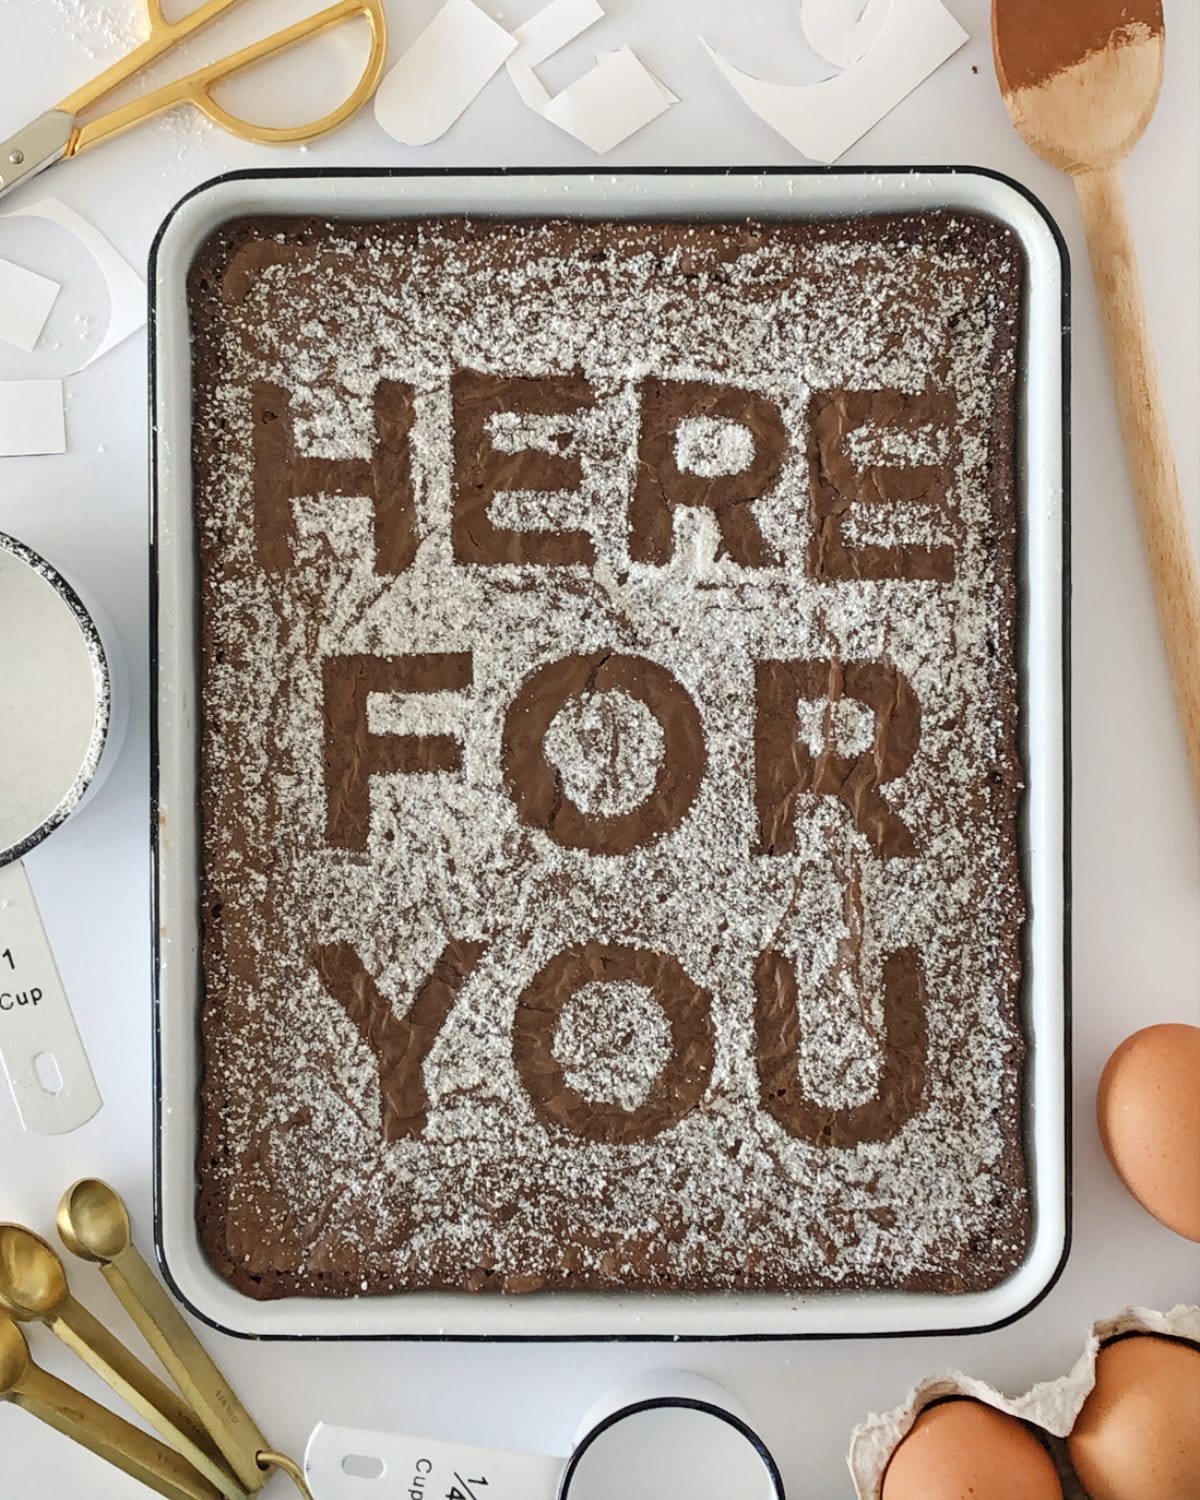
To add your thanks or support to this comforting, easily transportable dessert, just cut out letters from paper and lay them on top of a cooled pan of brownies. Dust lightly with powdered sugar and then remove the letters to reveal your edible note. Use our printable messages or create your own custom phrase by drawing the letters freehand or print out a typed note to fit. Just measure the size pan you’re using to make sure the words will fit.
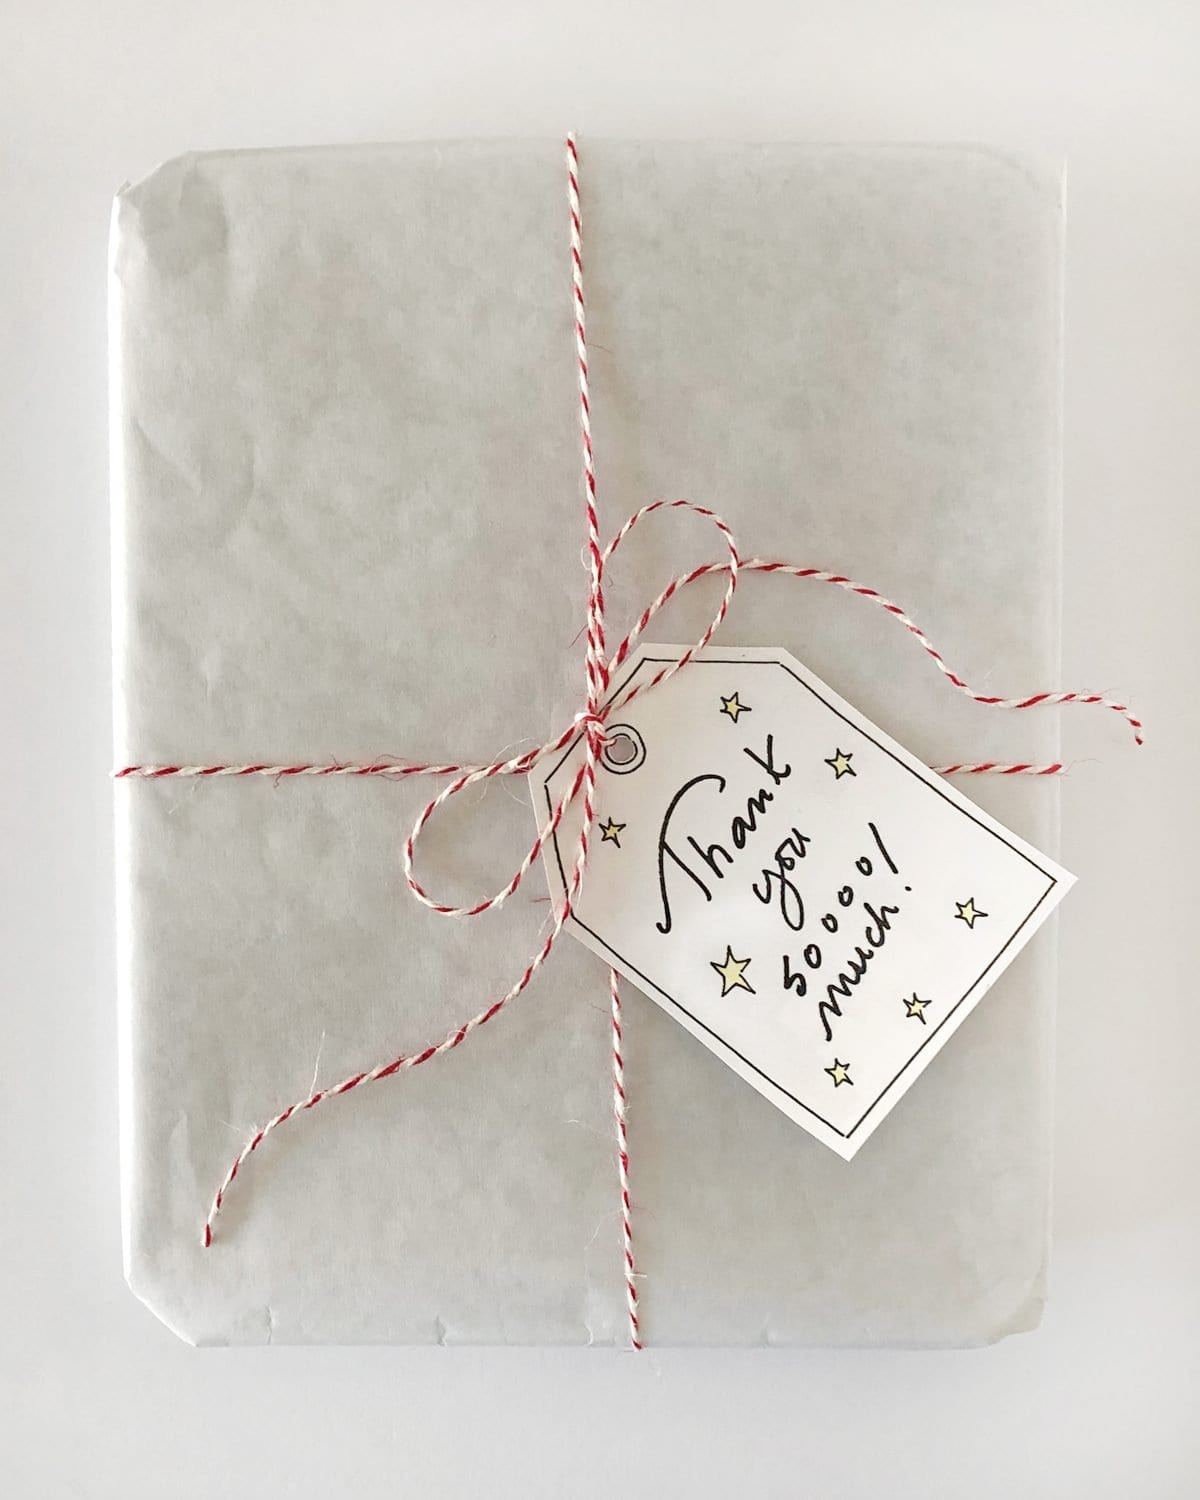
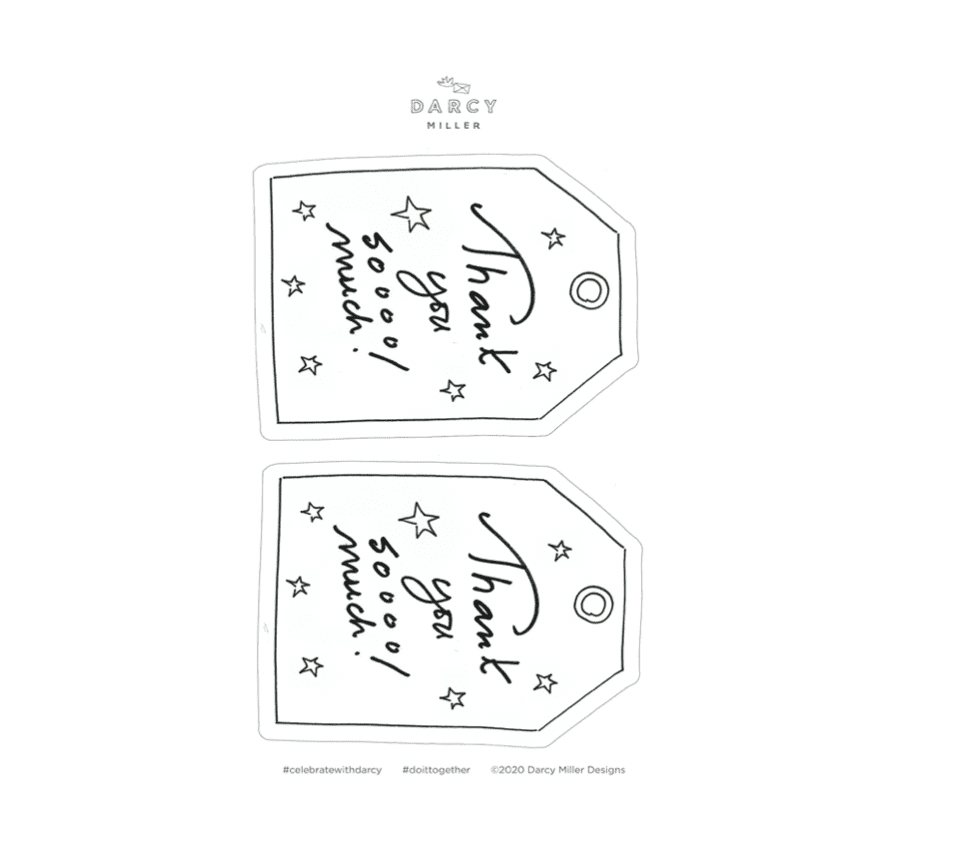
If you’re delivering the message, wrap the brownie pan in parchment paper or tinfoil, tie with string, and add a printable tag (with a personal note on the other side) so your recipient knows who it’s from!
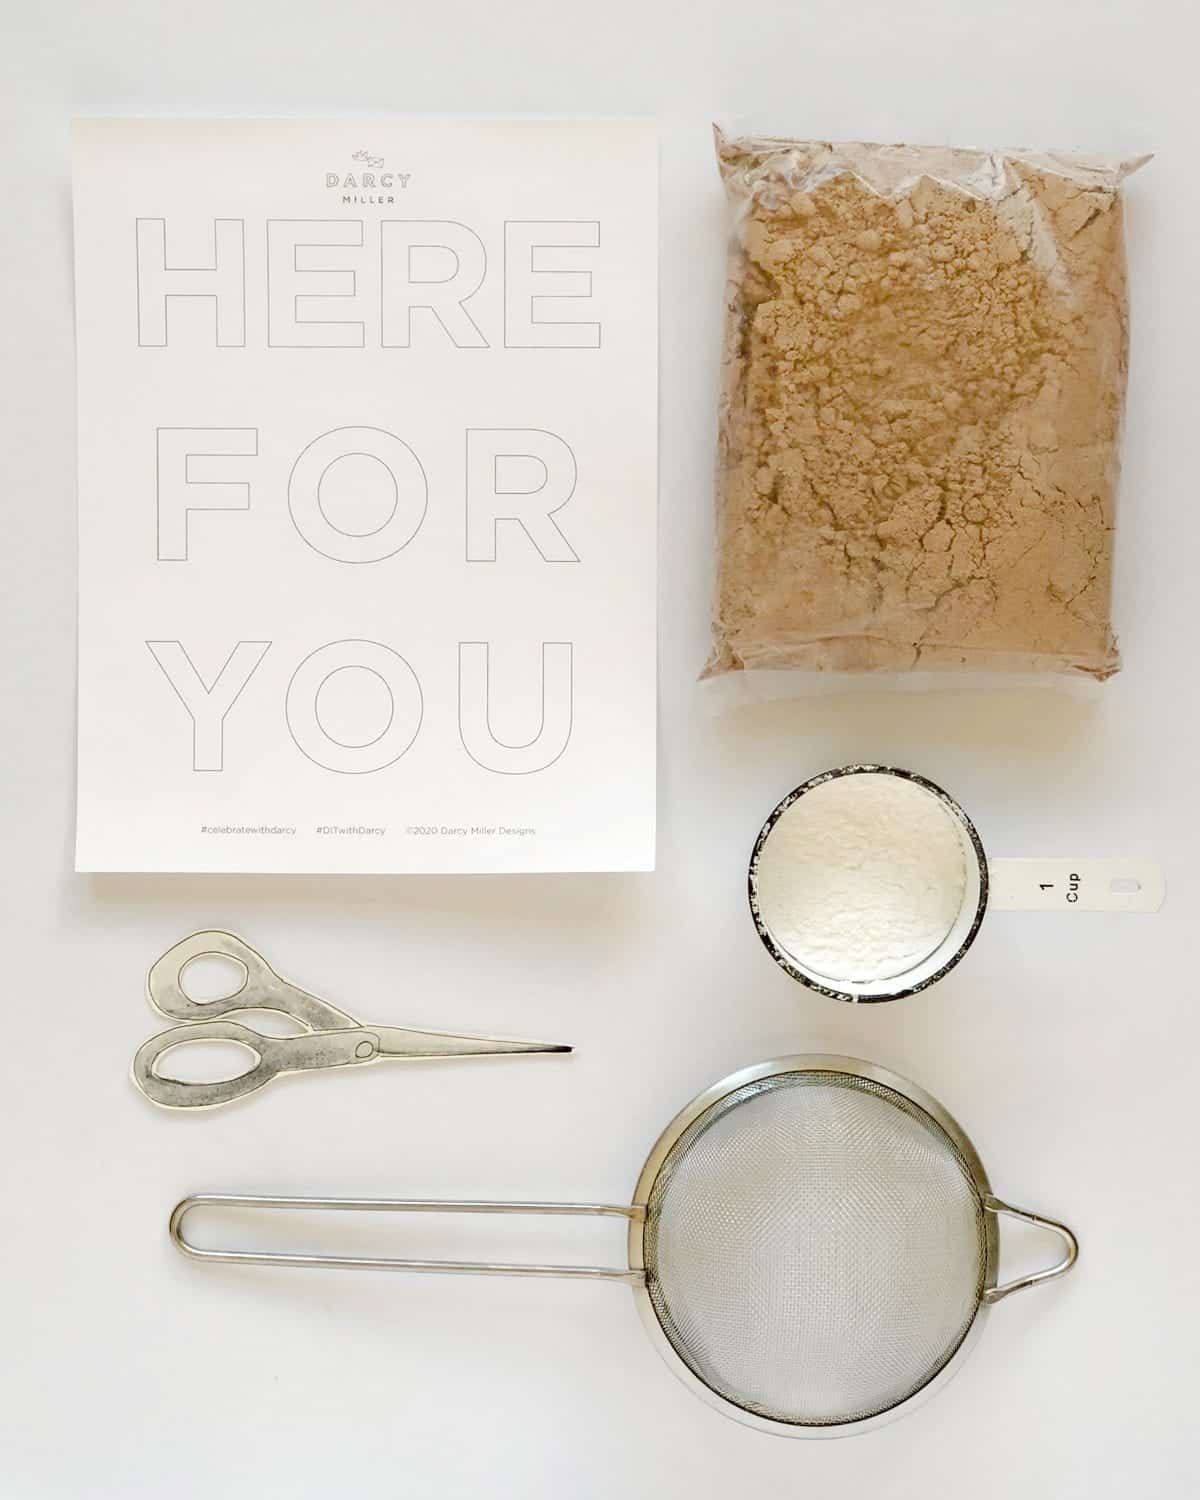
What you’ll need:
- Box of brownie mix
- Message template
- Printer paper
- Scissors
- Powdered sugar
- Flour sifter or strainer
- Tag template
- Hole punch
- Parchment paper and plastic wrap or aluminum foil
- Baking twine, ribbon, or string
Step 1 Bake the brownies according to the instructions on the box and let cool.
Step 2 Measure your baking pan and make sure the letters you plan to use will fit. The letters provided in the templates are designed to fit in an 11” x 8” pan, but you can spread them out if you’re using a bigger pan, or print at a smaller scale if you’re using a smaller pan. You can also create your own letter stencils by tracing the pan on a piece of paper and writing your own block letters so they fit inside the outline.
Step 3 Cut out the letters and arrange them in the pan.
Step 4 Using a flour sifter or a strainer, lightly dust powdered sugar over the letters in the pan until the entire surface of the brownies is evenly coated in a thin layer of powdered sugar. The sugar should be sprinkled thickly enough so that you’ll be able to read the letters when you remove the paper stencils.
Step 5 Carefully remove the paper letters. Tweezers work great here!
Step 6 To wrap, cover the top of the pan in plastic wrap and then wrap in parchment paper (or you could cover the pan in aluminum foil).
Step 7 Print out the tag and cut it out. Use a hole punch to punch the hole in the tag.
Step 8 Tie on the tag with baking twine, string, or ribbon and leave at the door of someone who deserves a sweet treat!