Fall Fashion
There’s a hot new accessory designer shaking things up this fall—and it happens to be you. These adorable patches—made with a Cricut Maker Machine, which cuts out any design you upload—can be used to personalize bags, makeover your favorite jacket, or dress up anything you can think of.
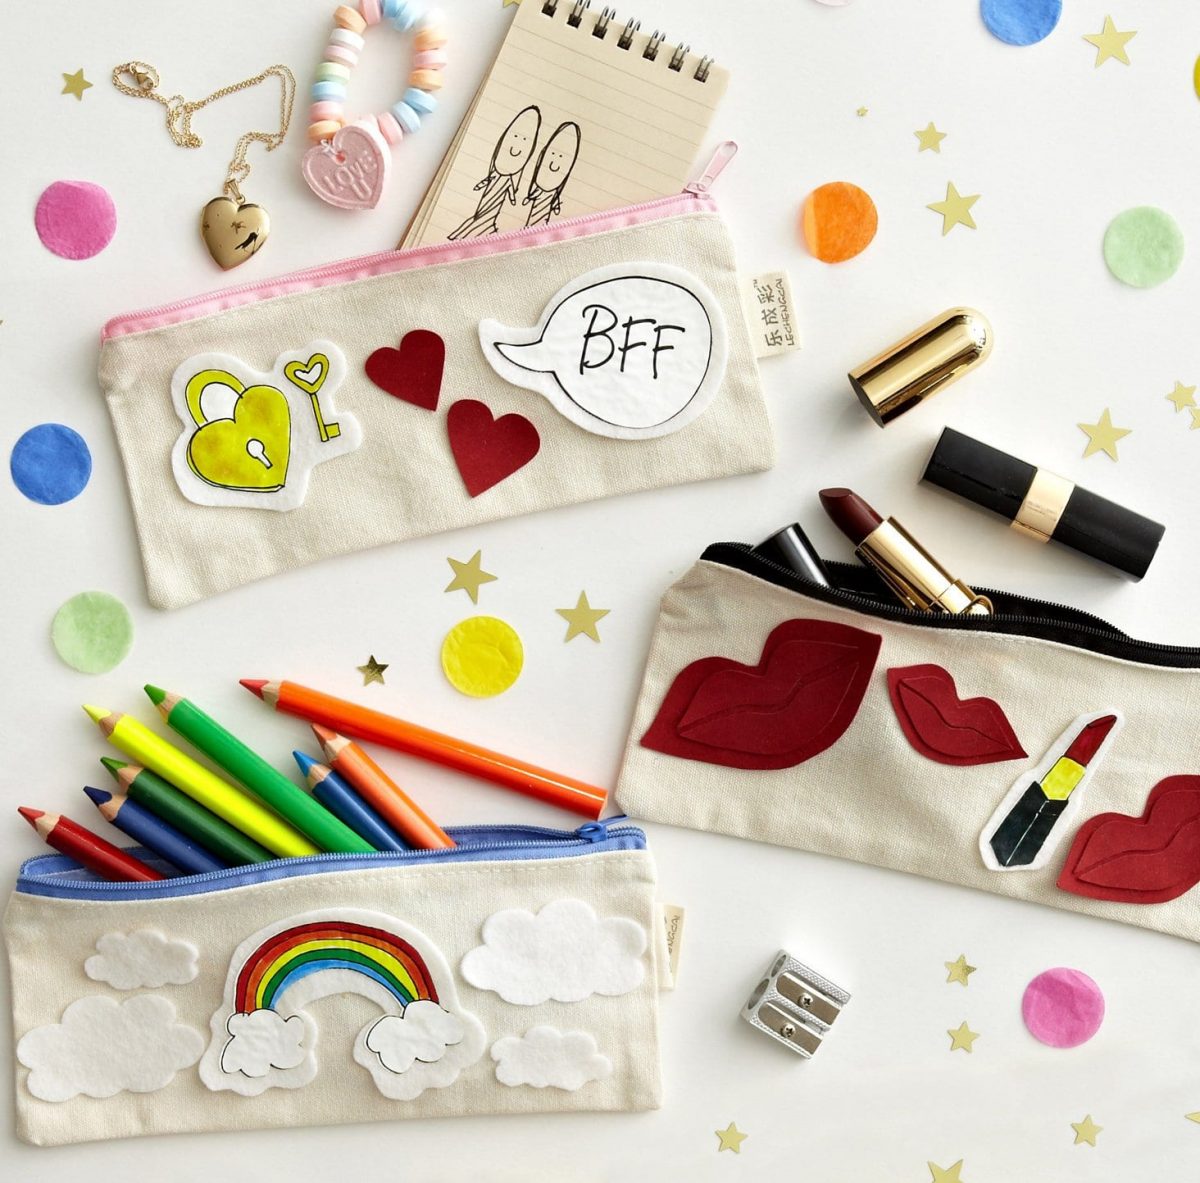
Chic Cases

Transform plain canvas pouches into the season’s coolest pencil cases, cutest makeup bags, and to-die-for totes with couture patches, custom-made by you (with a little help from a Cricut Maker Machine).
What You’ll Need:
- Fall Fashion Patches Template
- Cricut Maker Machine
- Cricut Dark Iron-on heat transfer sheet
- 9 X 12 sheet of white felt
- Cricut faux leather or faux suede sheet, if desired
- Tacky glue or hot glue
- Blank canvas bag
- Iron or Cricut Easy Press
How To:
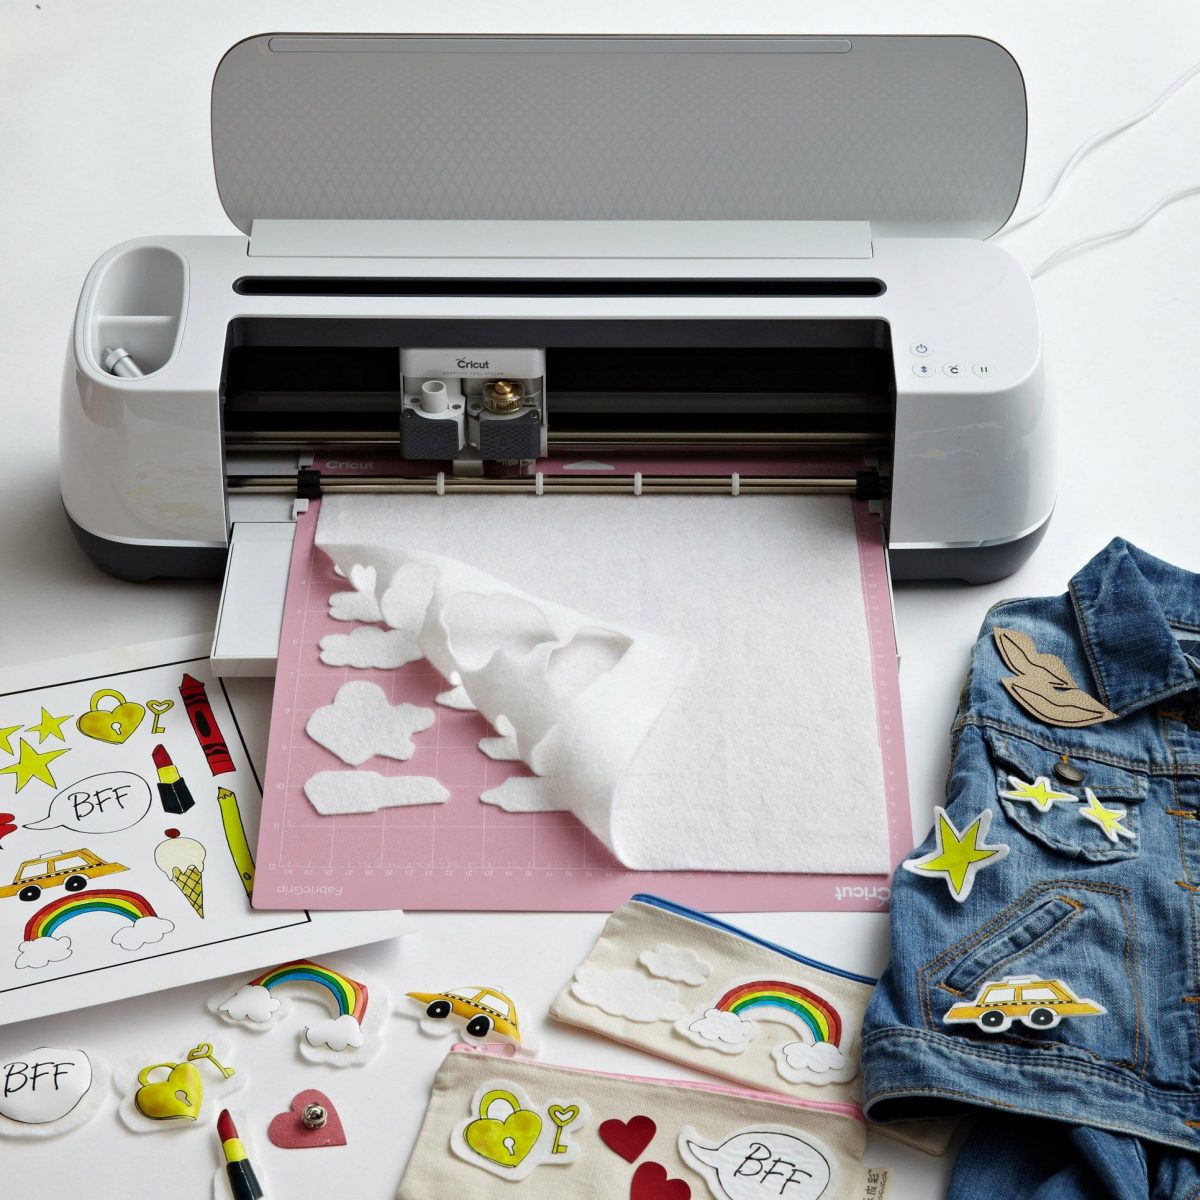
- Download our Fall Fashion Patches Template and convert from a PDF to a JPEG. You will end up with one page for the iron-on art, another for the felt patch outline, and a third to use with the leather, if desired.
- Upload Iron-On Art JPEG to Cricut Design Space, load Cricut Maker Machine with Dark Iron-On sheet, and follow Cricut instructions to print and cut. When prompted, select print with no bleed.
- Upload Fall Fashion Patches JPEG to Cricut Design Space, load Cricut Maker Machine with felt sheet, follow Cricut instructions to cut.
- You’ll end up with one sheet of blank felt shapes and one of matching iron-on art. Peel off felt shapes and iron-on art, and layer each iron-on art design on top of its corresponding felt shape, printed side up.
- Cover shapes with wax paper provided and adhere art to felt by using a Cricut Easy Press set to 250 degrees F following the instructions here, or your iron on low, applying heat in 20 second intervals three times in a row.
- Let cool for three minutes.
- Once your patches have dried, glue onto pouches with tacky glue or hot glue.
How To for Leather Patches:
- Upload the Leather Shapes JPEG (the third page of the template) into Cricut Design Space, and load leather sheet into Cricut Maker Machine.
- Follow Cricut instructions to cut leather shapes.
- For a 3-D effect, layer shapes and glue together with hot glue or tacky glue.
- Attach to pouches with tacky glue or hot glue.
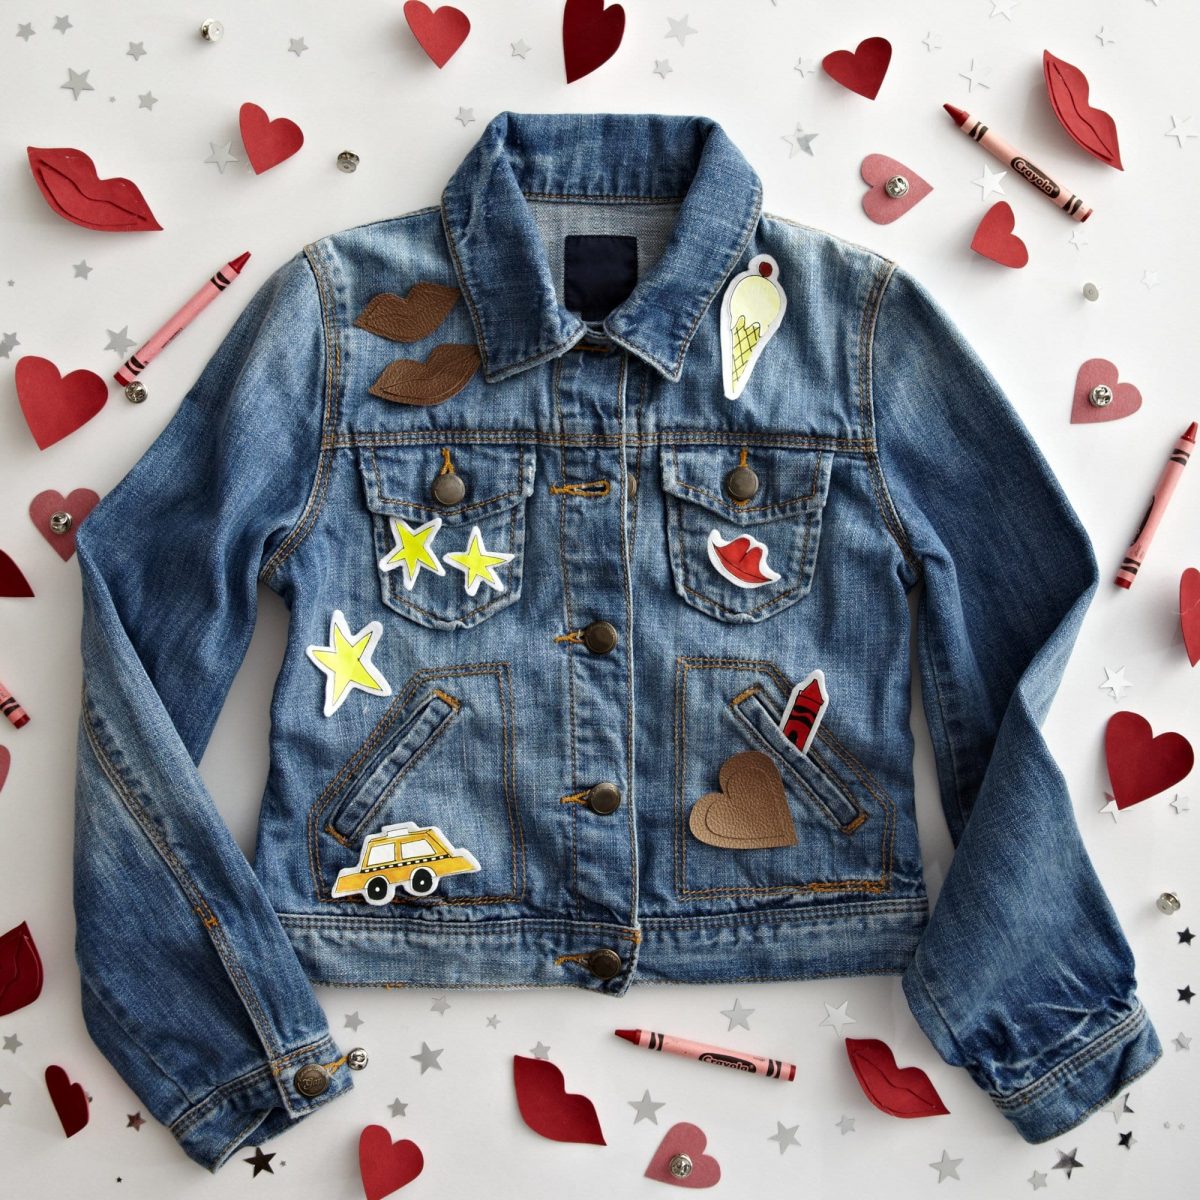
Pin it to Win it
Turn last year’s jean jacket into your new fall favorite by personalizing it with some playful pins you whip up yourself using a Cricut Maker Machine. Just glue a tie tack or safety pin to the back of our Fall Fashion patches, then add some pin-terest to anything that could use a makeover, from jackets to t-shirts to bookbags.
What You’ll Need:
- Fall Fashion Patches Template
- Cricut Maker Machine
- Cricut Dark Iron-on heat transfer sheet
- 9 X 12 sheet of white felt
- Cricut faux leather or faux suede sheet, if desired
- Tacky glue or hot glue
- Jean jacket (or other piece of clothing)
- Iron or Cricut Easy Press
How To:
- Download our Fall Fashion Patches Template and convert from a PDF to a JPEG. You will end up with one page for the iron-on art, another for the felt patch outline, and a third to use with the leather, if desired.
- Upload Iron-On Art JPEG to Cricut Design Space, load Cricut Maker Machine with Dark Iron-On sheet, and follow Cricut instructions to print and cut. When prompted, select print with no bleed.
- Upload Fall Fashion Patches JPEG to Cricut Design Space, load Cricut Maker Machine with felt sheet, follow Cricut instructions to cut.
- You’ll end up with one sheet of blank felt shapes and one of matching iron-on art. Peel off felt shapes and iron-on art, and layer each iron-on art design on top of its corresponding felt shape, printed side up.
- Cover shapes with wax paper provided and adhere art to felt by using a Cricut Easy Press set to 250 degrees F following the instructions here, or your iron on low, applying heat in 20 second intervals three times in a row.
- Let cool for three minutes.
- Once your patches have dried, glue each onto a tie tack or safety pin and start pinning!
How To for Leather Patches:
- Upload the Leather Shapes JPEG into Cricut Design Space, and load leather sheet into Cricut Maker Machine.
- Follow Cricut instructions to cut leather shapes.
- For a 3-D effect, layer shapes and glue together with hot glue or tacky glue.
- Attach to pouches with tacky glue or hot glue.
- Once your patches have dried, glue each onto a tie tack or safety pin and start pinning!
photo credits