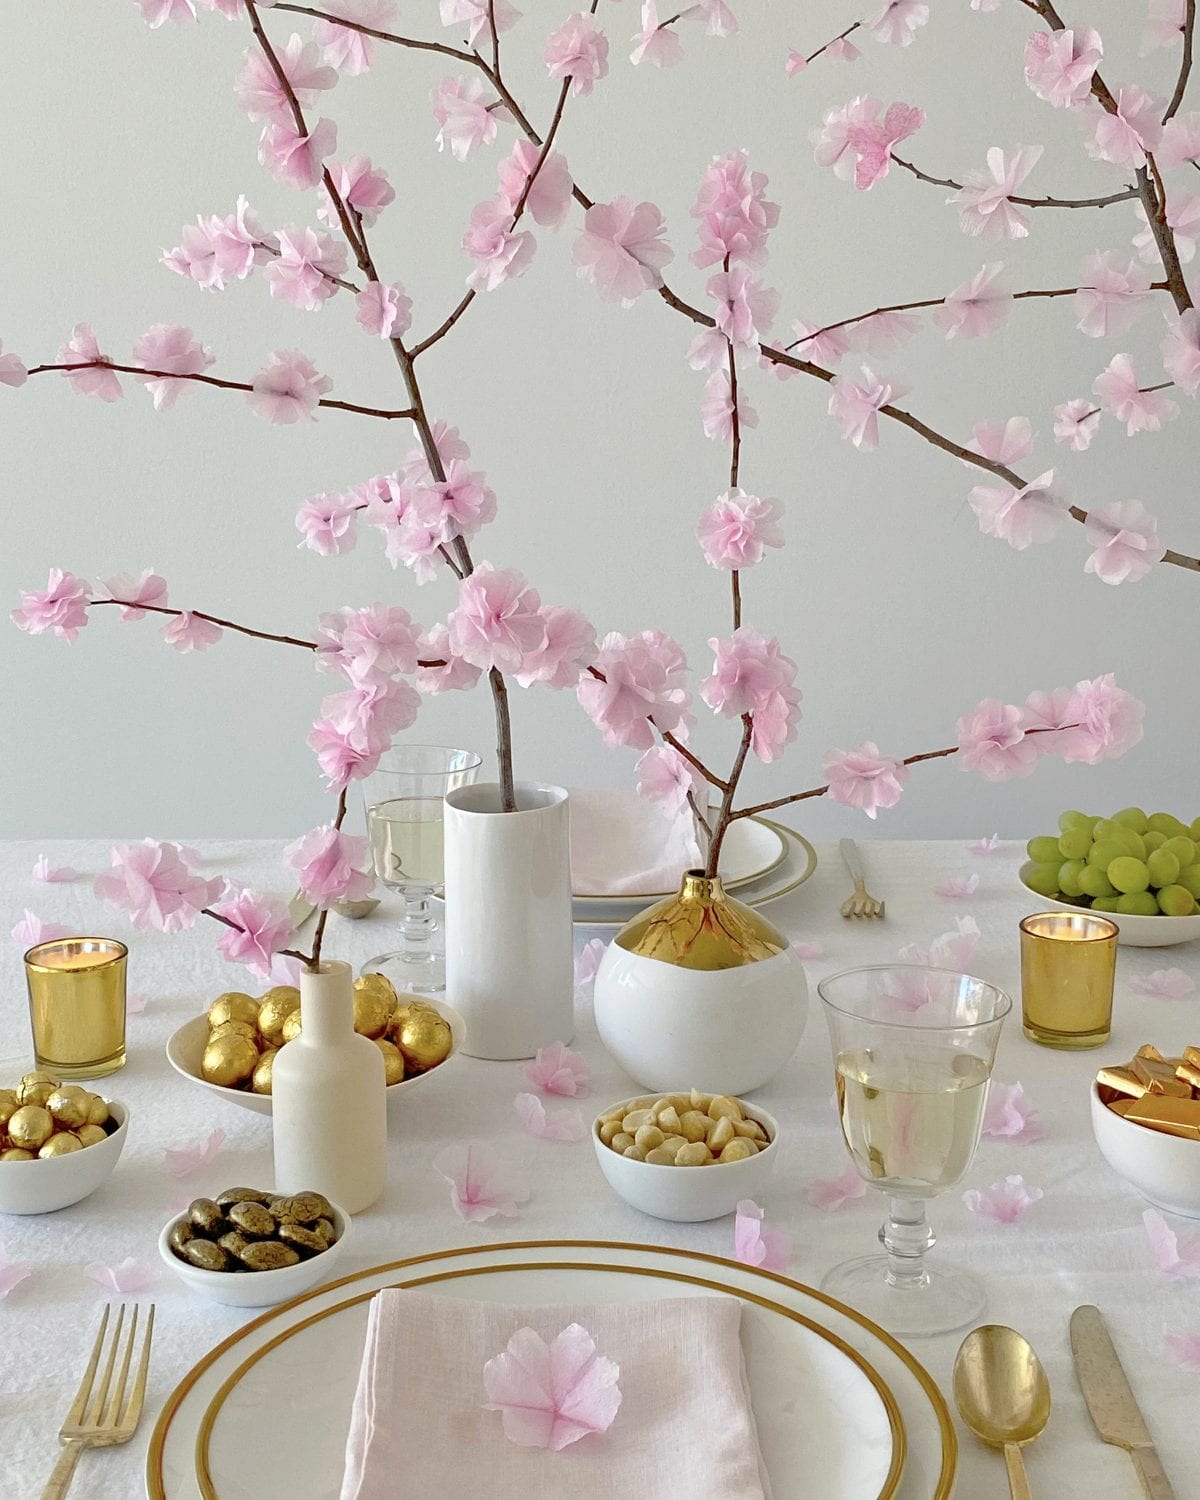
Bring spring indoors all year round with DIY Japanese cherry blossom trees, also called sakura. During the final week of March and the first few weeks in April, these special trees explode in pale pink blossoms down to the tip of every branch. While it might be difficult to see the actual trees at their peak, you can easily make your own version using a few supplies (like napkins and paper towels) you already have around the house and a quick trip to the backyard or park.
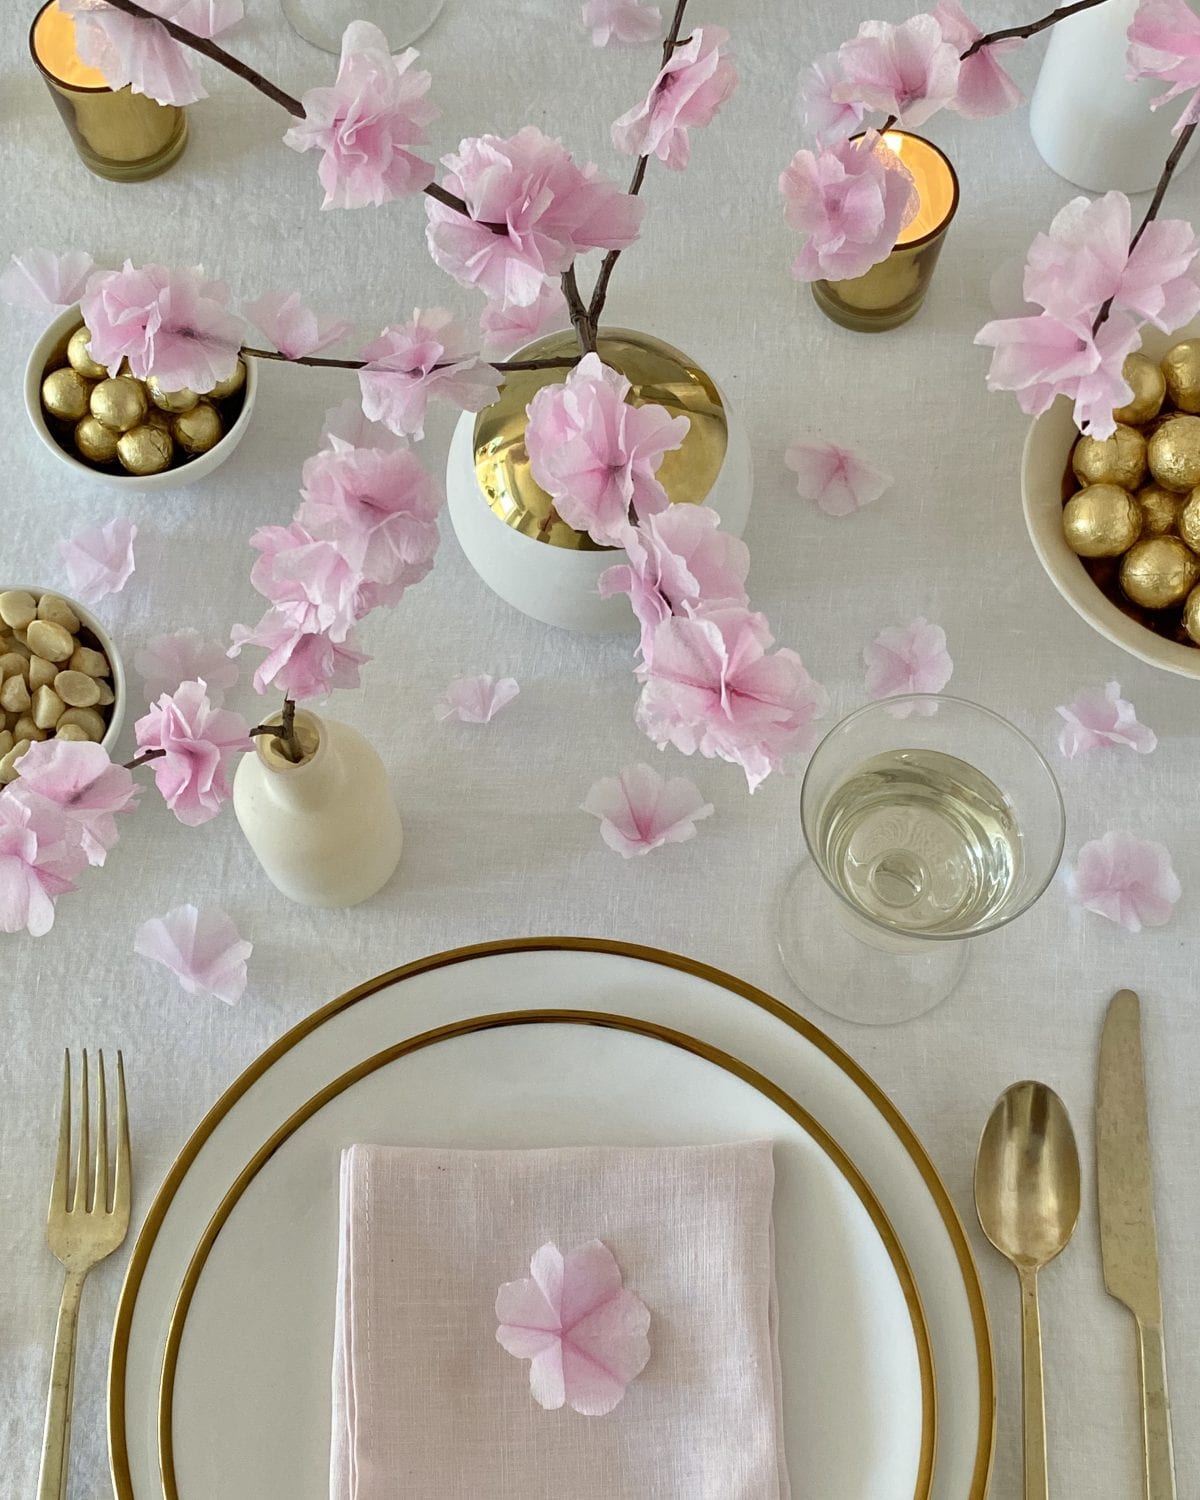
You can use the branches as centerpieces, decor at a wedding or bridal or baby shower, or even just as an everyday floral touch on your kitchen table, in your foyer or around your house. Even off the branches, once you have the flowers, they can be attached to place cards, scattered on a table, or used to dress up anything you can think of. Get creative! You can make a great backdrop, too–whether you’re scattering a few on your wall, or creating a photo backdrop for an event with flowers strung on garlands.
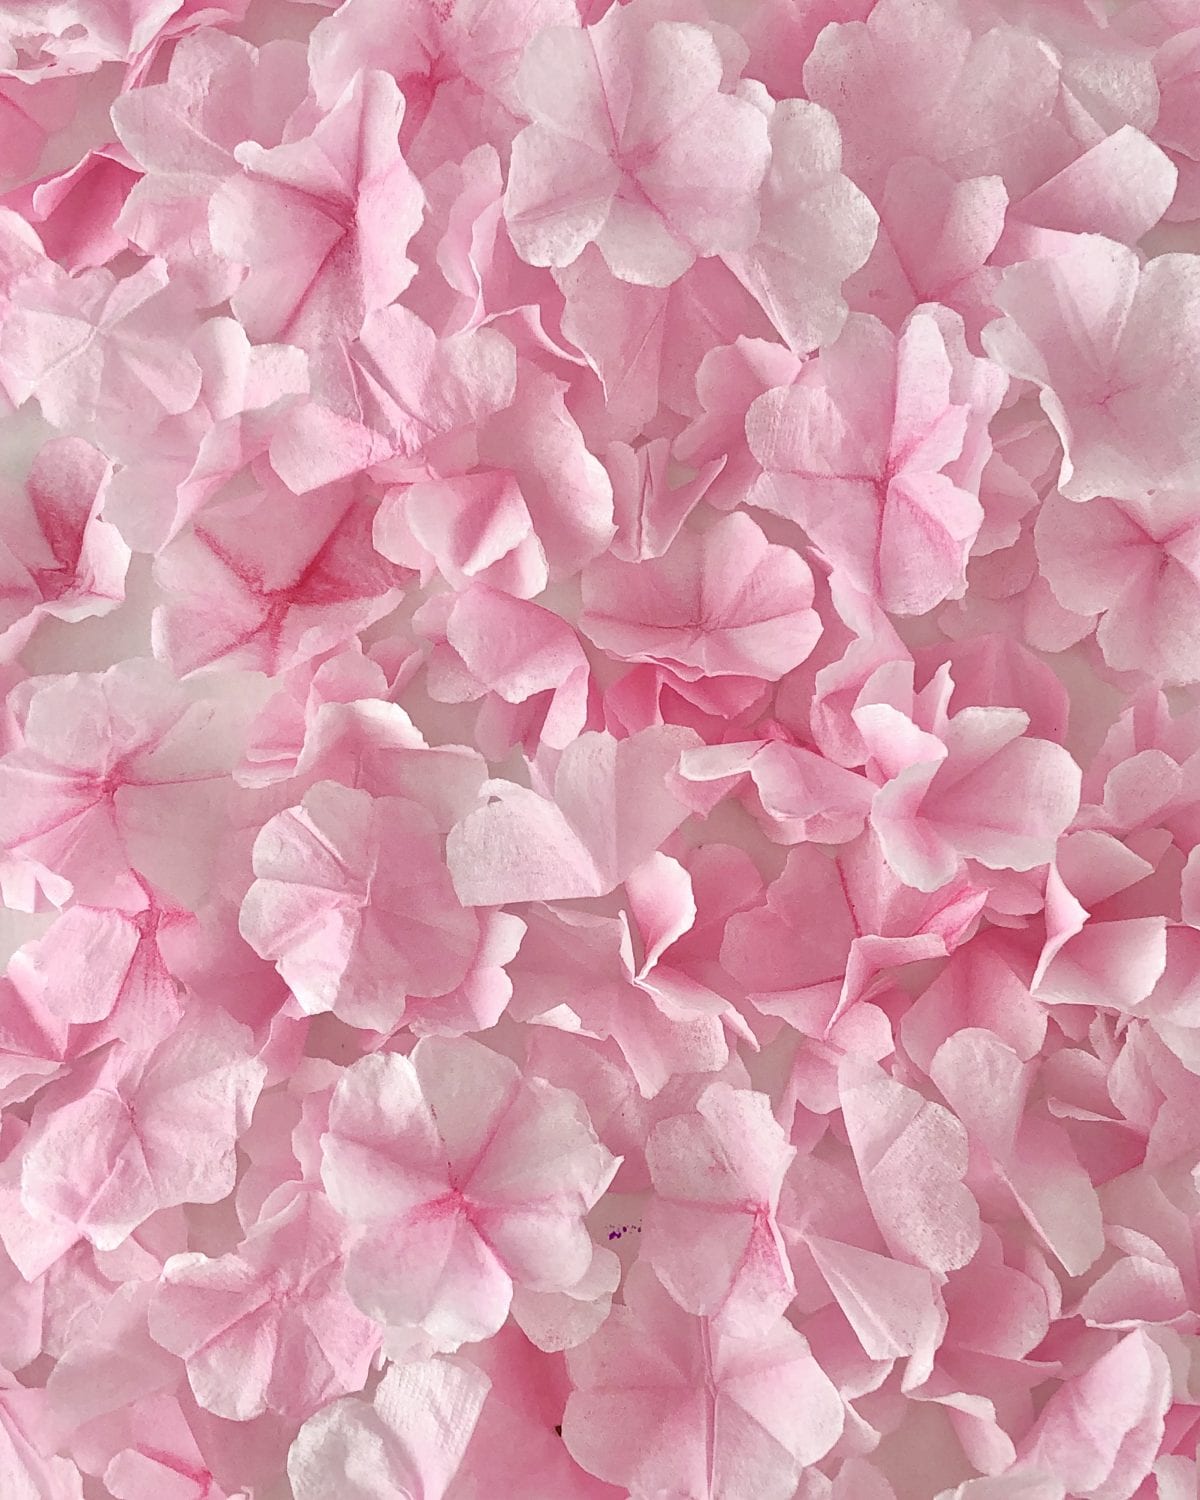
Make these decorative branches to celebrate Spring. They can dress up your everyday dinner table or be used for special occasions like Easter, Passover, Mothers Day or just to celebrate the Cherry Blossom Festival in your own home. You can also just make the blossoms to use as a cheerful spring confetti. Dyed with an ombre effect so they almost look like real petals, this pretty confetti would be perfect for a baby or bridal shower.You could even experiment with other colors to suit any palette. If you’re looking to bring some beauty into your home, this simple strategy for making floral branches is an easy way to pass the time and have it be Spring all year long.
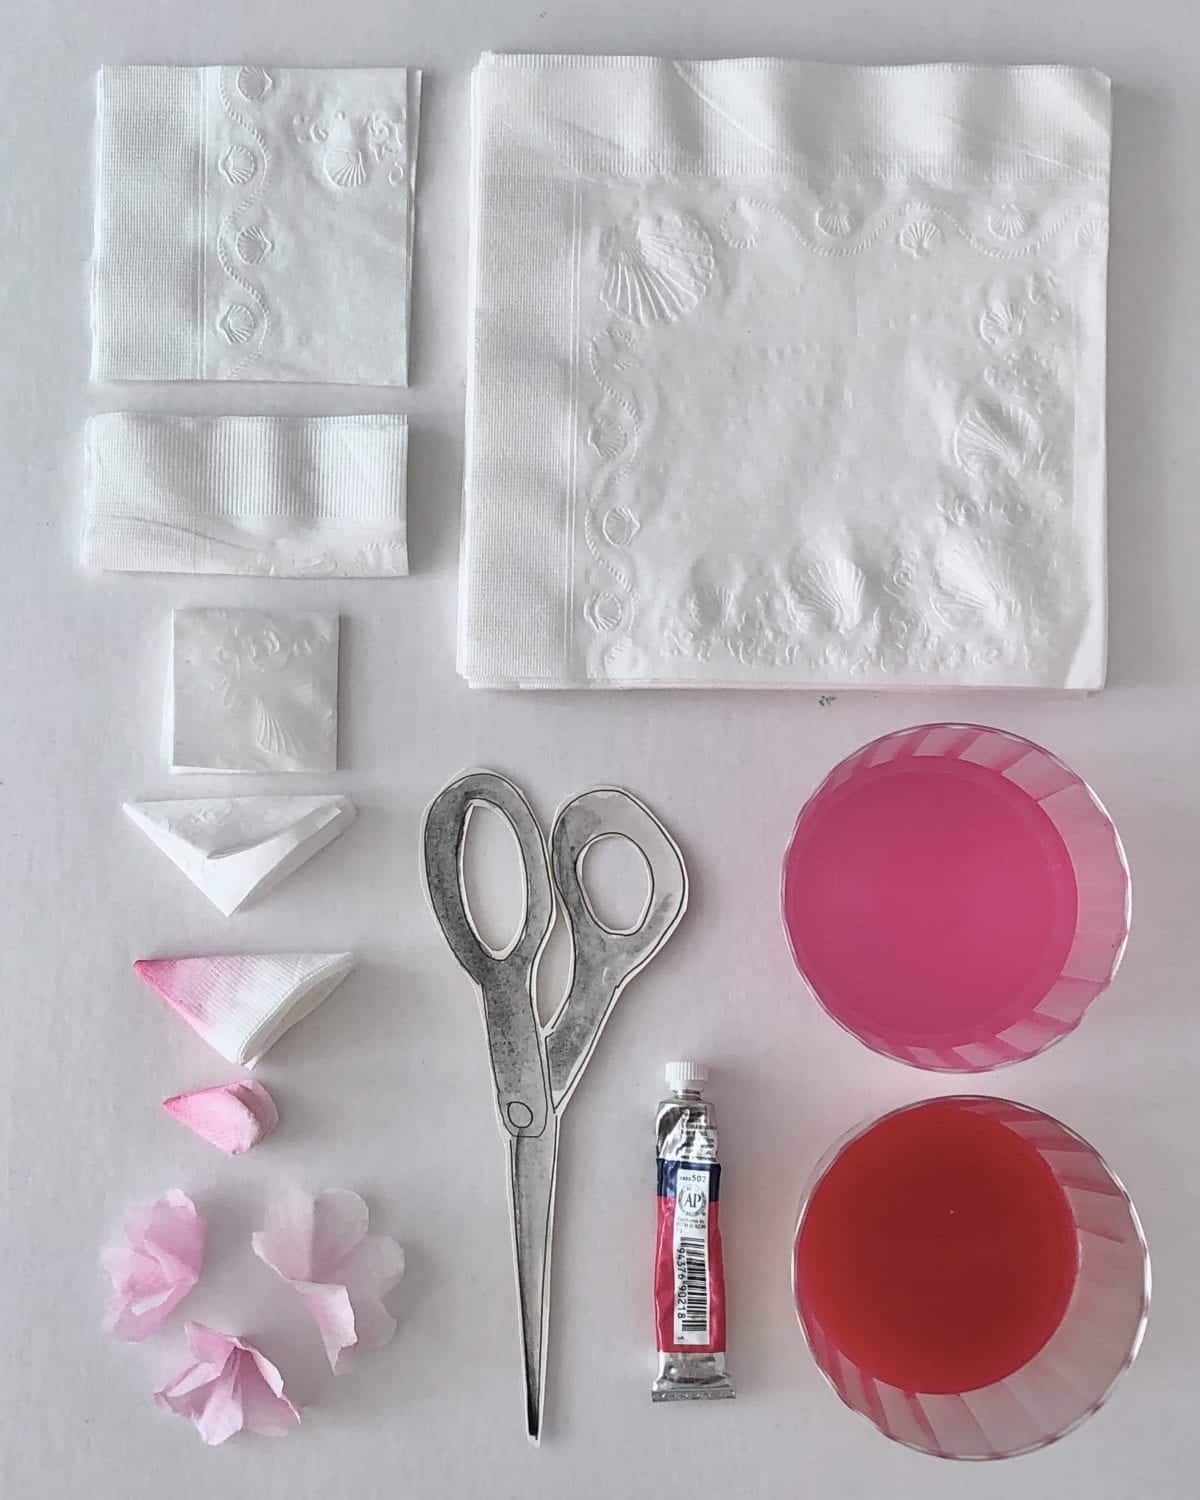
What you’ll need:
- Paper napkins, paper towels, takeout napkins, or any other soft, disposable paper product you might have around
- Any paint or dye for color you might have (craft paint, watercolor paint, food coloring, etc.)
- Two paint or dye safe containers (you can use glass or plastic bowls)
- Scissors
- A branch (you can find one in your own backyard or local park)
- Glue (hot glue recommended, but any glue will work)
Step 1 Cut napkin into 2×2-inch squares
Step 2 Take one square, and fold it in half and in half again, to make a smaller square.
Step 3 Fold in half on the diagonal so you have a triangle.
Step 4 Repeat Steps Two and Three with all 2×2 squares until you have plenty of smaller triangles to make enough blossoms to cover the size branch you’re using.
(Tip: If you’re using a multi-ply paper product, you’ll be able to peel about the layers and get several flowers out of each triangle.)
Step 5 In a small bowl, mix a few drops of your paint or dye with about a cup of water. Add additional drops of paint or dye until the color is very vibrant and opaque.
Step 6 Take about a teaspoon of your dye- or paint-and-water solution, and put it in your second bowl. Add another cup of water to that second bowl. You should now have two containers of dye–one darker than the other–for dipping.
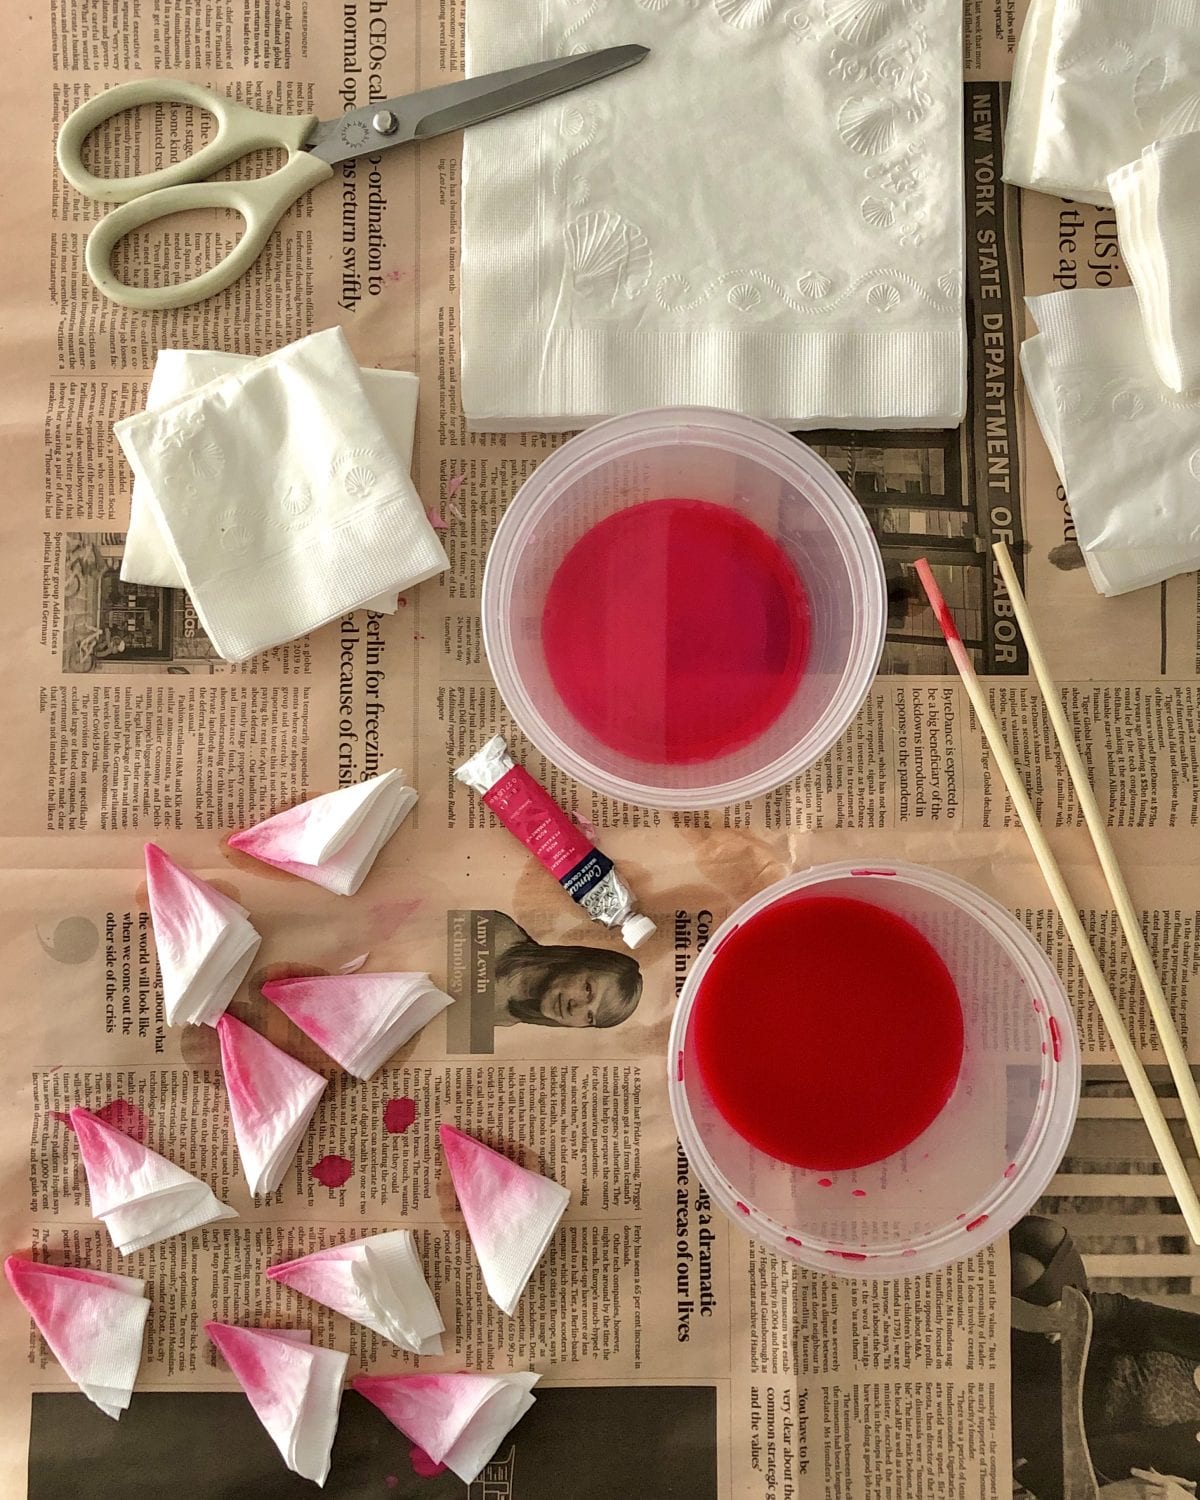
Step 7 Dip the folded end of each triangle into the lighter dye bath first. Dip it in so that about half the triangle is saturated.
Step 8 Dip just the tip of the folded end of each triangle into the darker dye bath, to create an ombre effect.
Step 9 Once the triangles have dried, hold them by the dyed, folded tip, and cut a rounded edge to make a petal shape (like you’re making a paper snowflake). Don’t worry about size, or how much you cut–each one can come out a little different.
Step 10 Unfold the flowers and peel apart the layers if you have any.
Step 11 Glue the flowers to the branches in clusters and space out at various distances to mimic the imperfectness of nature. Depending on the glue you’re using (if you’re not using hot glue), you might need to hold the blossoms in place for a moment so the glue can dry securely!