Creating a one-of-a-kind holiday or greeting card isn’t just thoughtful. It’s a fun project to do together, and a smart way to upcycle some old boxes. If you’re creative, this project is the perfect chance to express yourself. And if you have kids, it’s a crafternoon project that will keep them busy for hours and a fun activity to do at a birthday party.
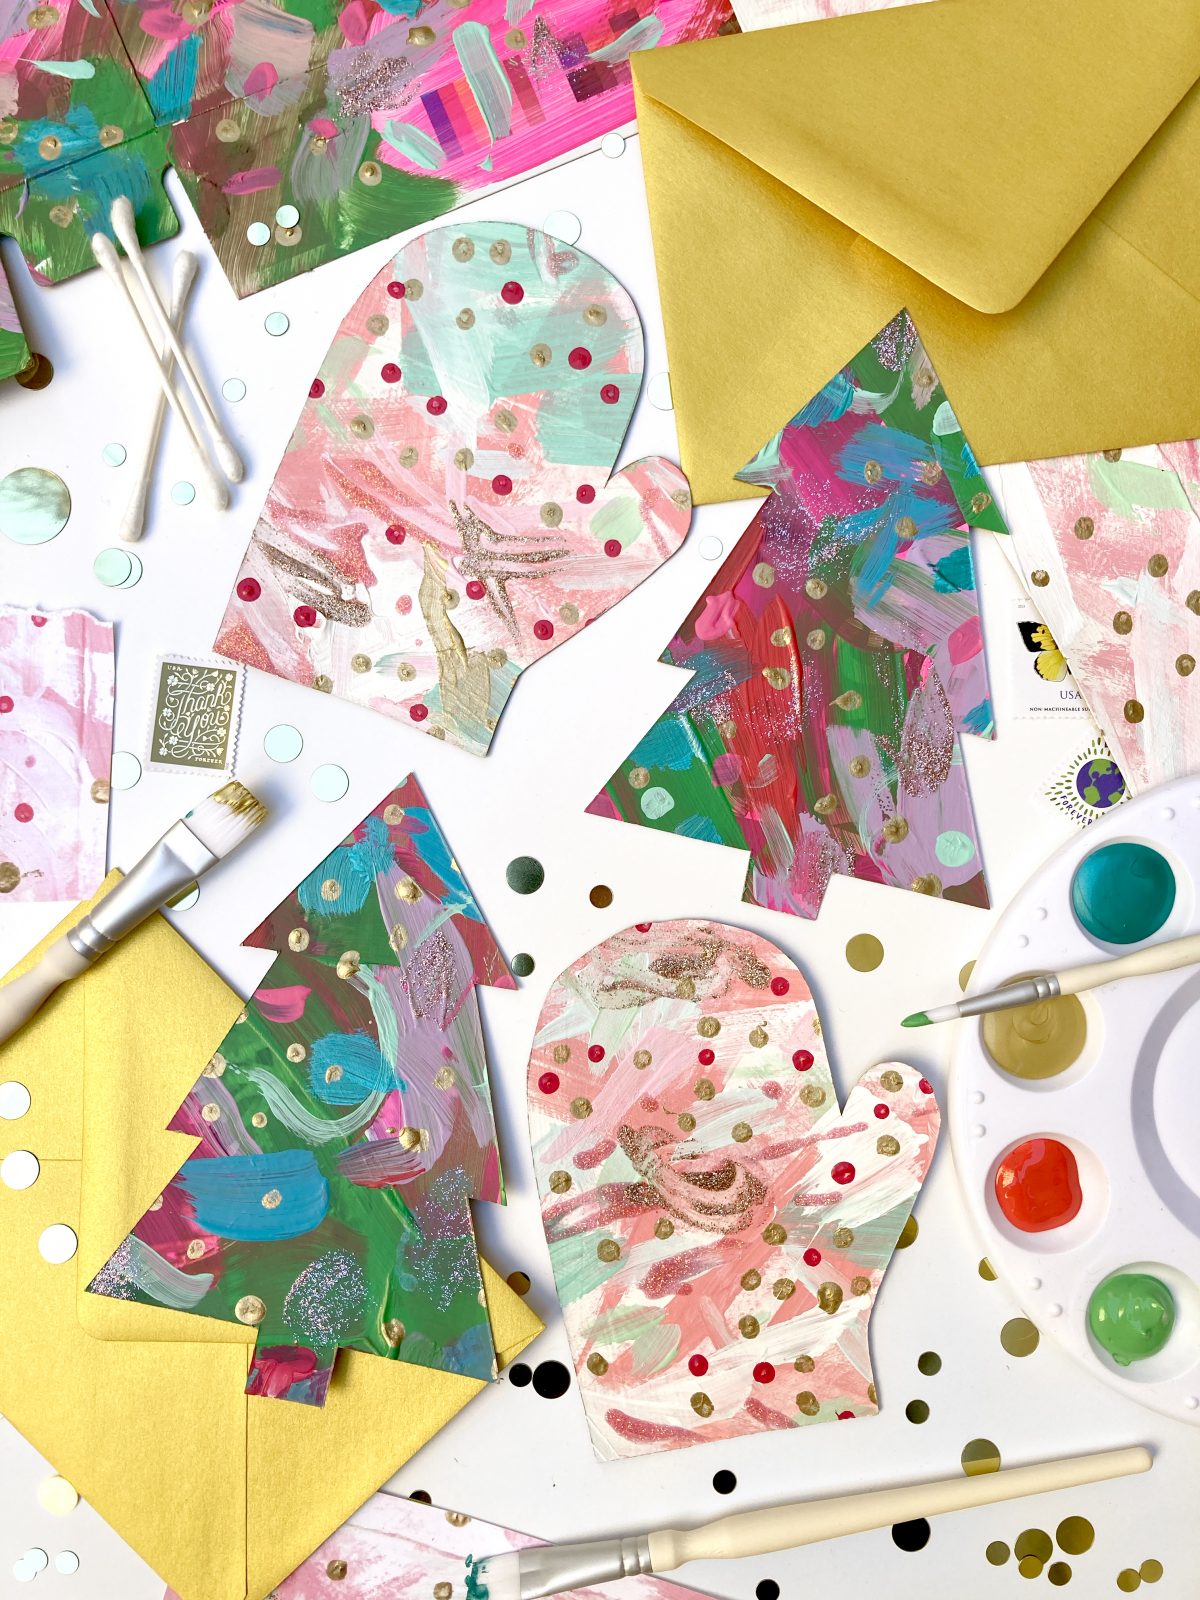
Start with empty boxes that used to hold cereal, crackers, mac and cheese, whatever you’ve got in your pantry. Break down the boxes into flat sheets of cardboard, then paint over the printed side using a solid color. (Acrylic or tempera paint works best.) Now, get creative! Decorate the cardboard with a pattern—you can do anything fromJackson Pollock-style paint spatters to adding stickers, polka dots, stencils, brush strokes, whatever you can dream up!
The decorated cardboard is your finished canvas. Once it’s dry, all that’s left is to cut it into shaped cards. You can snip freehand shapes or download our templates of a mitten or tree, trace them onto the cardboard and cut out into a shaped card.
Write messages on the plain cardboard back of the card, slip it in an envelope and send your masterpiece out into the world, giving your friends one-of-a-kind artwork to display. They’ll love the results (especially if it’s Grandma and Grandpa getting original art from the grandkids). You can also make a whole series and string them together to make garlands for holiday decor. And if you enjoy the process, you don’t have to limit it to the holidays! Art cards are great for birthdays, mother’s or father’s day, and all year long.
For more fun holiday card ideas, click here.
What You’ll Need
- Cardboard food boxes (think cereal, crackers, etc)
- Paint (acrylic or tempera works best)
- Decorating supplies: paint, markers, stickers, crayons, stencils, whatever you like!
- Art Card template
- Paper for printing templates
- Scissors
- Pencil or chalk for tracing templates
- Envelopes
How-To
Step 1 Break down your cardboard box and paint over the printed side with acrylic or tempera paint; if you want a light colored background, it helps to paint a coat of white paint on first as primer. Let dry.
Step 2 Decorate the painted side however you like (with stickers, crayons, paint, whatever!)
Step 3 Download Art Card template, print and cut out.
Step 4 Trace template onto the plain side of the cardboard and cut out.
Step 5 Write message on the plain side, place in an envelope and mail. (Or string into garlands and get festive!)