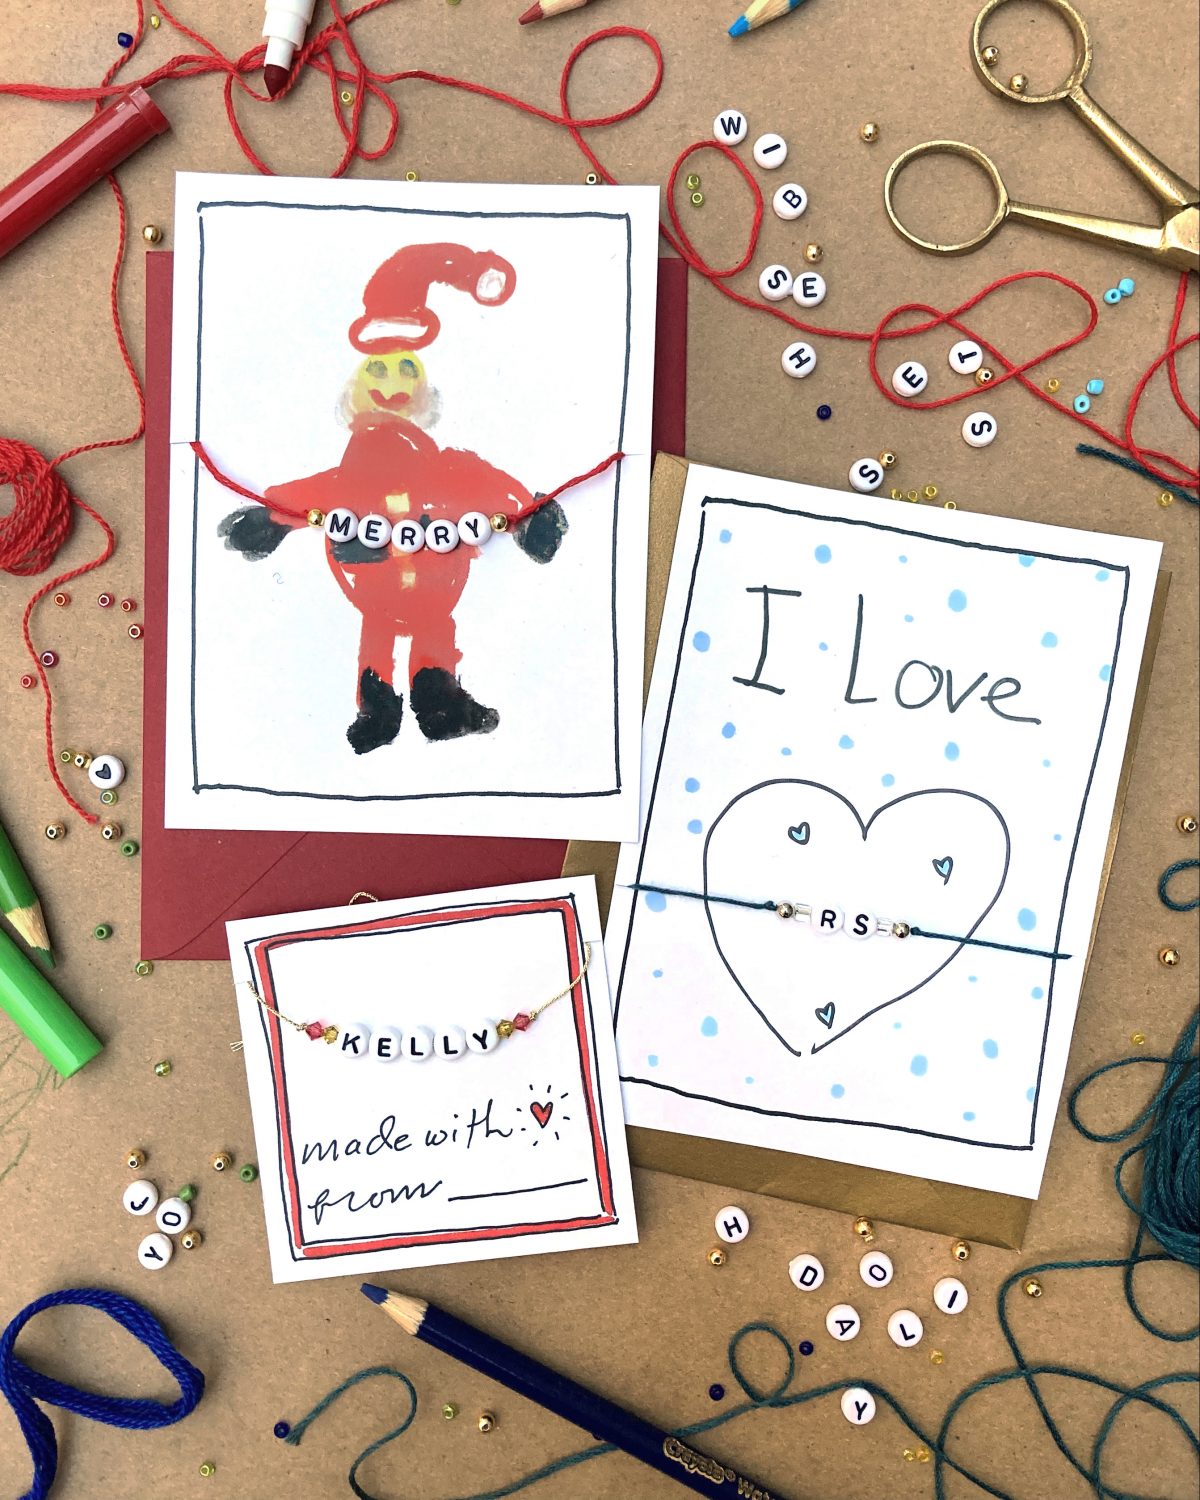
Here’s a fun activity that’s a holiday card and a holiday gift all in one. It’s also a great craft project and a beading activity to do with your friends.
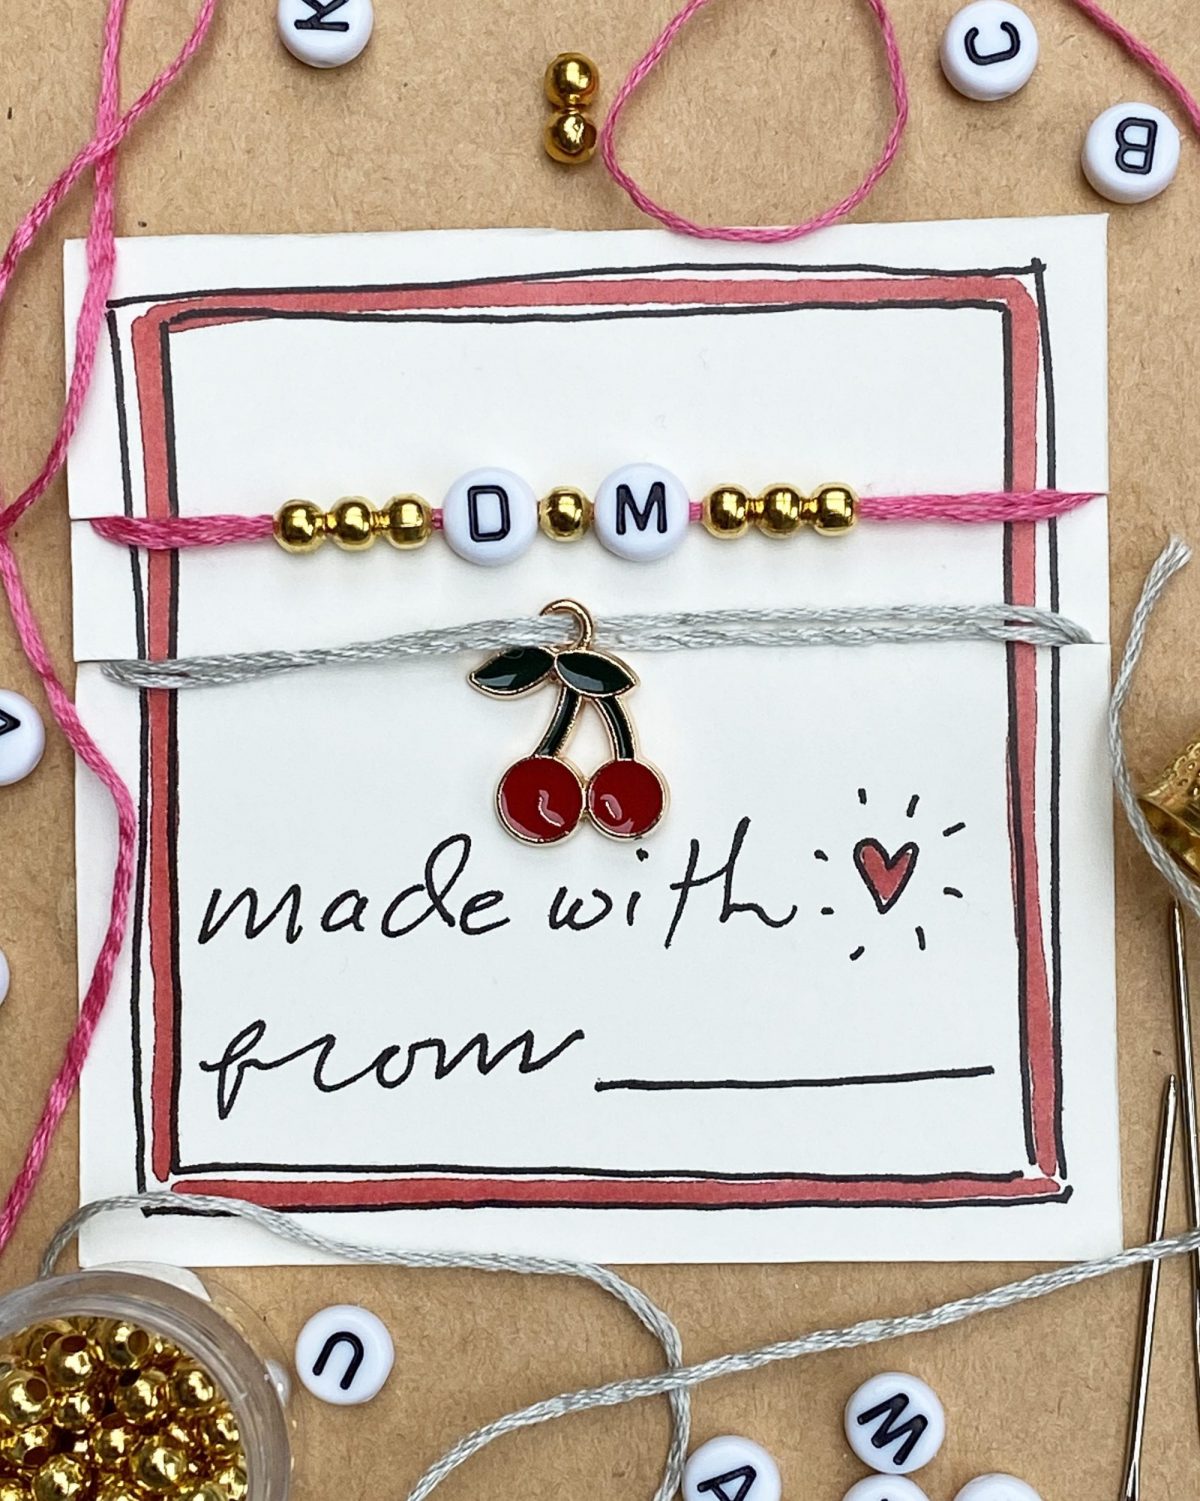
The idea is to string together some beads friendship style, then wrap the bracelet around a card so that the beads become part of the holiday greeting.
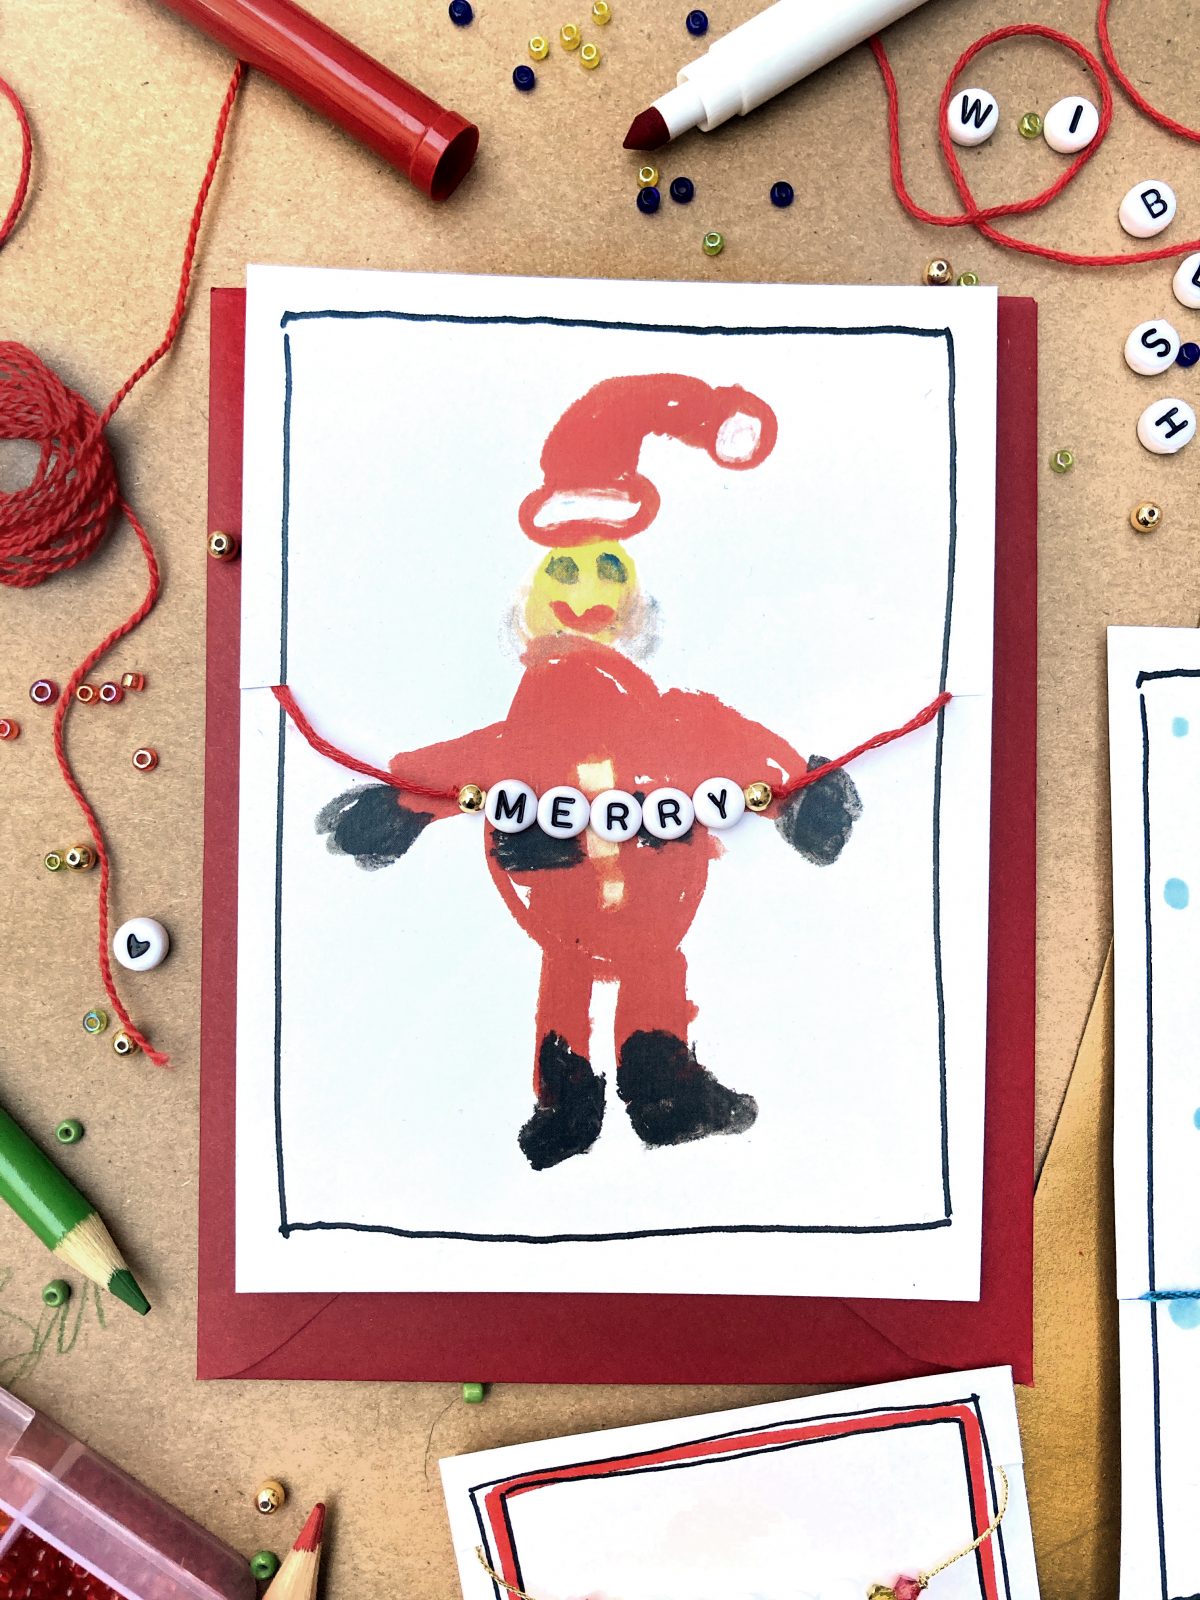
You could use a single charm and some string or put together letter beads to write out a word like “Merry!” and let the card fill in the rest of the sentence. Or you might
Write short words like KISS, LOVE, PEACE or JOY
Make a bracelet with the initial of the person you’re sending it to.
Use numbers to write the date of the new year.
Or, send text-like messages like LOL, I*U, HBD.
Once you’ve made your bracelet, wrap it around a personalized card. You can use our Made With Love template, or scan a note, drawing, or kids’ artwork and print it out on cardstock. You could even print a photo and wrap the bracelet around it as if the person in the photo is wearing a necklace! Snip small slices in the sides of the card, and slide the bracelet onto those, securing it in the back.
A bracelet holiday card is not just a fun craft and a personalized gift, but also a way to stay connected. A bracelet is also a sweet reminder that you’re thinking of the person you made it for—and they’ll think of you each time they see it on their wrist.
For more unexpected card ideas, click here.
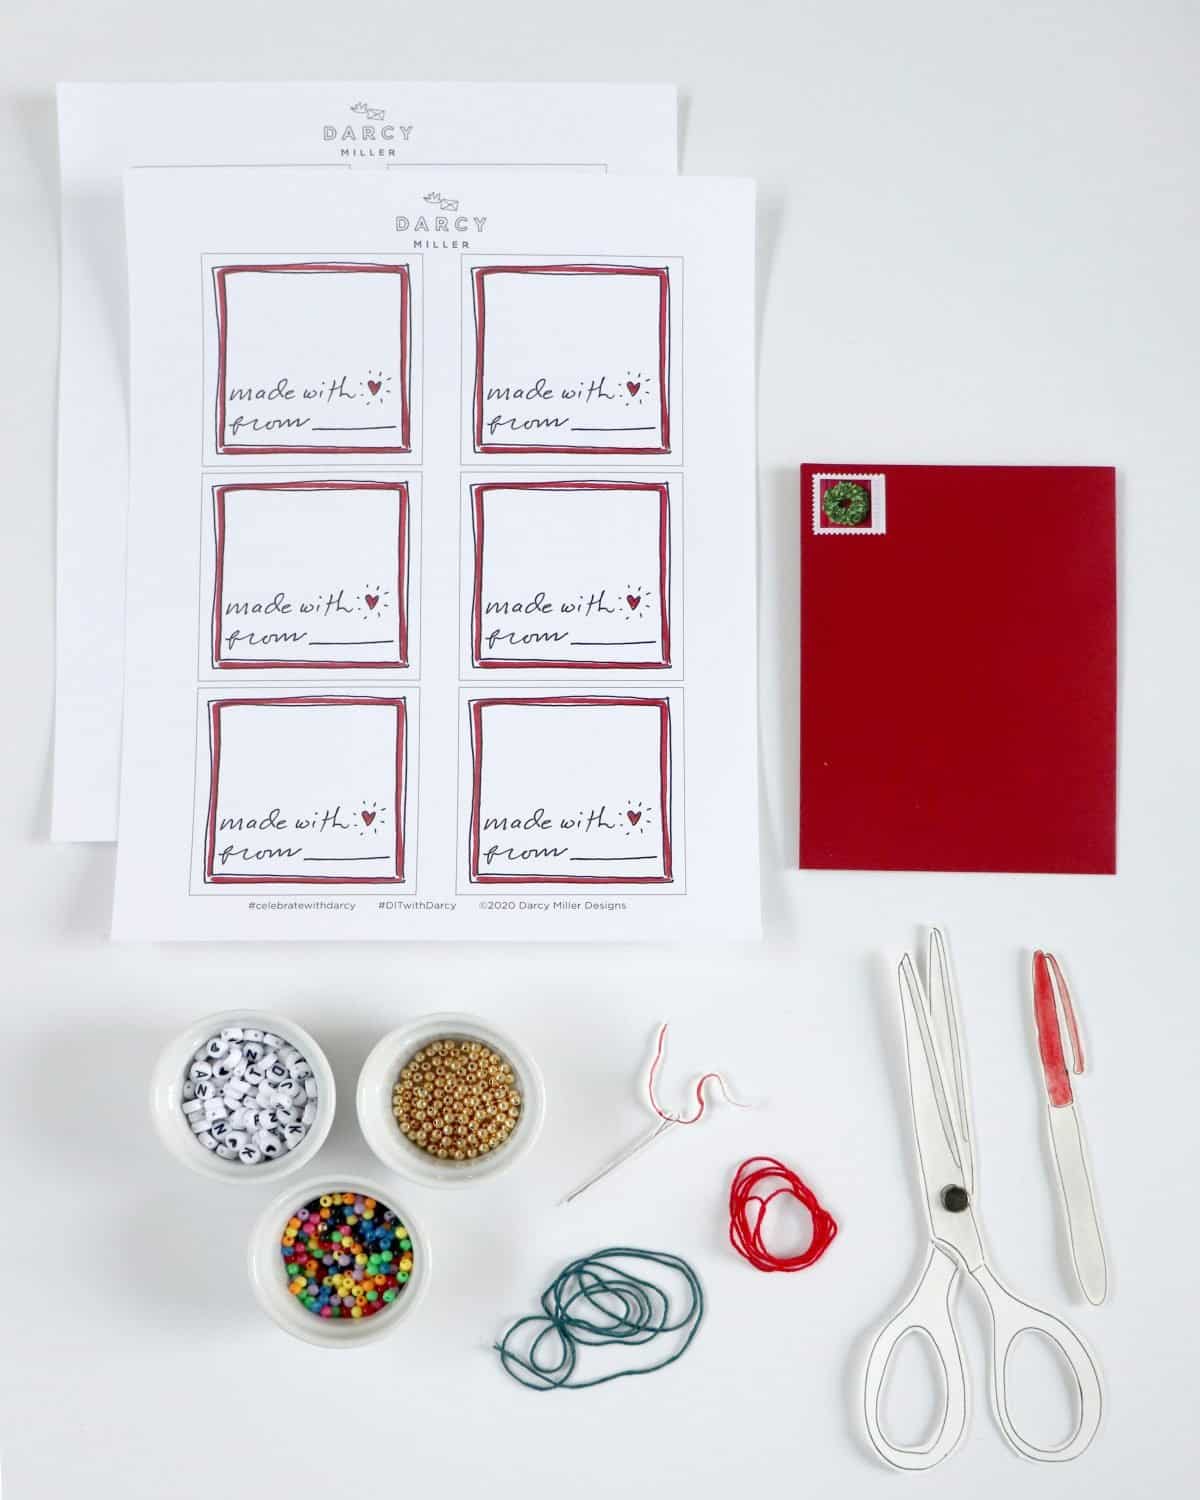
What you’ll need
For the bracelet:
- Thread
- Beads
- Needle
- ScissorsFor the card:
- Downloadable Darcy Miller card template
- Cardstock or thick paper (white paper works best for colored templates; use any colored paper you like for the black and white versions)
- Scissors
- Envelopes for mailing
STEP 1 Measure the desired length of thread you want, make sure to leave a little extra room to tie it on your wrist once it’s completed, double it if you want a double thread bracelet like these, then cut.
STEP 2 Tie the looped end in a double knot to make sure it is secure, leaving the loose ends untied.
STEP 3 Thread both loose ends through the needle, then slip on whatever beads you want; most of these started with a gold base bead, then letters in the correct order, then another gold bead to finish the word.
STEP 4 When you’re done with the bracelet, remove the needle and tie the loose ends in double knot to secure
STEP 5 Download Darcy Miller Designs Friendship Bracelet Card template, print, and cut out. You can choose our colored-in designs or black and white templates to color in yourself.
STEP 6 Cut small slits on each side of the card where you want the bracelet to sit, or for the “I love you” card, punch, cut, or poke a hole underneath the butterfly and the bee.
STEP 7 Nestle each end of the bracelet into the slit—or thread each end of the bracelet through the hole punch for the I Love You card—and tape loose ends to the back.
Step 8 Slip card into an envelope, address, and mail!