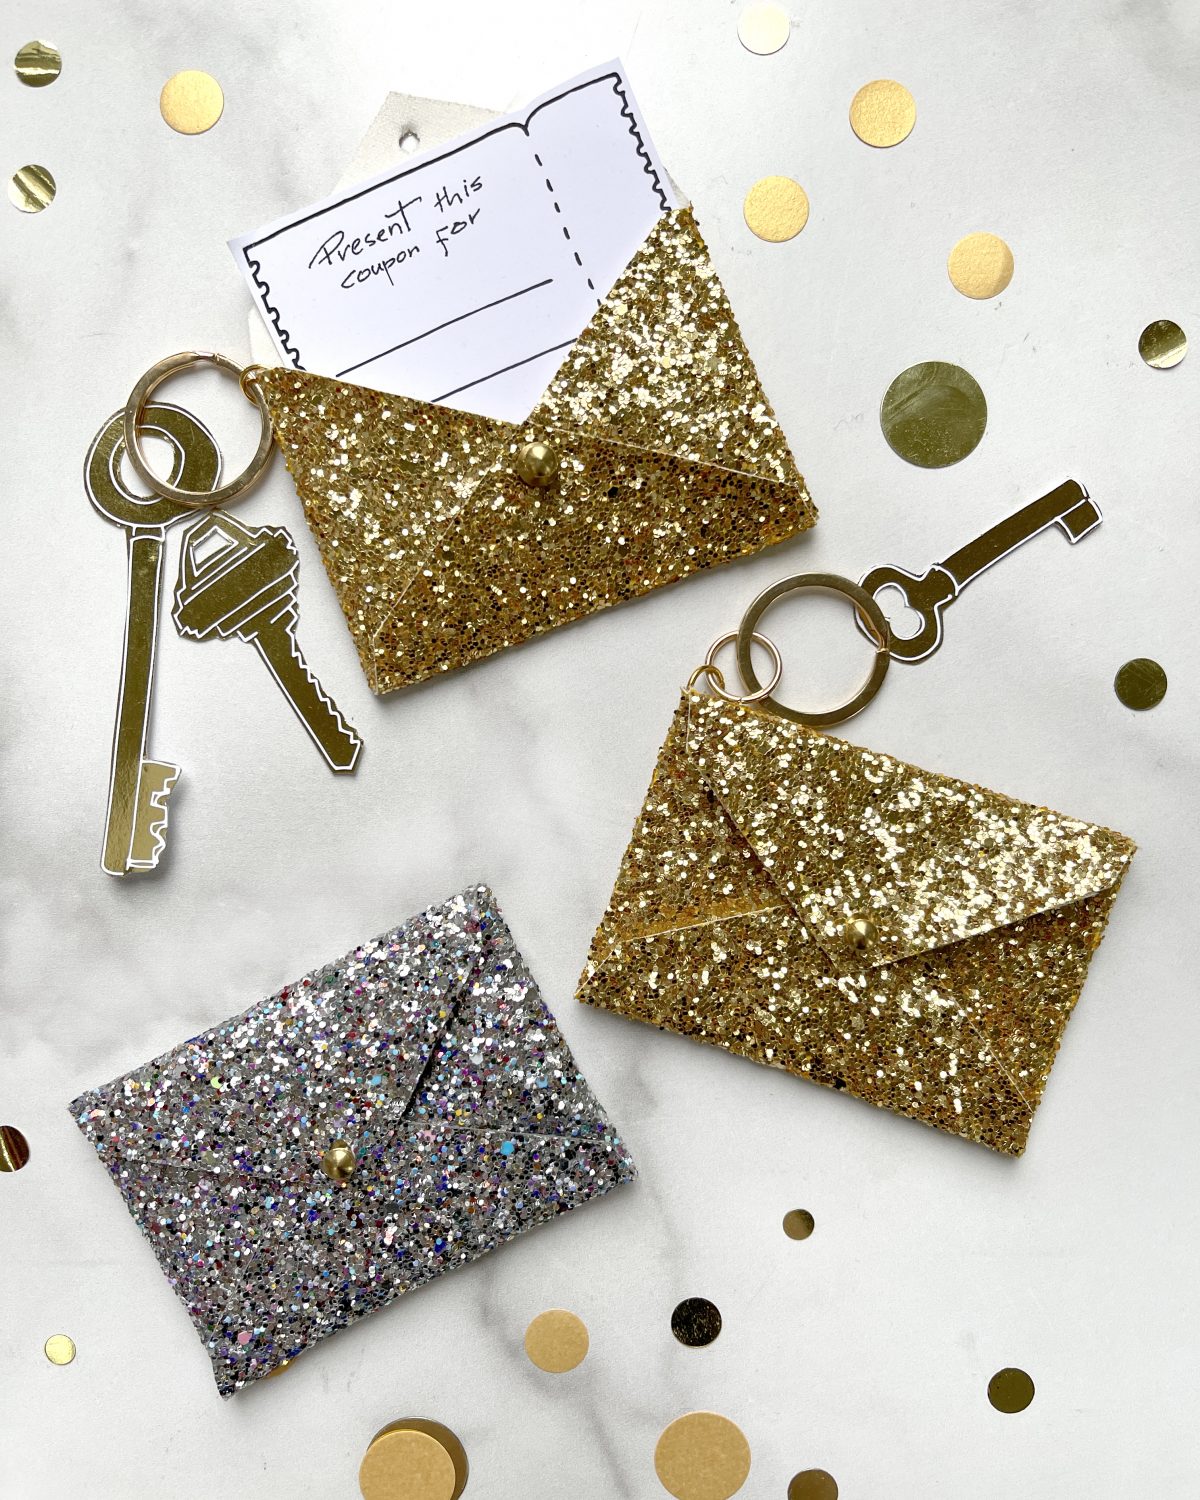
Whether you’re looking for a handmade Mother’s Day present, birthday present, bridesmaids’ gift, or just a creative way to update your own style, this DIY Card Case is as fun to make as it is to carry. It’s an unexpected way to personalize a gift card, and it’s just the right size to hold a credit card, ID, or bus pass.
Follow our template to cut the shape out of glittery gold vinyl (or any other color vinyl you choose!). Then, fold it into a mini envelope, securing the bottom three flaps with a stud clasp.
Before you give the glittery card case, fill the envelope with a fun surprise, making it two gifts in one! You could tuck in
– A sweet note or message
– One of our downloadable coupon cards below
– A gift card to a local store or restaurant
– An IOU for an adventure to be had later
– An invitation to a birthday dinner date, mother’s day picnic, or some other occasion!
– A real business card—this makes a great gift for someone starting a new job!
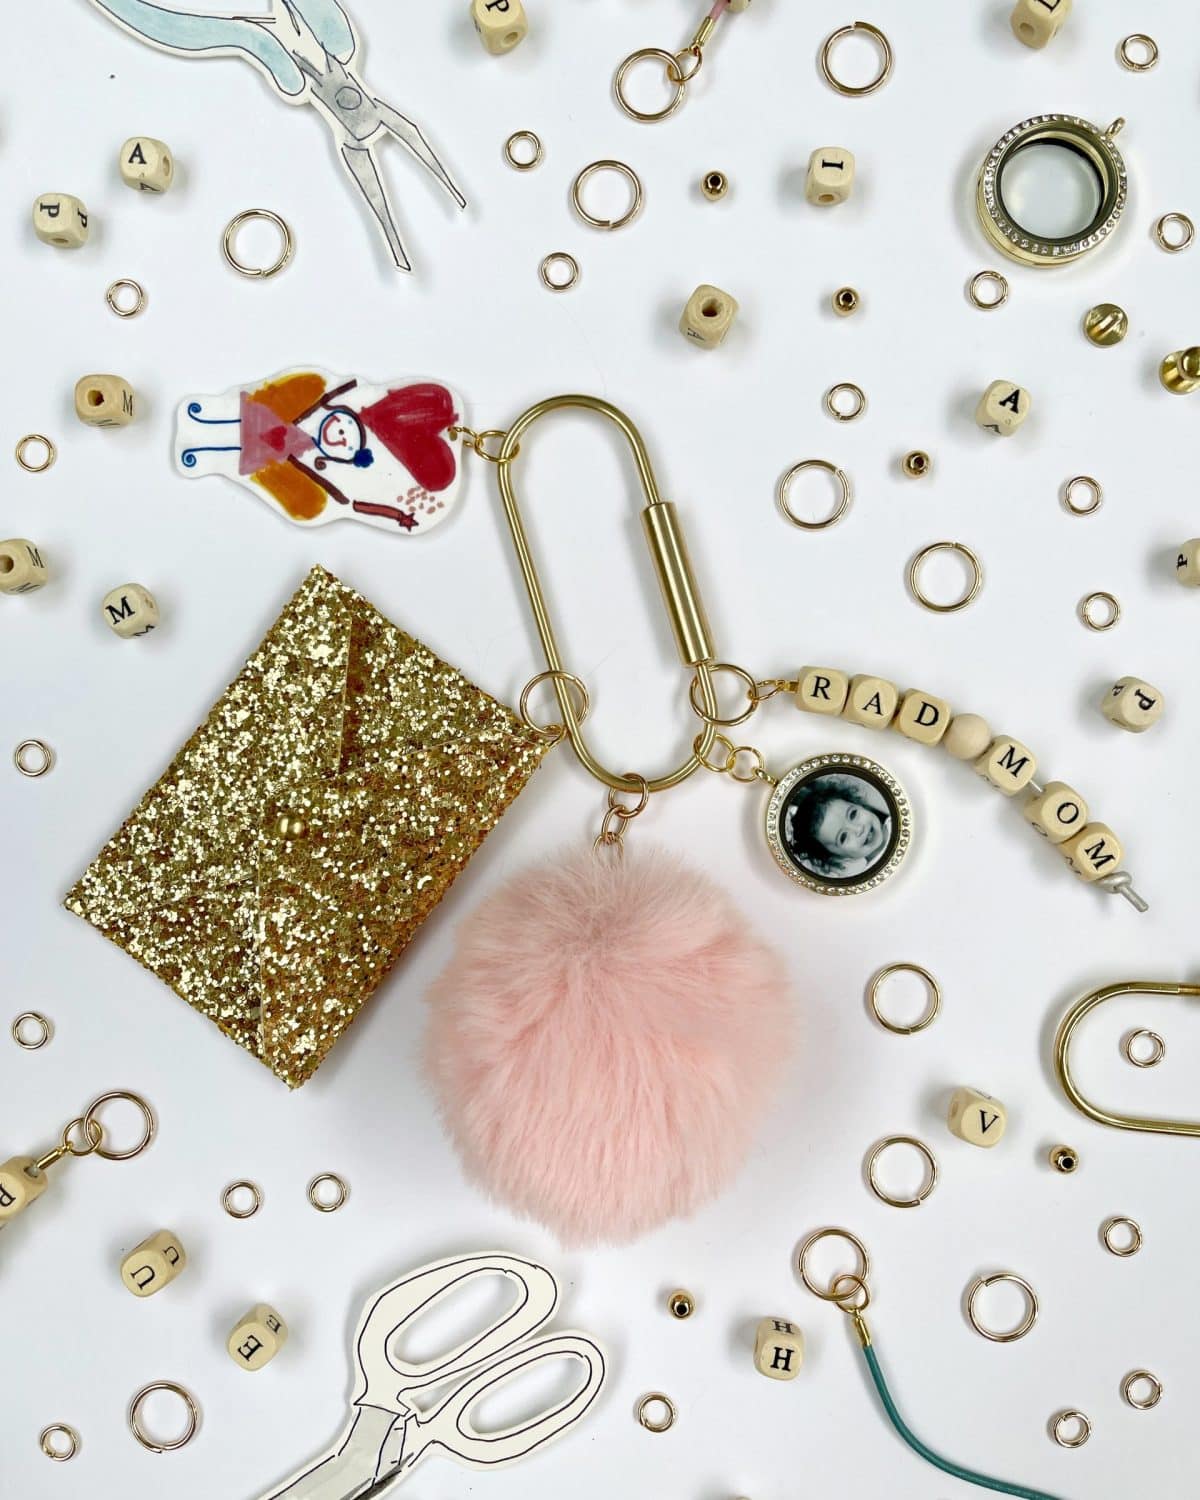
This DIY card case is such a fun project, you may want to make one for yourself, too! Or, craft several for a group—one for mom, grandma, and your sisters at the holidays, or one for each of your friends with a note asking them to be a bridesmaid!
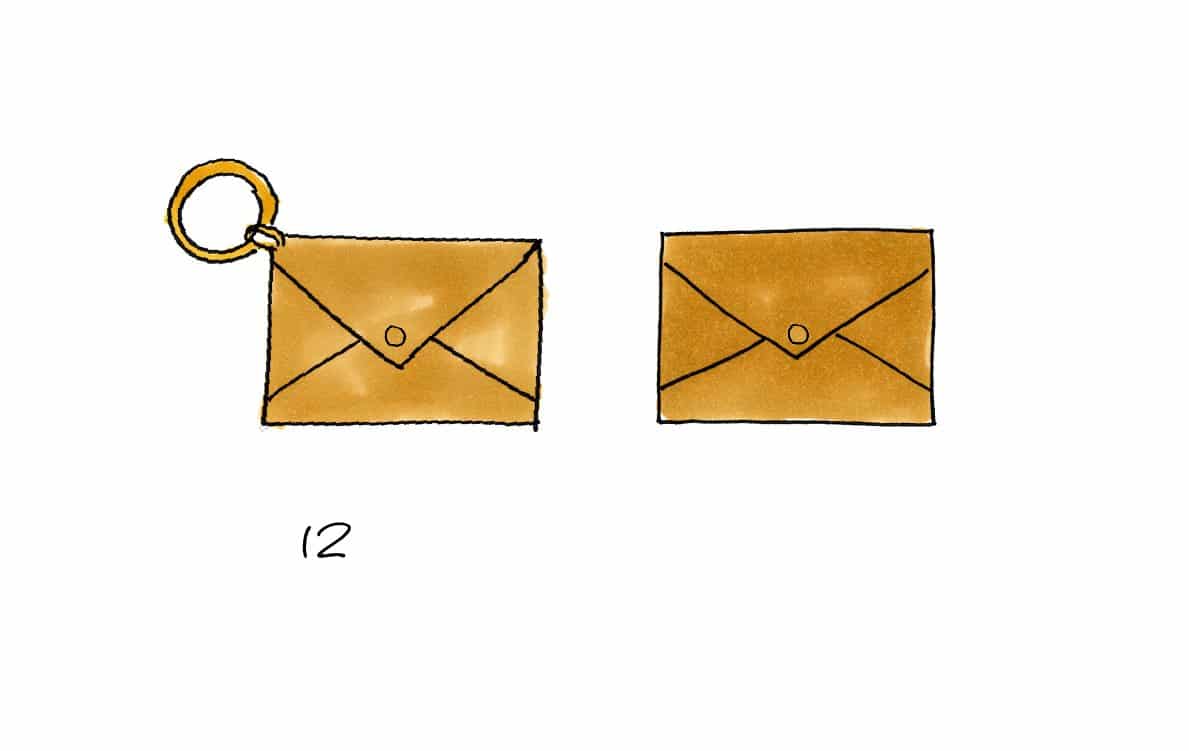
You can even turn the card case into a keychain by adding an eyelet ring and sliding it onto it to a jump ring you can attach to a larger keychain or purse strap. Wear the DIY card case alone or make it part of a series of accessories.
However you choose to wear it, an envelope card case adds a special delivery of style to your handbag or keychain. And when you’re giving it as a gift, don’t forget to seal it with a kiss!
Shop Supplies
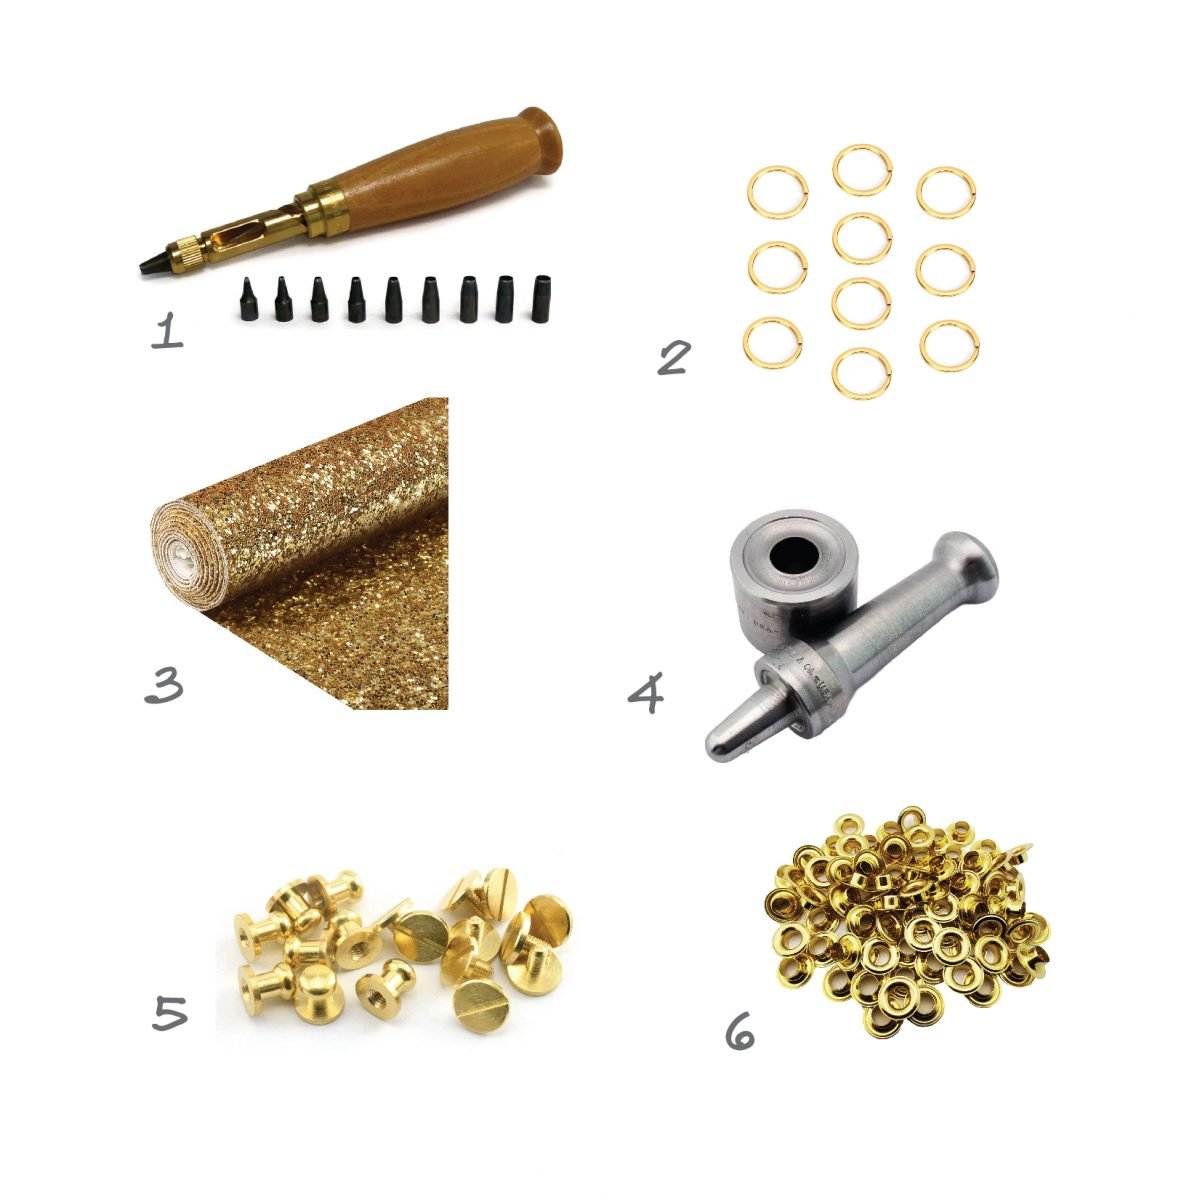
- Screw Punch 2. Key Ring 3. Sparkly Vinyl 4. Eyelet Tool 5. Screw Button 6. Eyelets
You’ll Need
- Downloadable Envelope Card Case Template
- Gold Sparkle Vinyl
- Scissors
- Screw punch
- Screw Back Button Stud
Optional for Keychain:
How-To
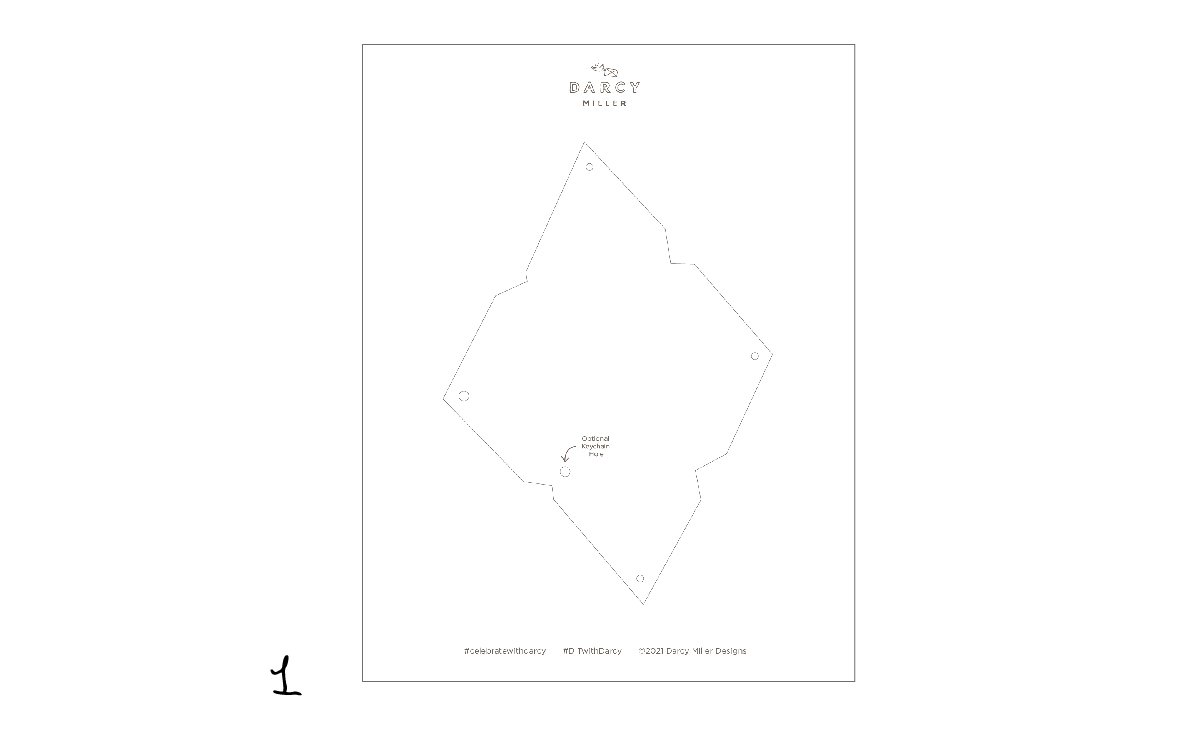
Step One: Download Envelope Card Case template, print, and cut out.
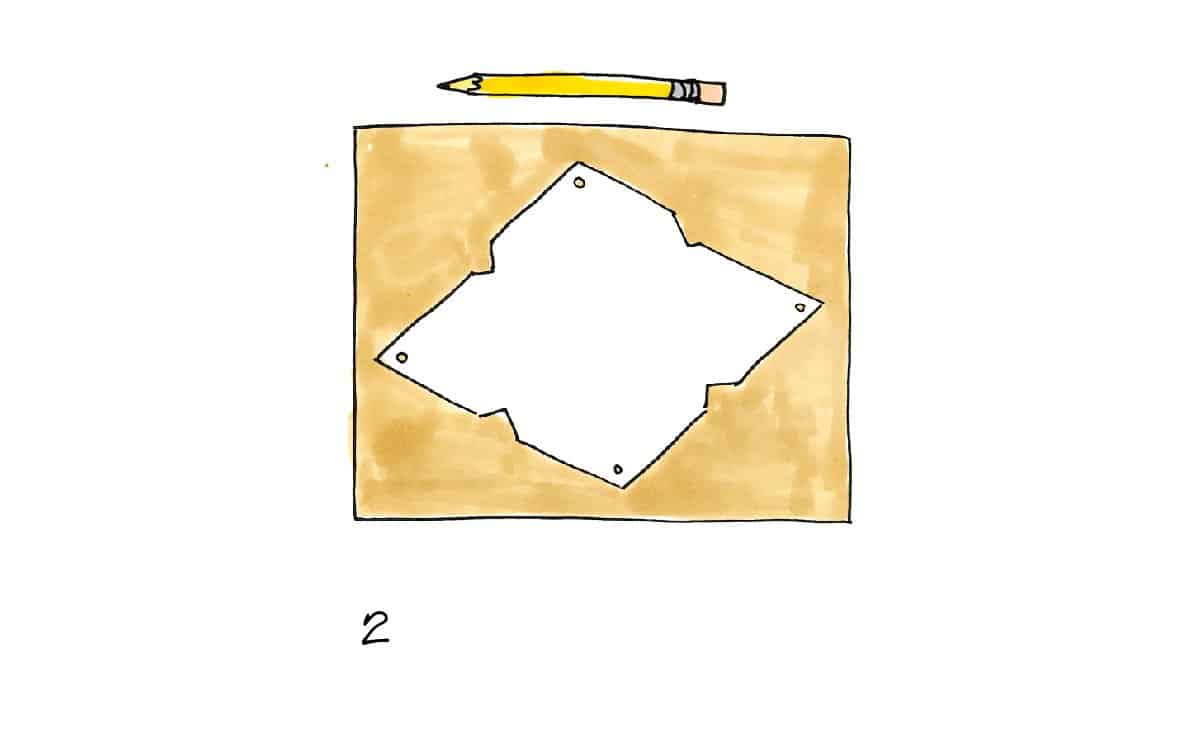
Step Two: Trace template onto the reverse side of the vinyl.
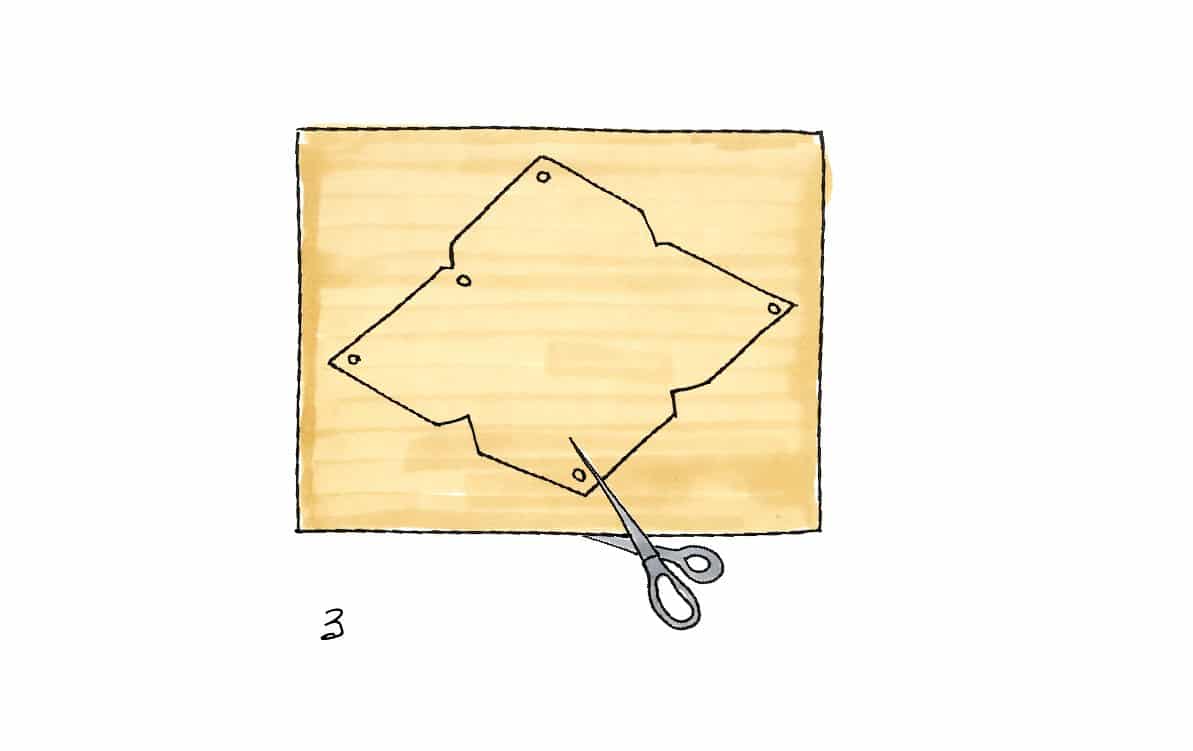
Step Three: Cut along the lines.
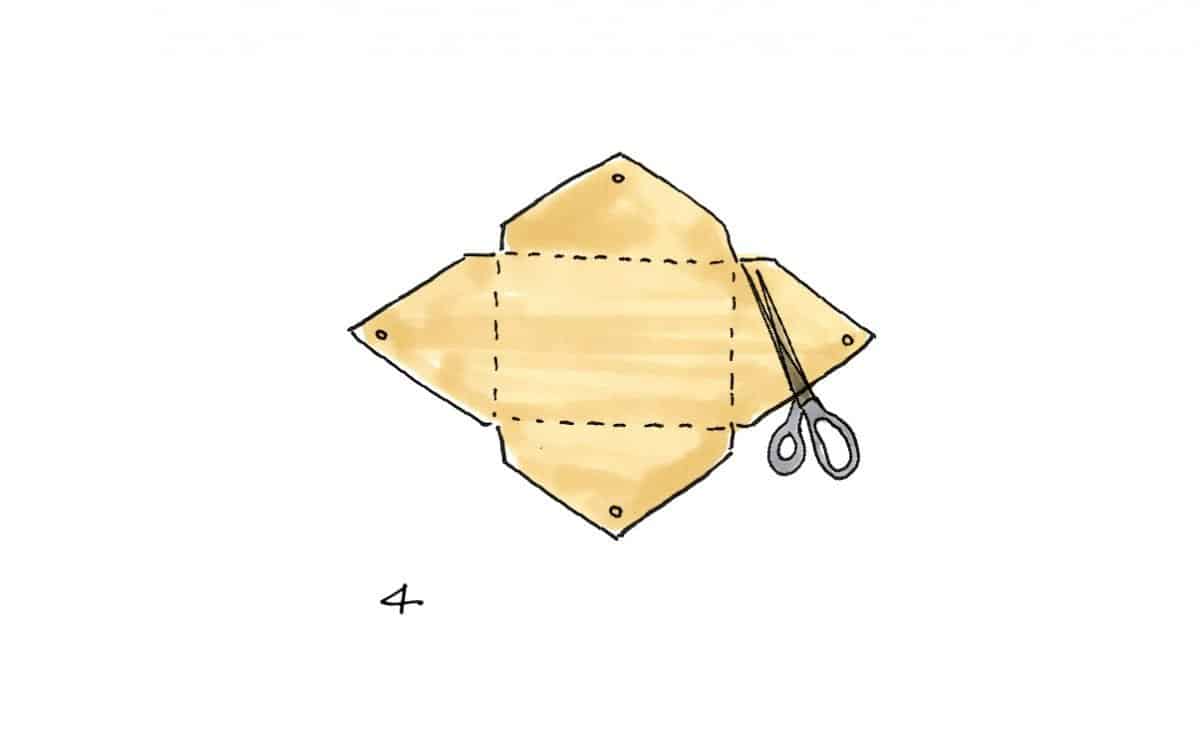
Step Four: Score vinyl as shown on template. You can use the back edge of scissors or a bone folder.
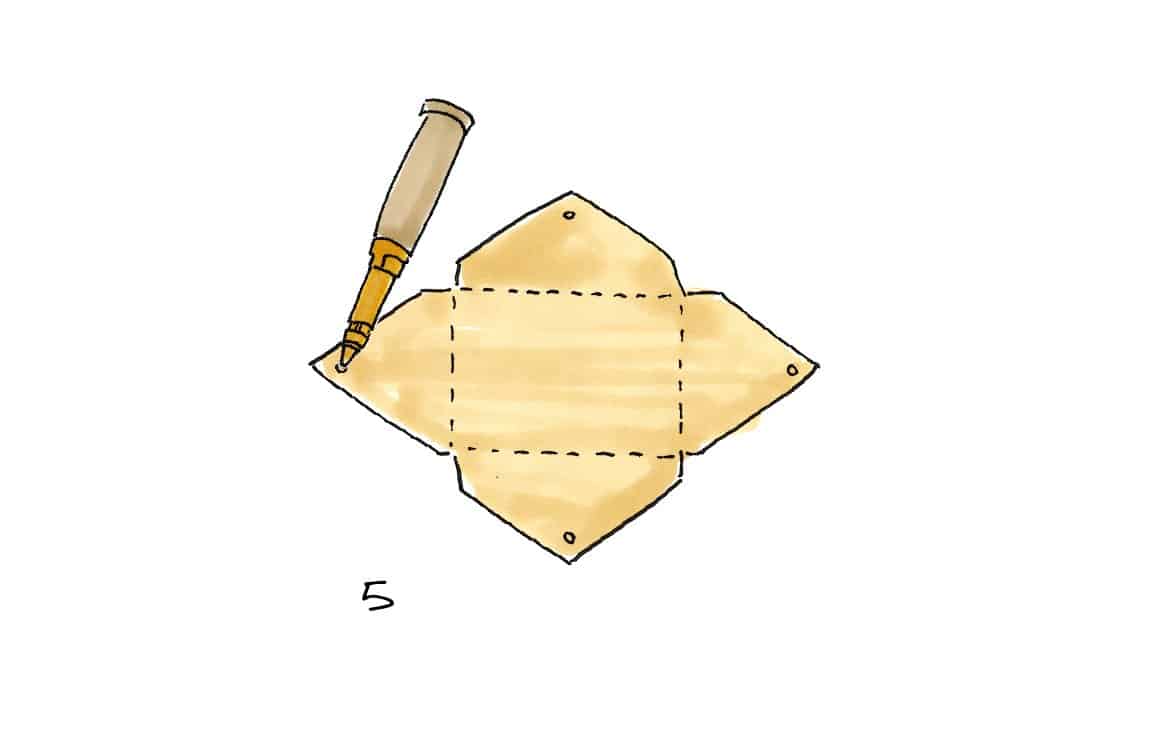
Step Five:Use a screw punch to make holes as shown on template.
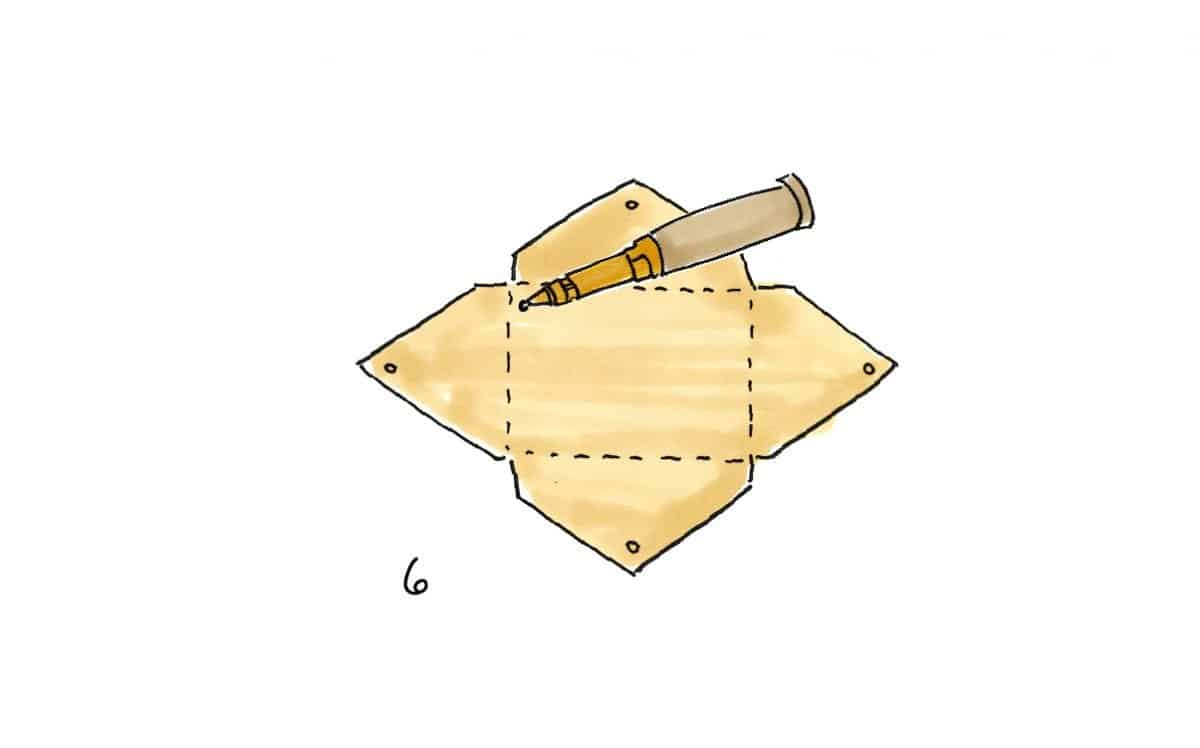
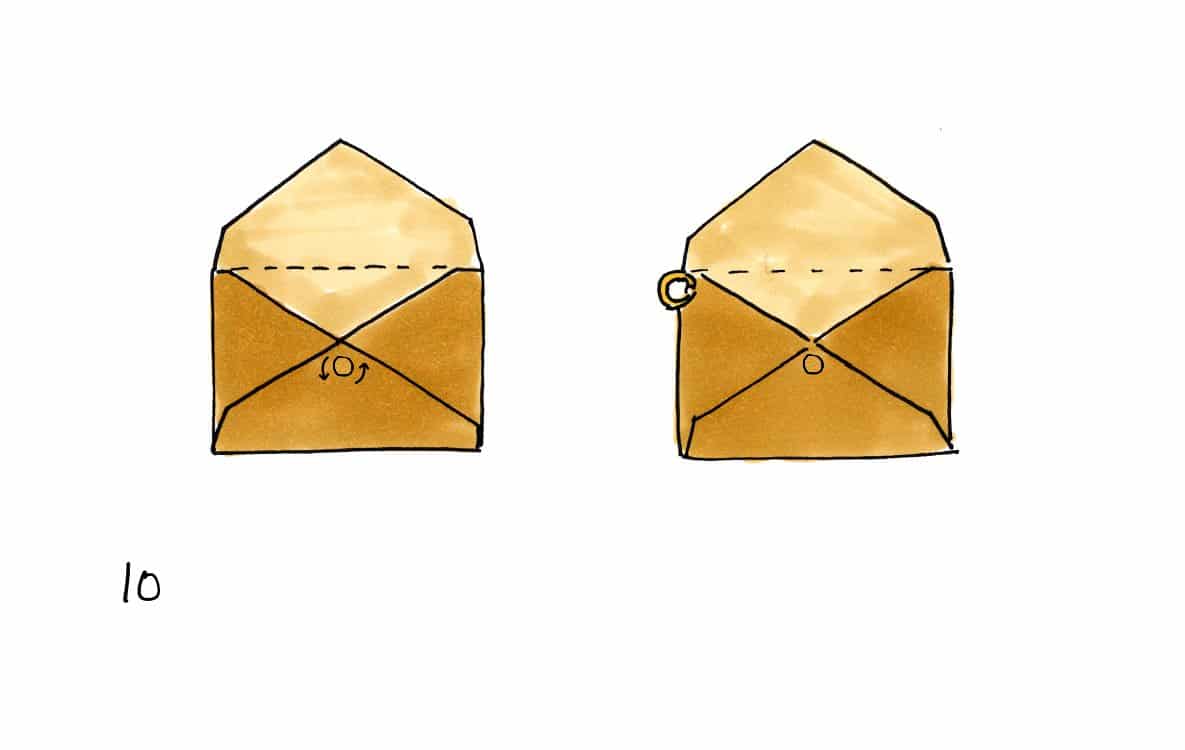
Step Six: If you’re turning the envelope into a keychain, you’ll also need to use the screw punch to make a hole through the back of the envelope, as marked in the top left corner. Otherwise, you can skip this step!
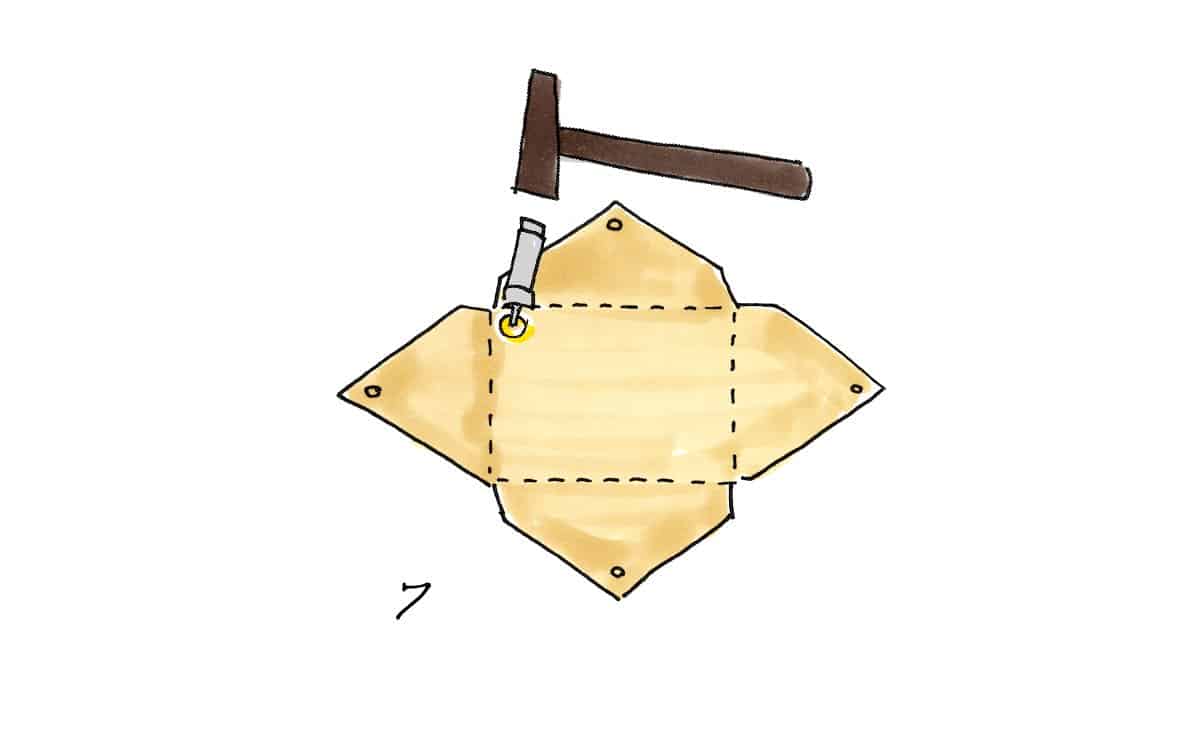
Step Seven: Skip this step if you’re not turning the card case into a keychain. If you do want to use it as keychain, use the eyelet tool to attach the eyelet to the larger hole in the corner as shown.
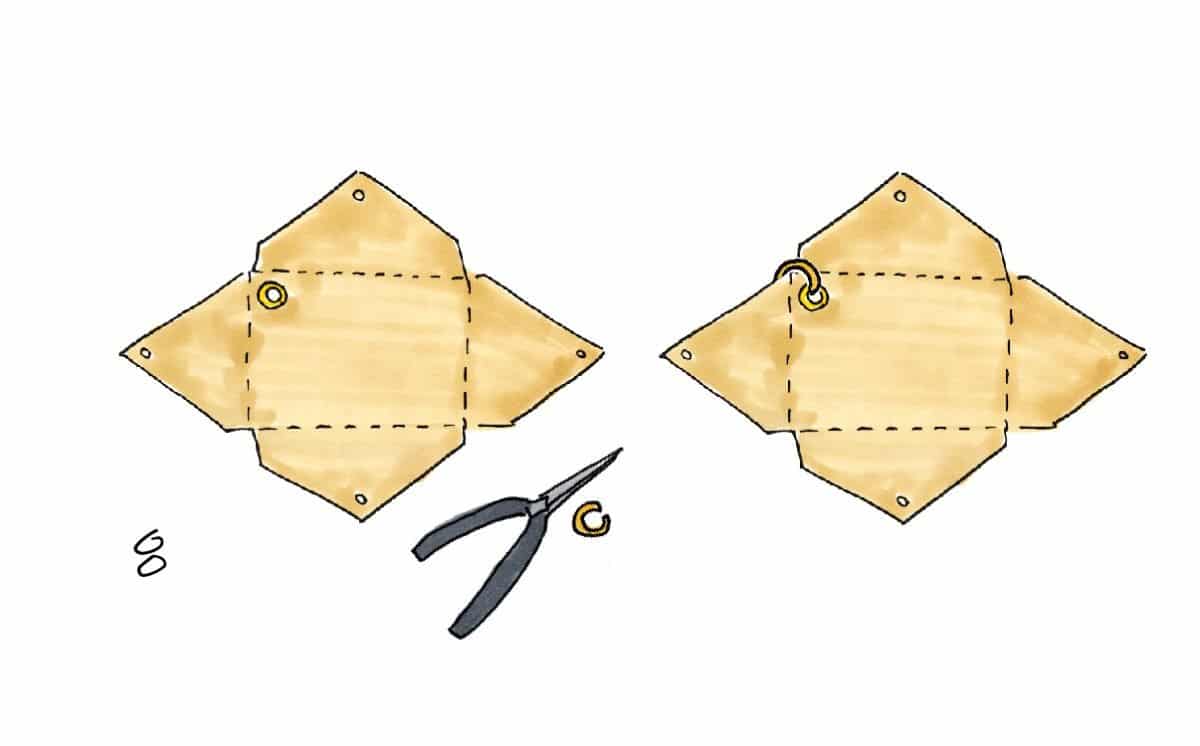
Step Eight: If you’re turning the card case into a keychain, use needle-nose pliers to open jump ring and hook it through eyelet, and close tightly. Otherwise, skip this step!
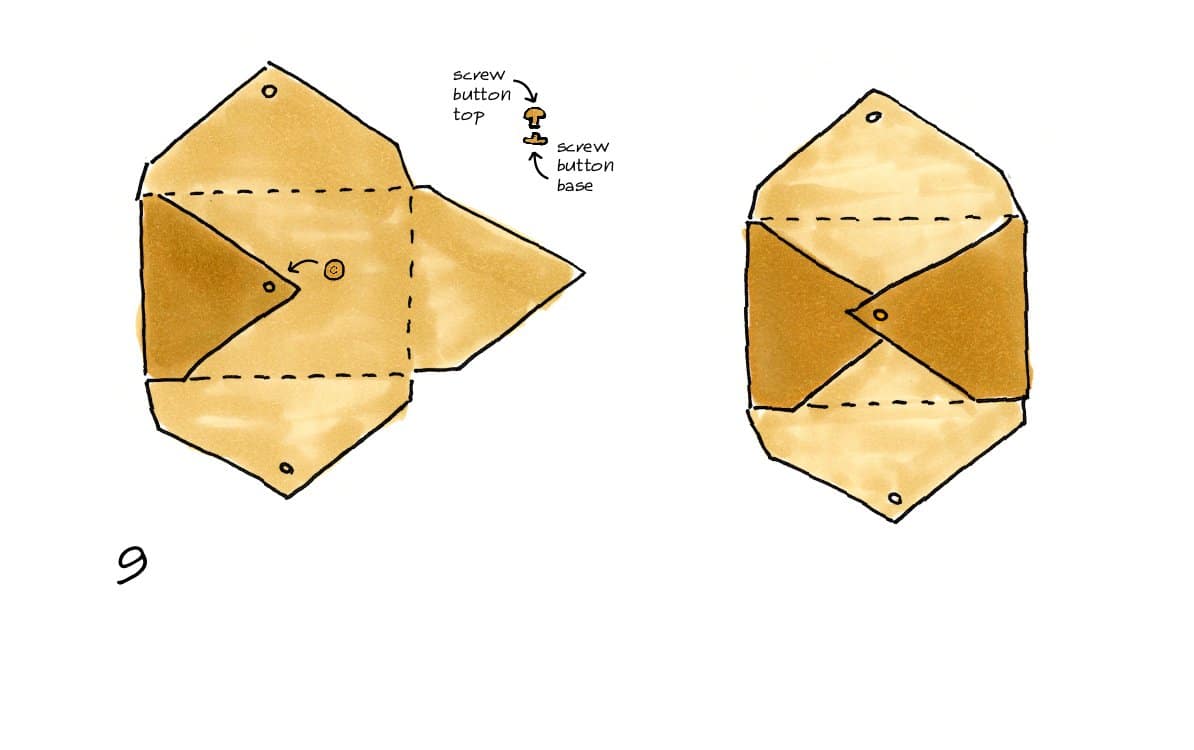
Step Nine: Fold the bottom three edges of the template over the screw-back button stud base, left first, then right, then middle.
Step Ten: Attach screw-back button stud to base to seal and create the pocket of the envelope. If you’re just using the envelope as a card case, just slip in one of our coupons, a gift card, or a sweet note, and you’re done!
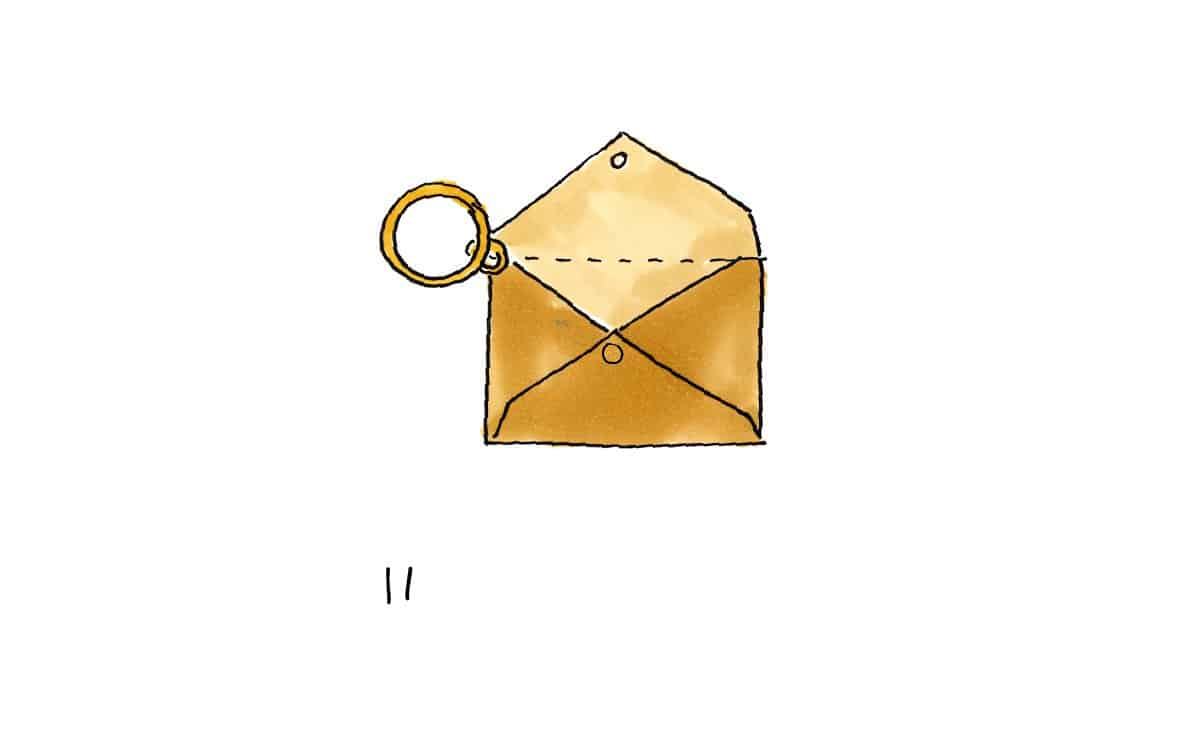
Step Eleven: If you’re turning the card case into a keychain, slip the jump ring onto a key ring to finish the project!
Step Twelve: To close the envelope, fold over the top of the envelope and loop it onto the screw-button stud.
Now you’ve got a special delivery present!
Don’t forget to show us your creations: @darcymiller #DITwithdarcy