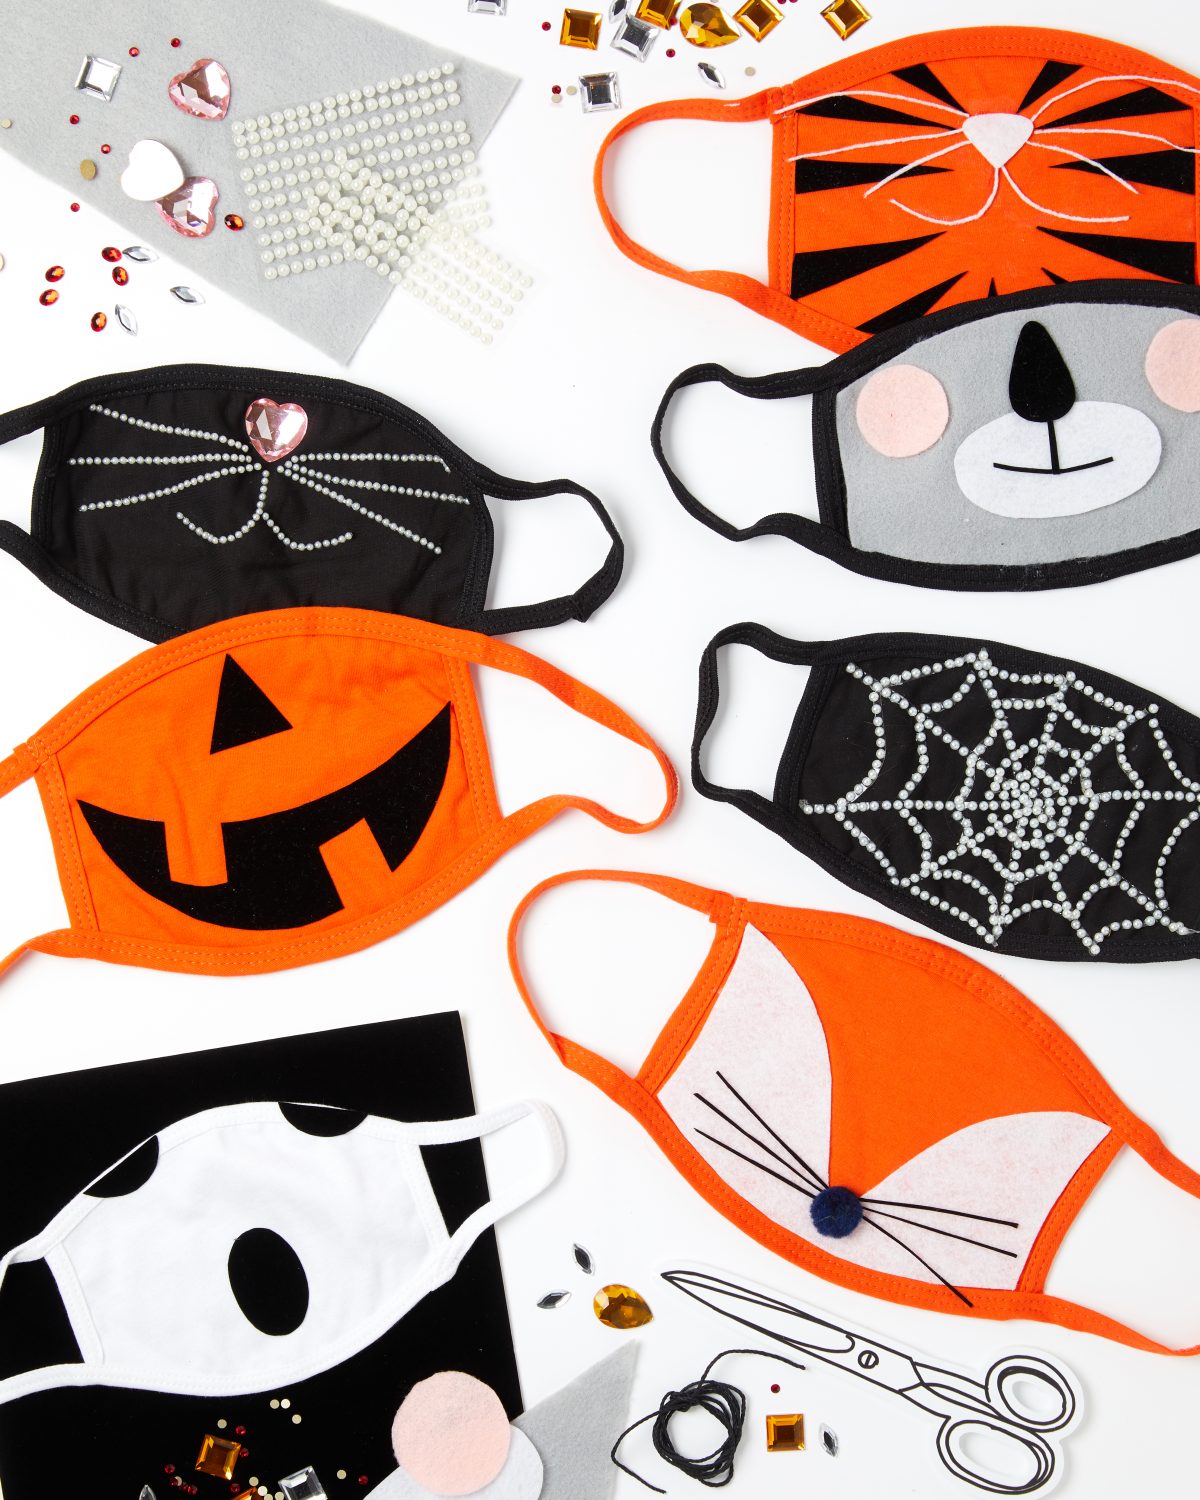
Halloween crafts are always a huge hit for keeping kids busy. This DIY (that’s decorate-it-yourself!) lets kids have fun embellishing a DIY face mask for Halloween that they can keep wearing any time they want to look festive. There are endless variations when it comes to mask decorating. You can write names or sayings on them or draw on them with fabric markers, add stick on jewels or felt, embroider them with initials, sew on sequins or whatever you can dream up!
A DIY Face Mask for Halloween isn’t just a cool craft for an afternoon playdate. Put all the materials together in a cute bag or box—like our Halloween-ready coffin box—and it’s also a fun favor for guests at a Halloween party.
The masks can be super simple for littler kids. Draw black circles on a white mask with a fabric marker and you’ve got a spooky ghost saying boo! Or, cut out some adhesive felt shapes and stick them onto an orange mask to make a Jack O’Lantern.
Older kids may want to bling out with lines of stick-on gems, arranged on black masks to be spiderwebs or kitty cat whiskers. And there’s no rule that says grown ups can’t make their own masks, too! Set up your supplies and get crafty!
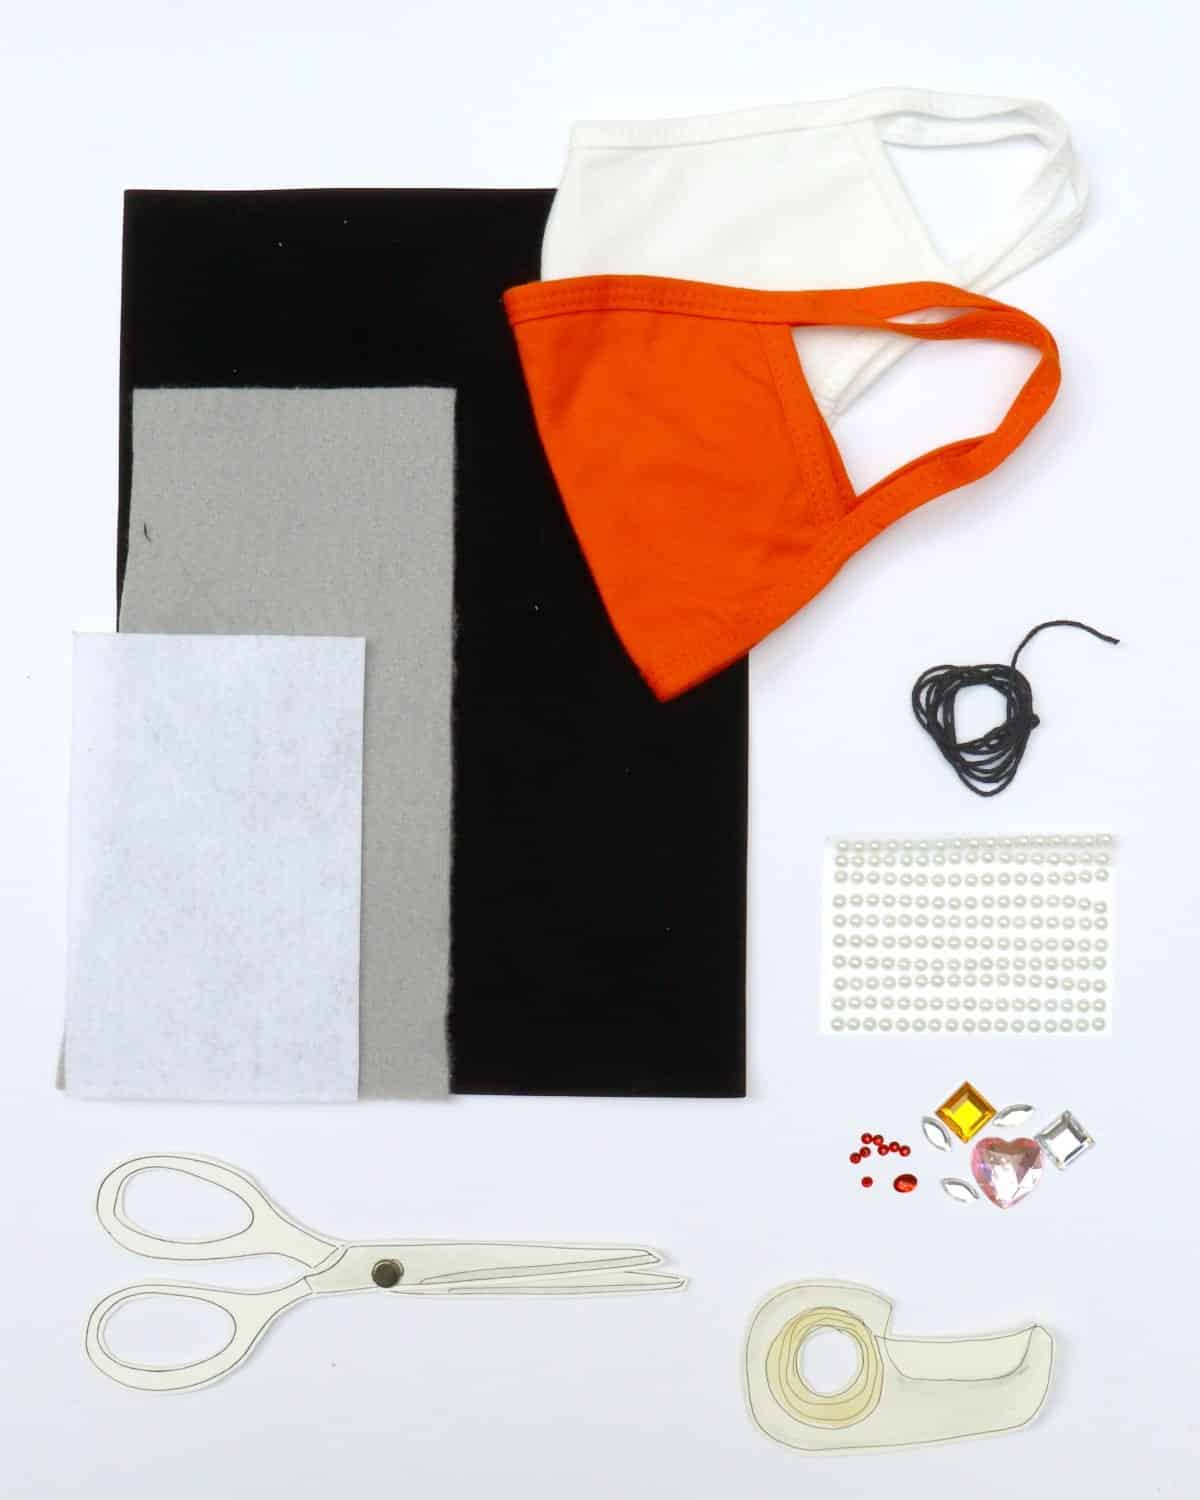
What You’ll Need:
- Kids’ Cotton Face Masks (and adult ones if you’re getting in on the action!)
- Fabric Markers
- Peel and Stick Felt
- Scissors
- Stick on gems
- String (for whiskers)
How-To
Step 1 Set out materials and crafts and let kids imagine their design.
Step 2 Put the pieces together! For a ghost, drawk dark circles for a mouth and eyes. For a Jack-O-Lantern, draw features or cut them out of adhesive felt, then stick on. For a spiderweb, arrange strips of stick-on gems in a web pattern; do the same to create kitten whiskers. For a fox, koala, or cat cut features out of felt and stick them on, then follow with gems to create whiskers.
Step 3 Put on your mask and have a safe and happy Halloween!
For more cool and crafty ideas for Halloween at home, click here.