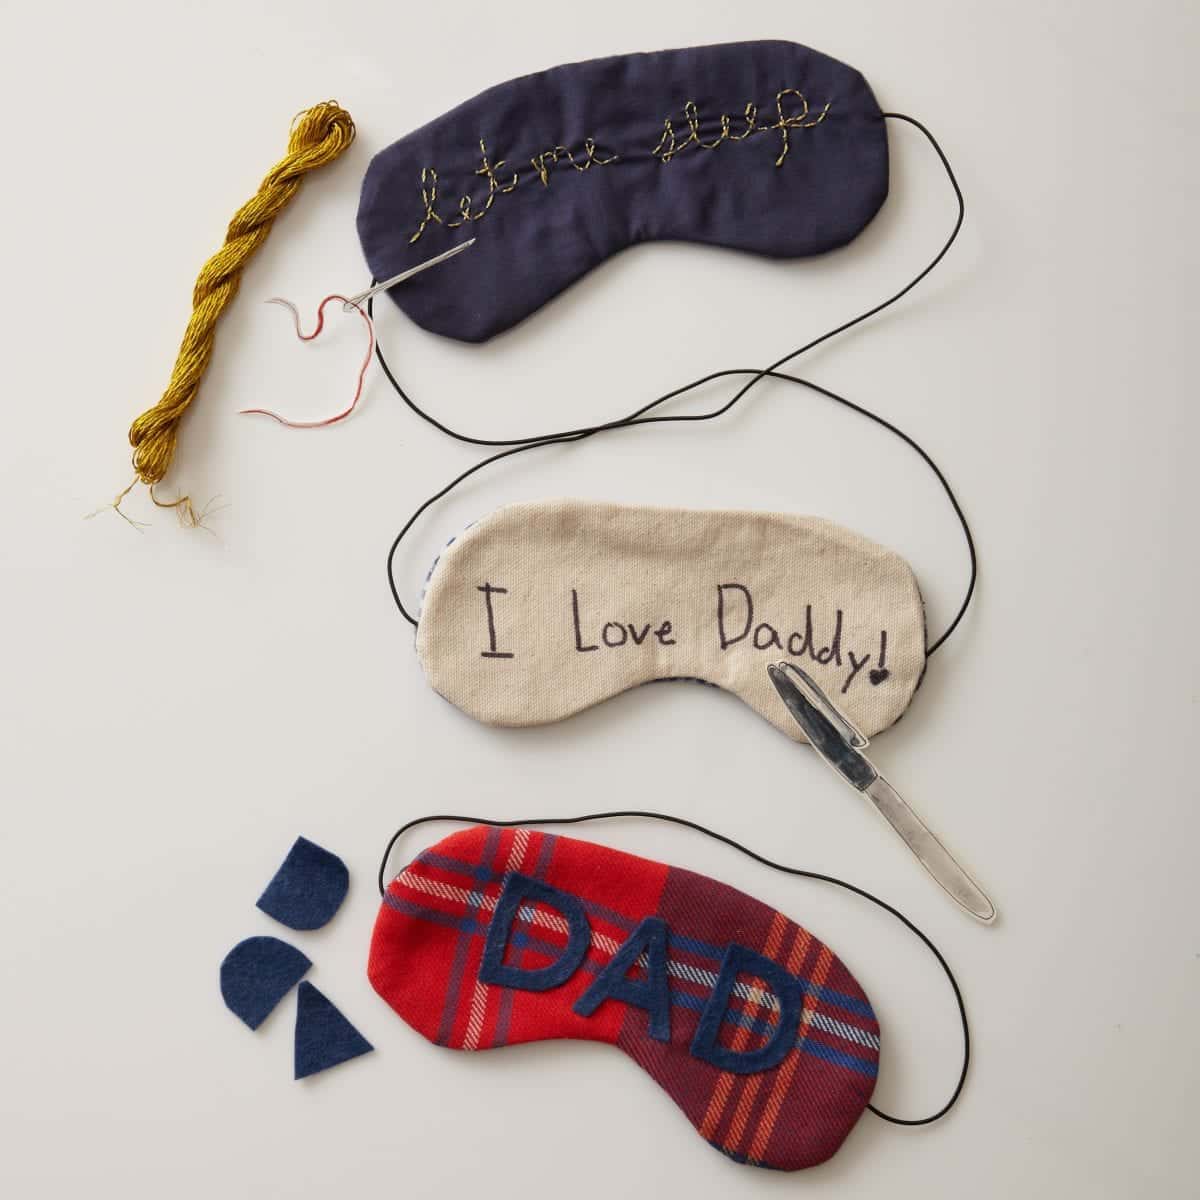
Give Dad what he hasn’t had since you were born—a good night’s sleep—by sewing him an eye mask that will make him even better at his favorite sport: napping.
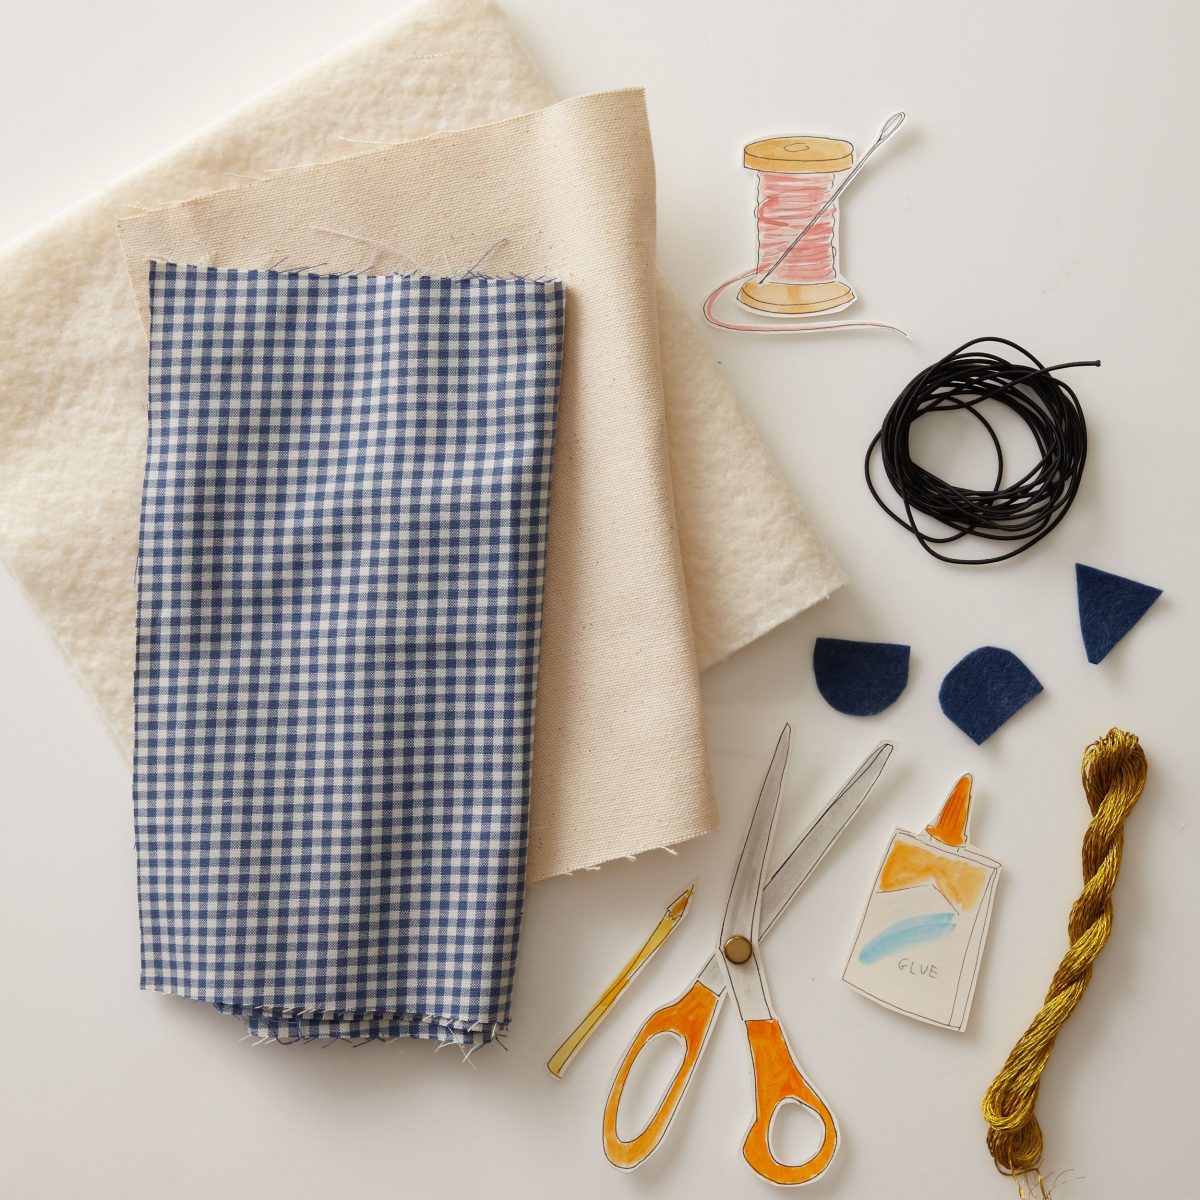
What You’ll Need:
- Sleep Mask Template
- Cardstock paper
- Scissors
- ¼ yard of fabric
- ¼ yard of batting
- Pencil
- Pins
- Fabric Scissors
- Elastic cording or ¼ inch elastic
- Needle and Thread
- Sewing Machine (needs capability for basic straight stitch)
- Iron
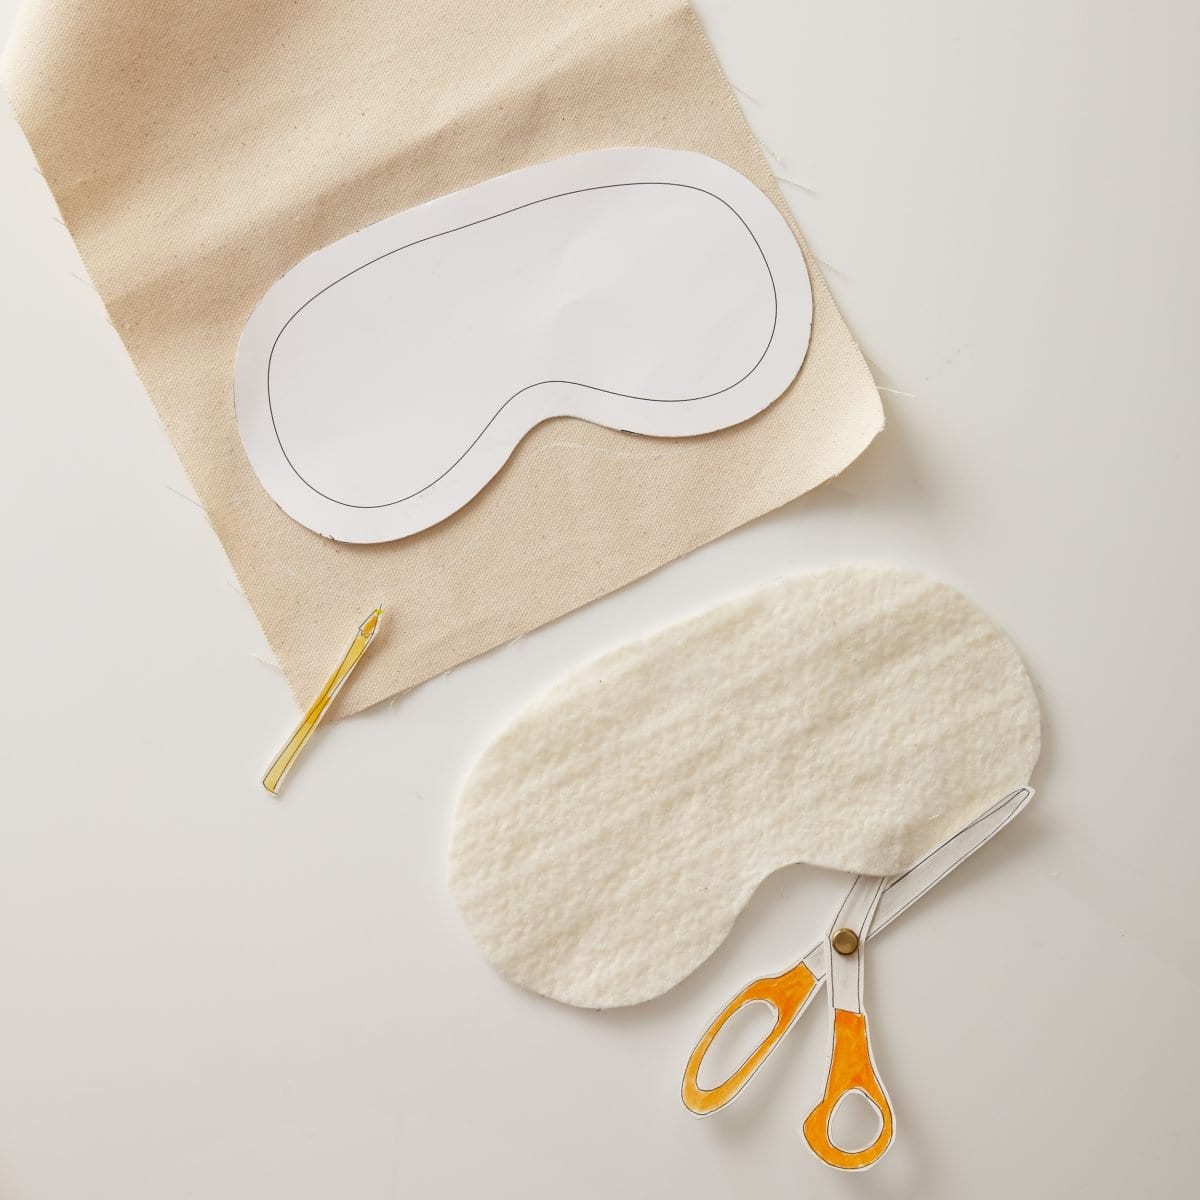
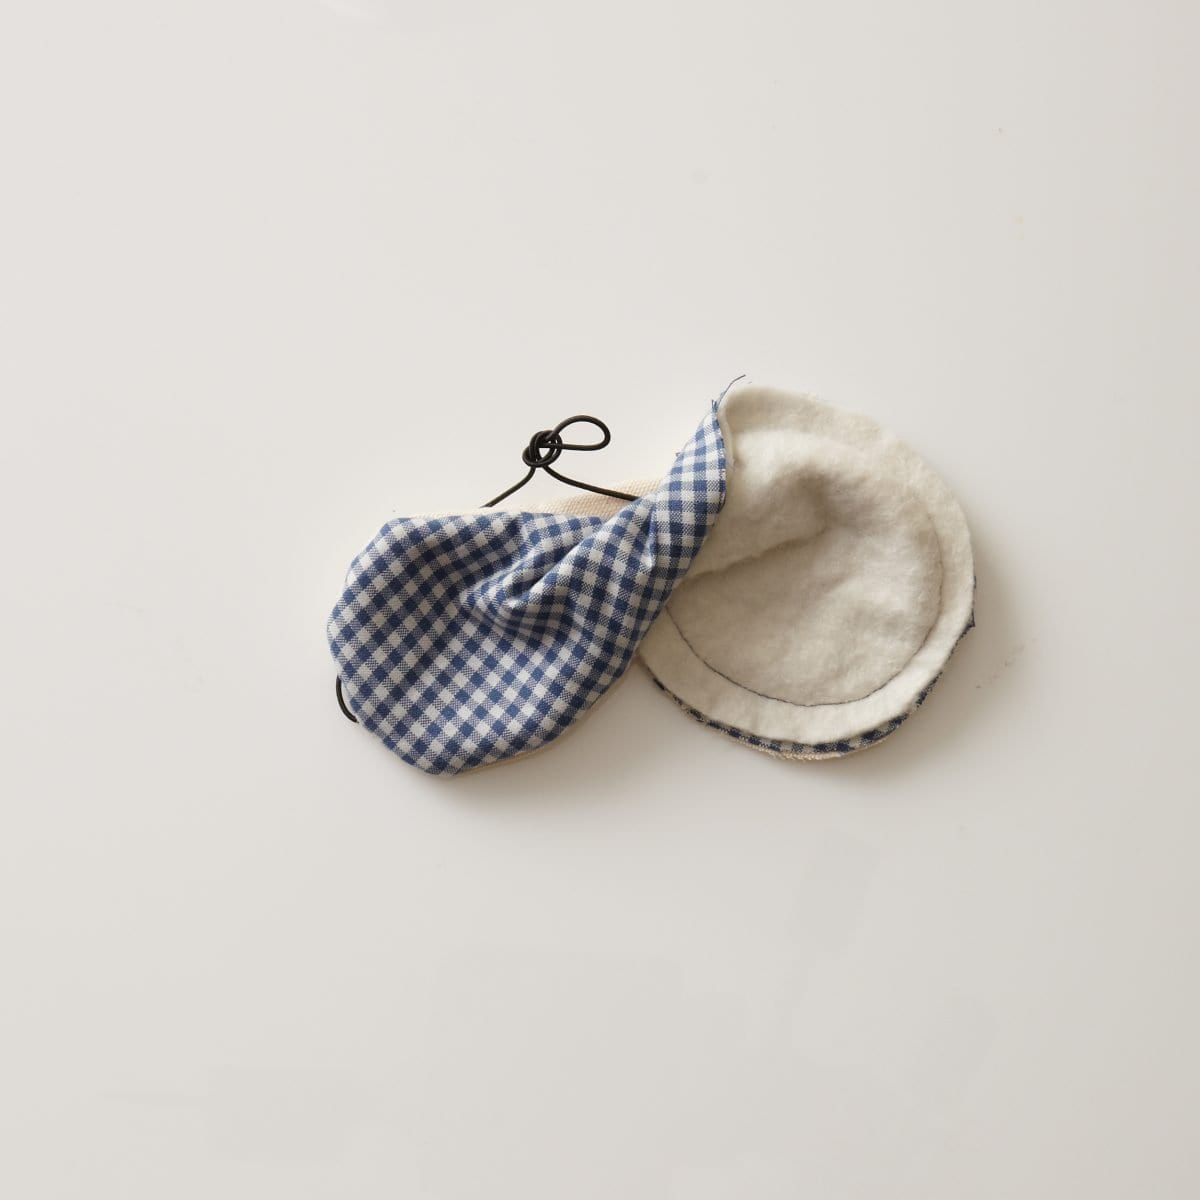
Step 1 Print and cut out Sleep Mask Template (make sure you are printing at 100% scale) Trace template onto fabric of your choice with a pencil—be sure to stay perpendicular to the bottom hem (selvedge) of fabric. Cut out along pencil line. Repeat on second fabric if you are using different fabrics for front and back (as shown here), or cut two from same fabric. Trace template onto a piece of batting with a pencil and cut out along pencil line.
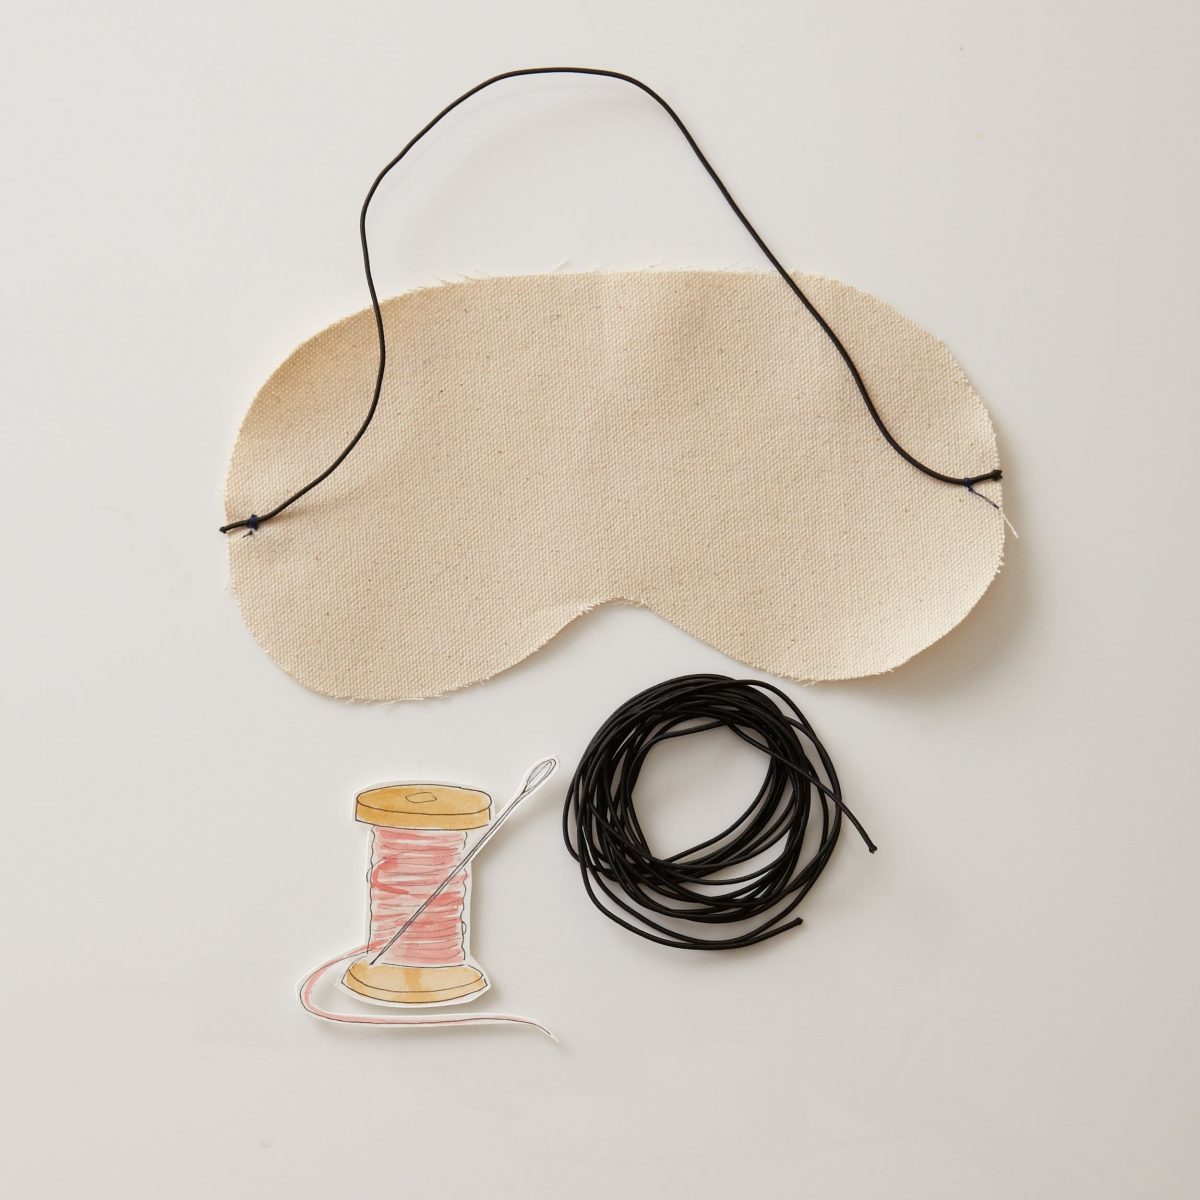
Step 2 Cut elastic to approximately 13” and hand sew each end of the elastic to what will be the front the top fabric, ¼” in from each edge. Tie elastic temporarily so that it doesn’t get in your way as you sew. If you want decorate the sleep mask with an embroidered message, do it now.
Step 3 Lay each of your three pieces on top of one another in this order:
-batting on bottom
-back piece of sleep mask facing up in the middle
-front of sleep mask facing down on top (elastic will be inside as shown here)
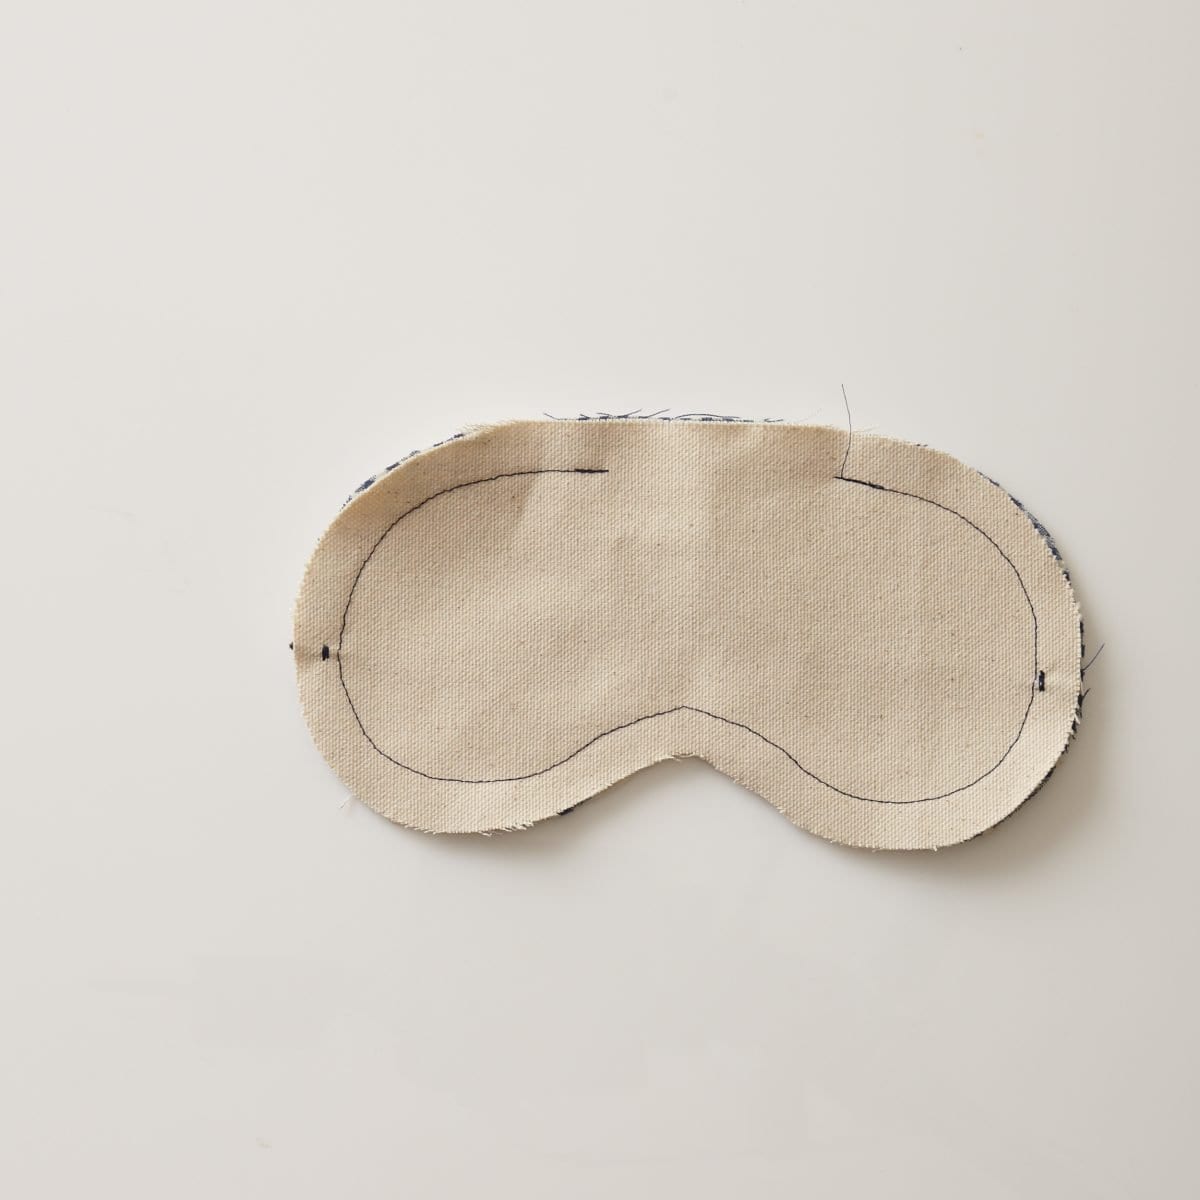
Step 4 Pin stack of fabric together where shown on template. Refer to template for starting place to sew. Using the sewing machine, sew around outer edge counterclockwise, staying ½” in from the edge, ending where marked on template. You will be leaving about 2 ½” open.
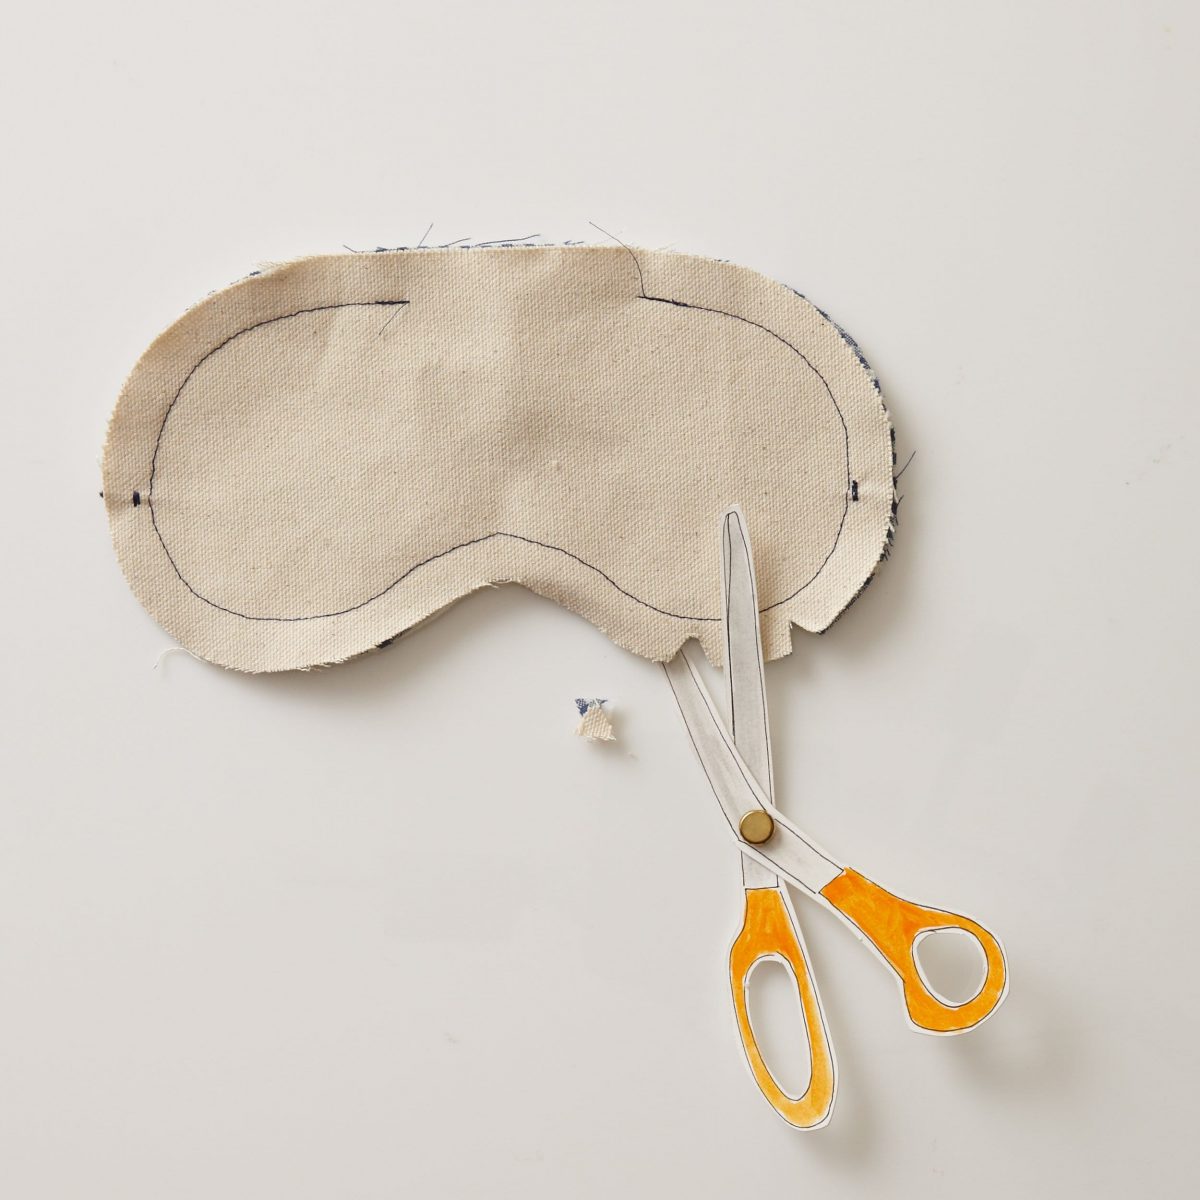
Step 5 Cut out small, triangle-shaped notches around the curved edges, making sure not to cut your seam
Step 6 Turn sleep mask inside out, pushing curved edges out with your fingers. Iron it smooth. Handsew the top opening closed using a blind stitch if you’re able.
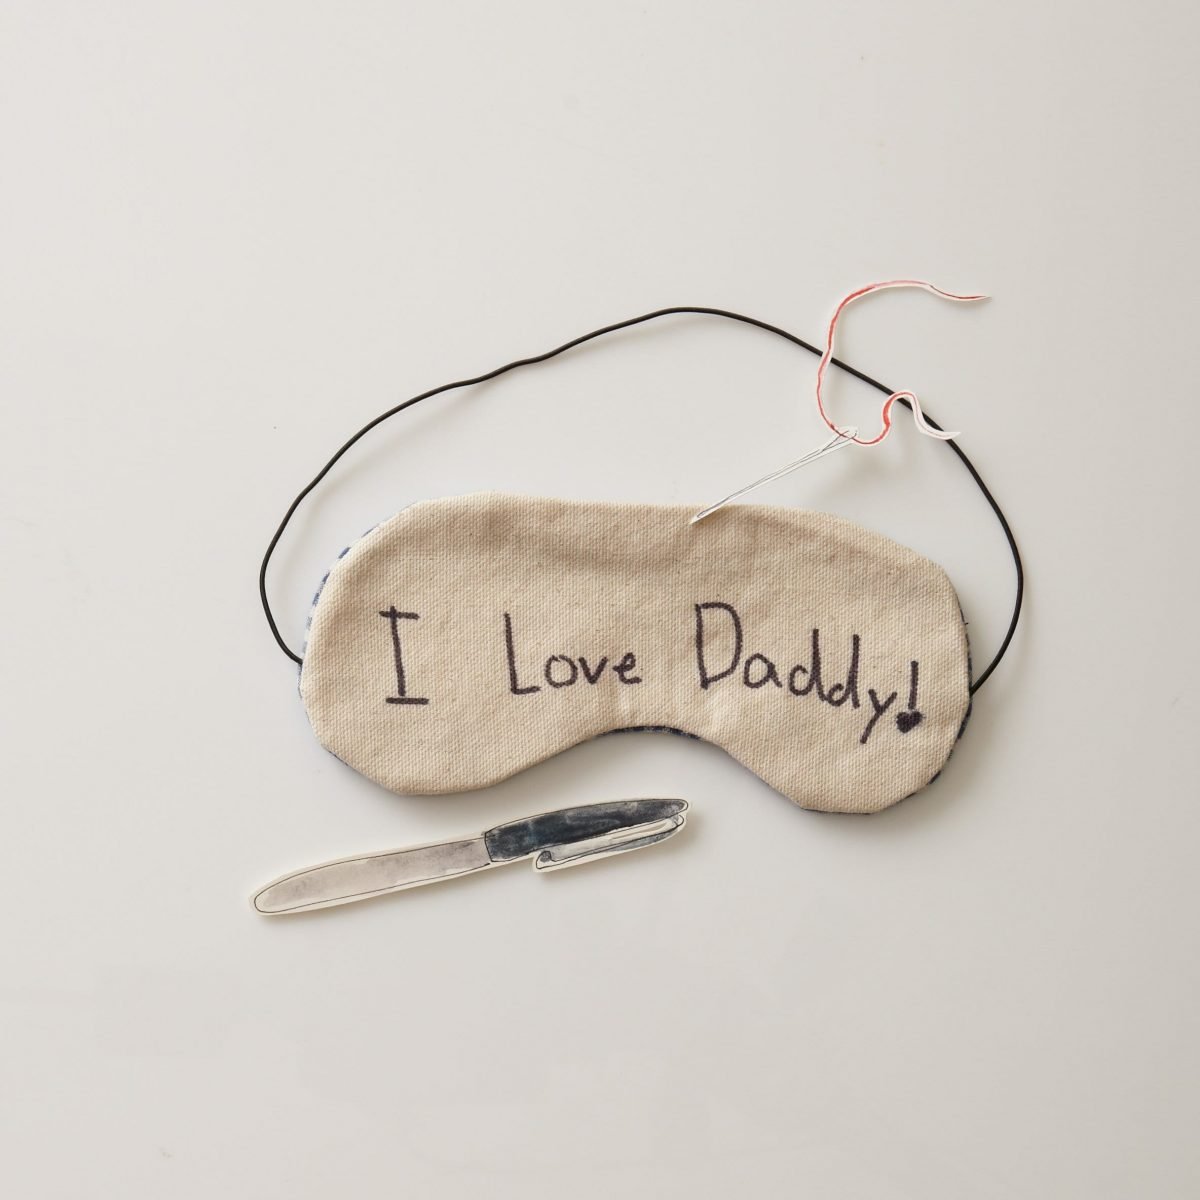
Step 7 To make the mask even more adorable, decorate one or both sides with Sharpie or fabric markers, felt letters, glitter, or any other add-ons you can dream up. Note that if you want to embroider a message or monogram, you’ll need to do sew before sewing the mask together.