Fill your yard with fun—and birdsong—with DIY birdfeeders in any shape you imagine. Just cut the shape you want—a heart, a star, even letters—out of cardboard, slather with creamy peanut butter, cover in birdseed, and hang from a tree.
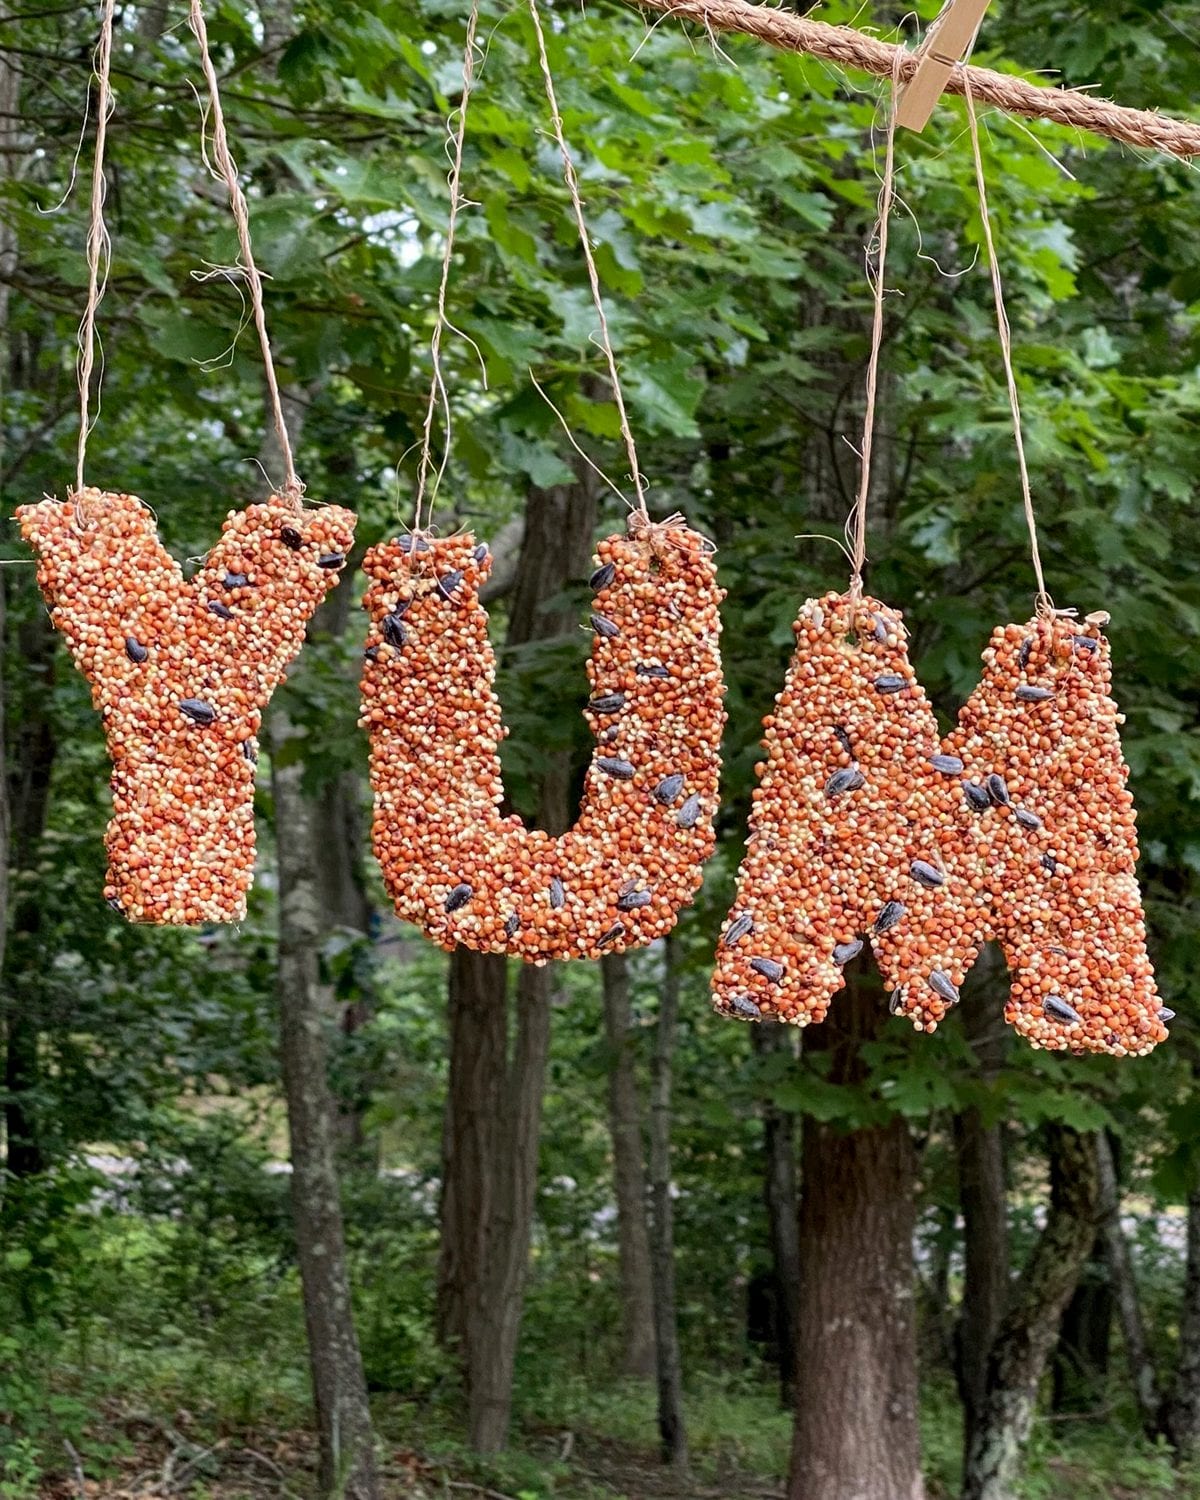
You can use the same technique to make a feeder of most any shape, from symbols like a heart to letters spelling out YUM or HI (just in case your birds can read!) or I (heart) U.
Try:
–Initials or names
–I Do, MR. and MRS. for a wedding or shower
–HBD for a birthday,
–FUN for a barbeque
–Numbers
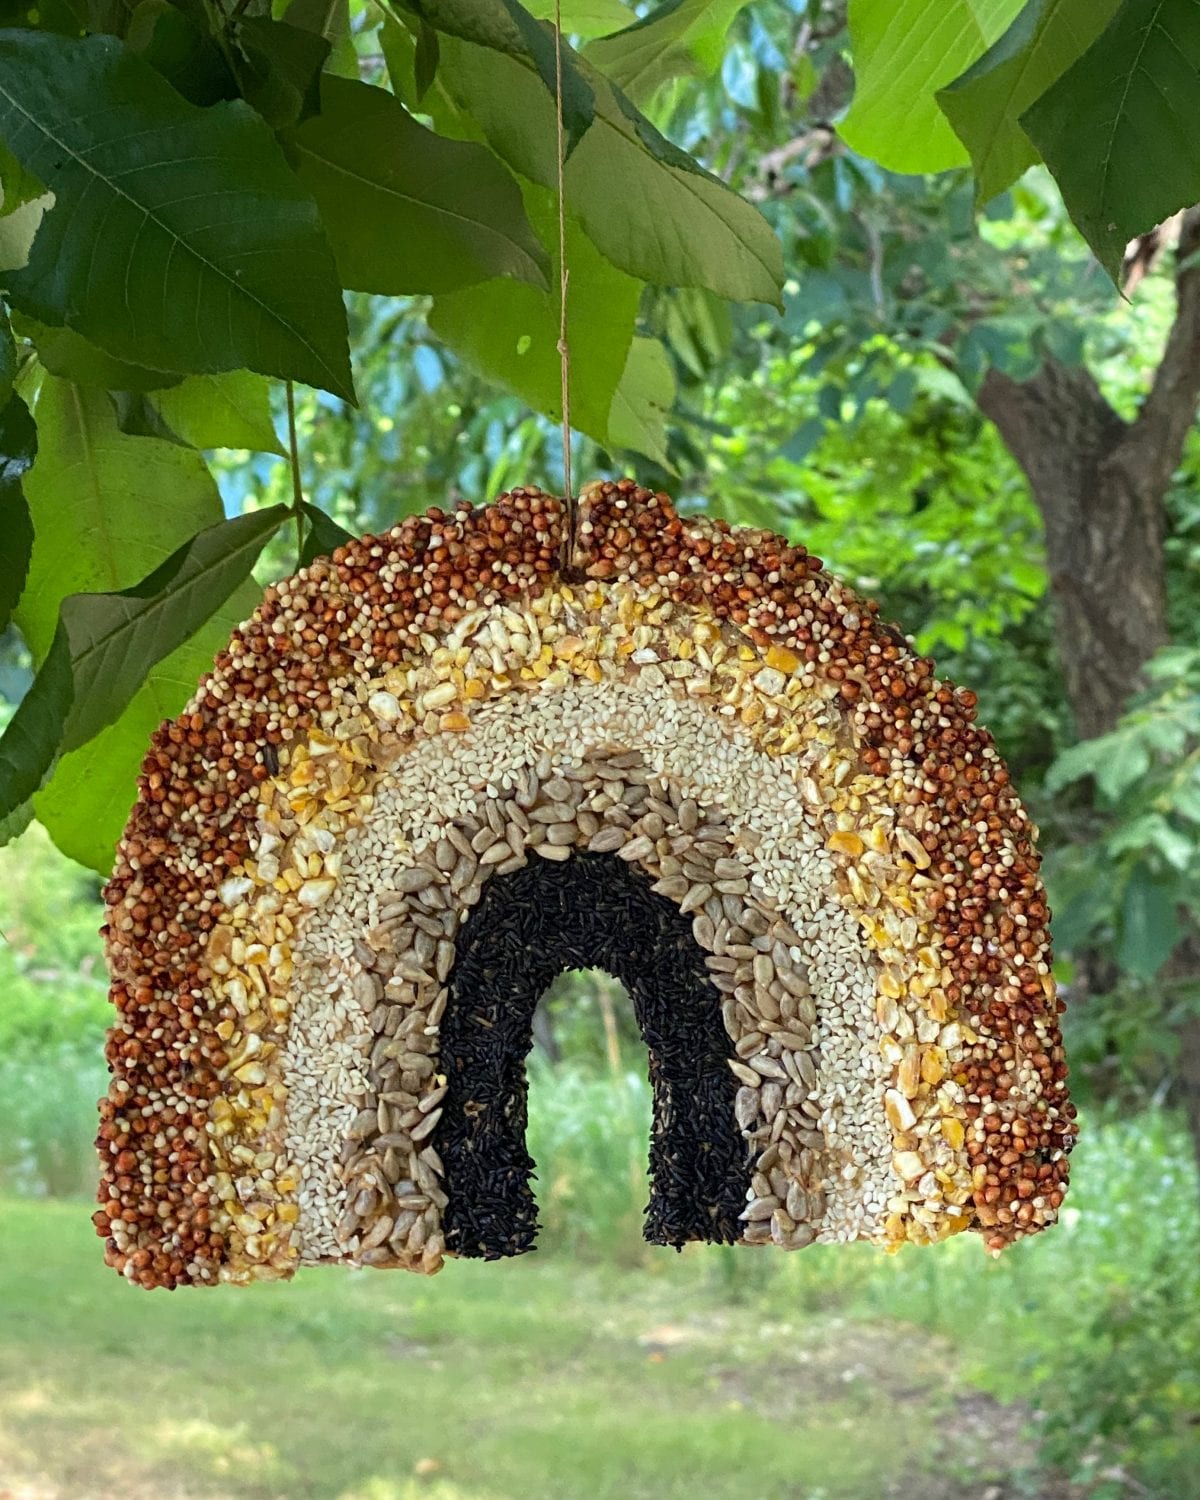
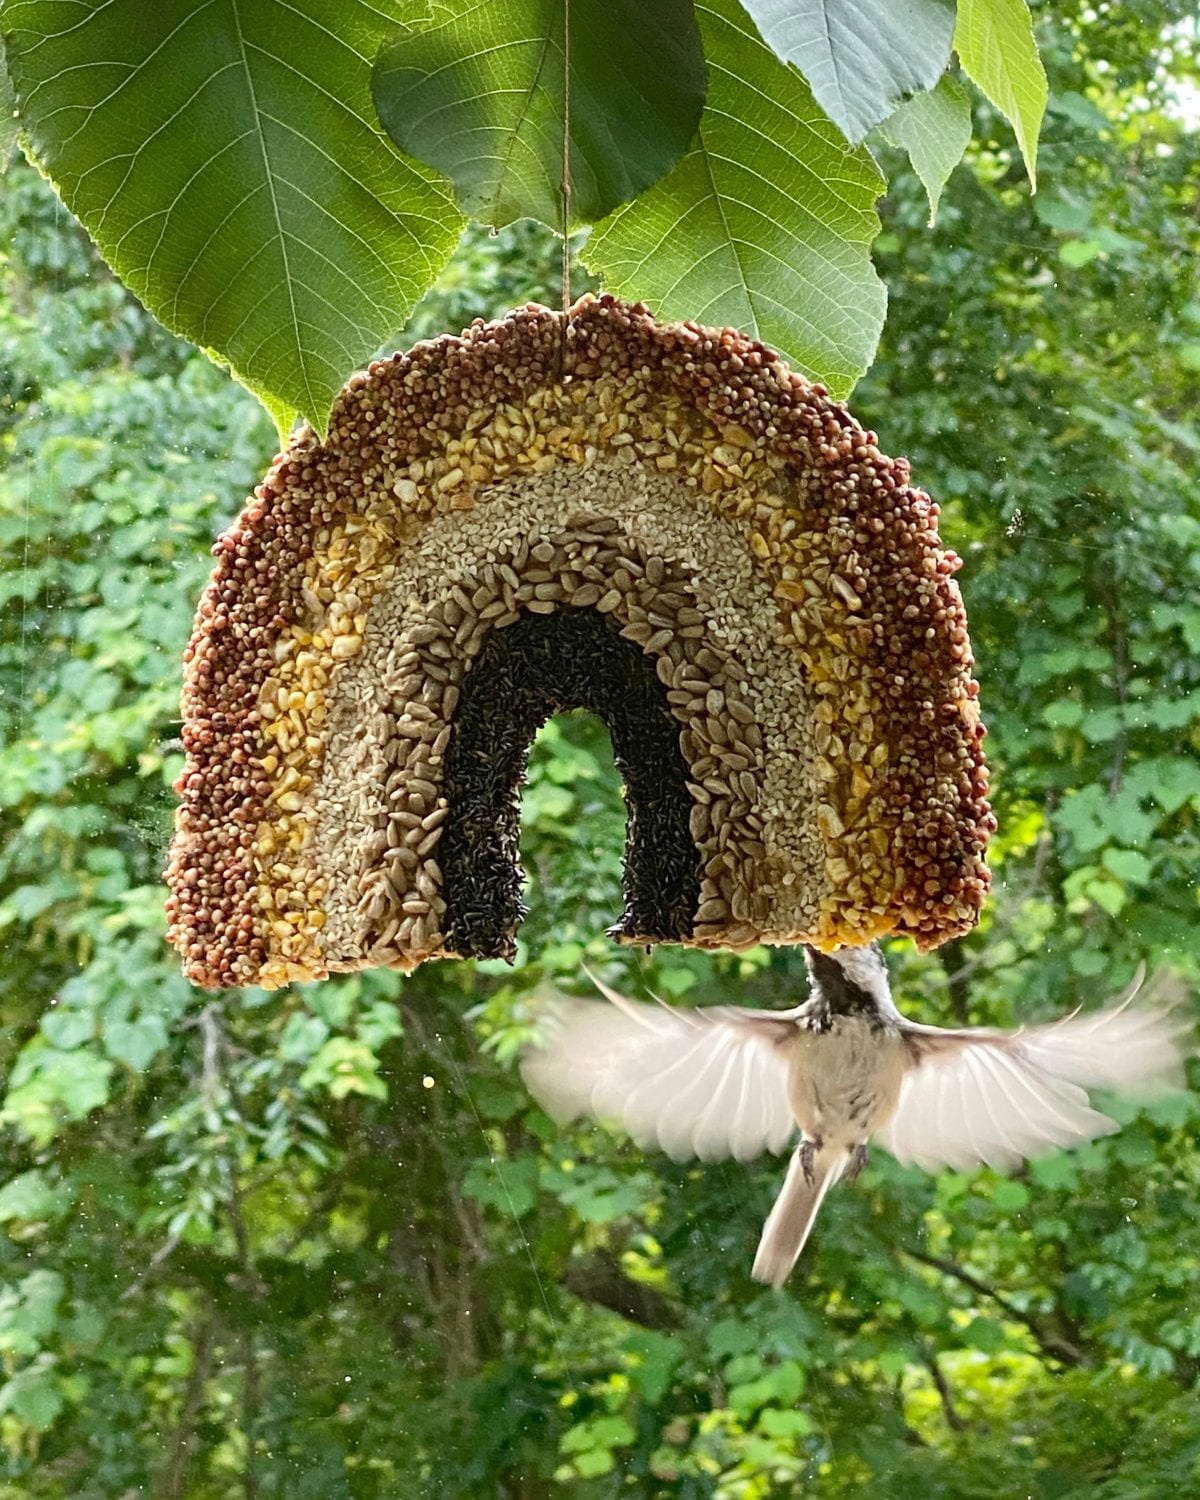
Here, we turned an arch into a neutral-hued rainbow by covering in a variety of seeds. Not only do the different types of seeds look great together, but they each attract different species of birds drawn by the various types of seeds. Finches like to feast on nyjer, a.k.a. thistle seeds, while sparrows prefer cracked corn, and almost all backyard birds love sunflower seeds. You can also try dried fruit (to woo orioles) or peanuts, a crowdpleaser that will delight most birds.
For more fun (and educational!) bird ideas, click here.
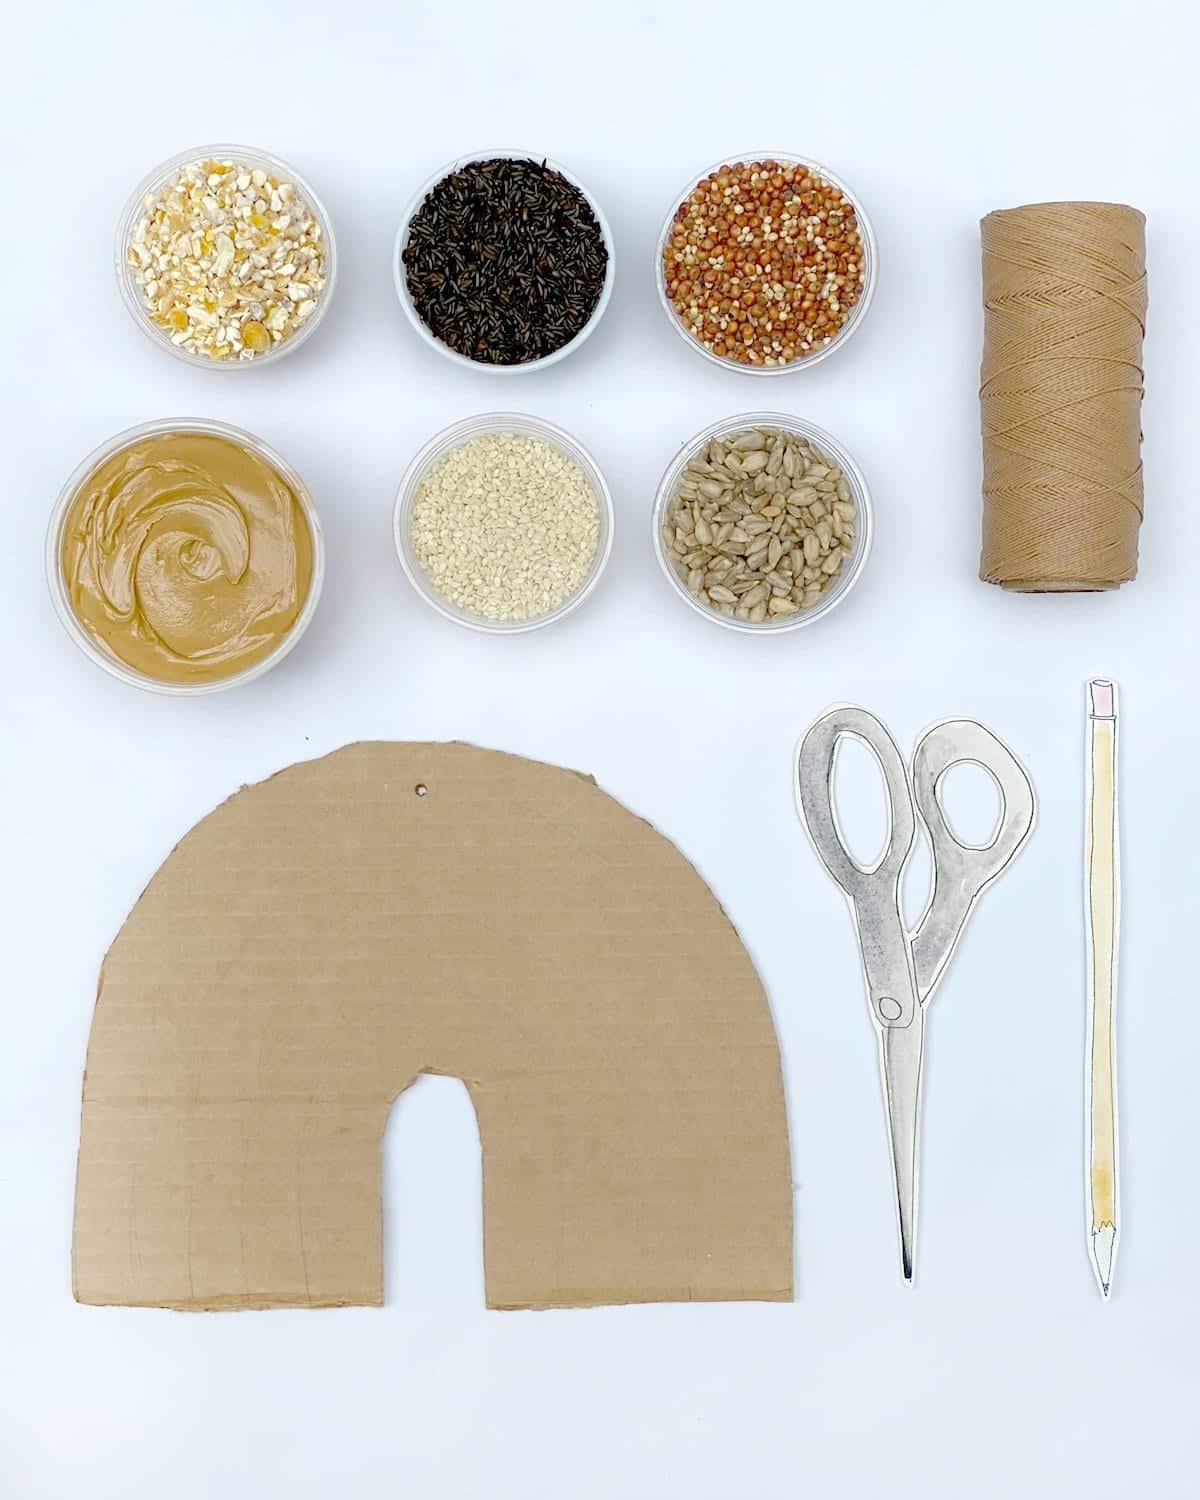
What you’ll need:
- Cardboard (use a leftover shipping box)
- Pencil
- Scissors
- Creamy peanut butter
- Different varieties of bird seed, such as nyjer, cracked corn, sunflower seeds, sesame seeds, and millet
- Twine
Step 1: Draw a rainbow shape on a piece of cardboard. Use a bowl or plate for extra help drawing the round part of the rainbow. Our rainbow is approximately 8” wide by 6” tall but you can make these larger or smaller, whatever you like!
Step 2: Cut out the cardboard rainbow.
Step 3: Using the pencil, draw the rows of the rainbow so you have one row for each type of seed.
Step 4: Using the pencil or a bamboo skewer, poke a hole towards the top of the rainbow so you can hang it later.
Step 5: Working from the bottom up, start filling in the rainbow by smearing peanut butter across the smallest arch. Work on one side of the rainbow at a time. Coat the cardboard generously with room-temperature peanut butter. (If it’s just out of the fridge, it will be harder to spread and the seeds won’t adhere.)
Step 6: Sprinkle seeds over the coated section, gently pressing down until that row of the rainbow is filled in thoroughly. You might want to use a paper plate underneath your project to catch excess seeds, or just work outside where the mess won’t matter. Flip the rainbow over and repeat steps 5 and 6 on the back. Fill in the edges of the rainbow as well.
Step 7: Continue filling in the rest of the rainbow row by row, working from bottom to top. If it feels like the process is getting too messy, put it in the freezer for a few hours so the peanut butter can harden and secure the arch, before moving on to the next one above it. Once you finish the entire rainbow, freeze it overnight to secure the seeds.
Step 8: Thread twine through the hole (you may need to poke through the hole again to clear it out) and hang on a tree branch where you can see it!